
The DIY jobs anyone can have a go at
Not all DIY tasks are created equal

kitzcorner / Shutterstock
Whether you've just moved home or the 'to-do list' keeps getting longer, trying a spot decorating and renovating yourself can save money and create a sense of achievement. But, if you are a beginner, the thought of any DIY may be daunting.
We've put together a set of DIY jobs that are so simple you'll soon be crossing jobs off the list. That being said, some skilled projects require a professional, so we've found a few of those too.
Tile a backsplash
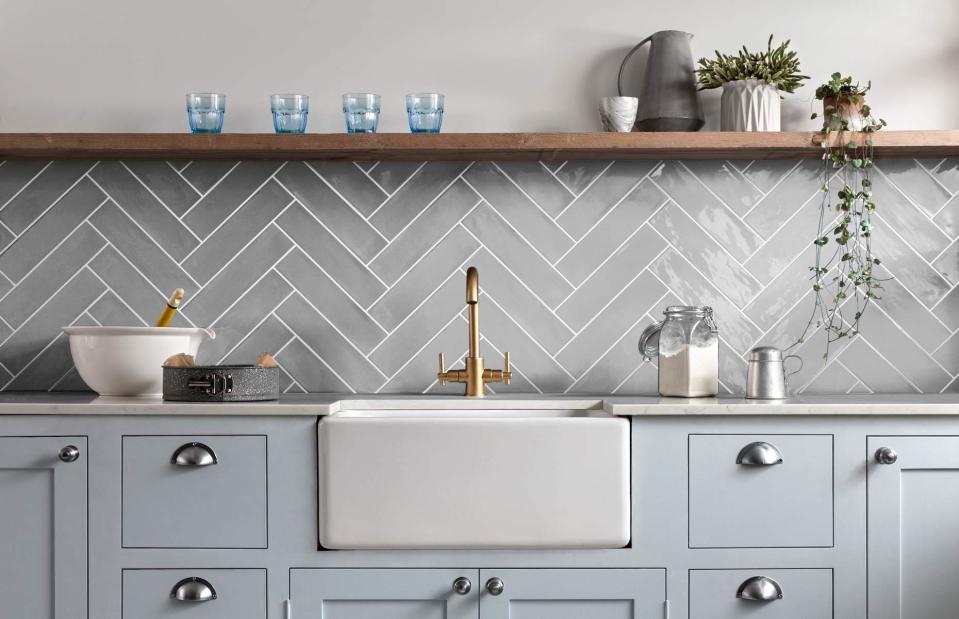
CDT Tiles
Renovating your kitchen or bathroom? Considering how much a tiler costs to lay a simple backsplash, why not have a go at tiling yourself? The small space makes a perfect canvas to try out your design and cutting skills. One of the most important parts of tiling is measuring the space for your tiles. Get that wrong and it could be money down the kitchen sink. So always measure twice and cut once.
Tile a backsplash
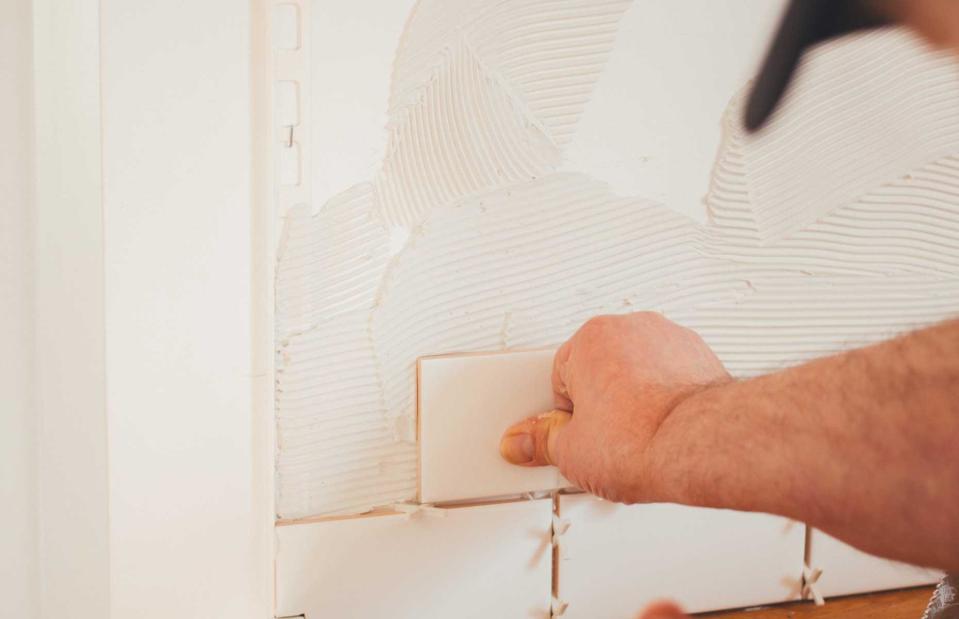
Charles Deluvio / Unsplash
The key to tiling is starting in the middle. Amanda Telford at CTD Tiles says: "Working from the lower center upwards and outwards, apply your adhesive to the wall, making sure you work in small and manageable areas at a time. Apply your tile to the adhesive on the wall and place it in the right position, making sure it’s straight (look back at your lines). Add a spacer to the sides of the tile and then carry on with this process row by row." The tricky part is at the end of rows. "Simply mark on the back of a tile where it needs to be cut and cut to the required size using a manual tile cutter or electric tile saw," adds Amanda.
Build flat-pack furniture
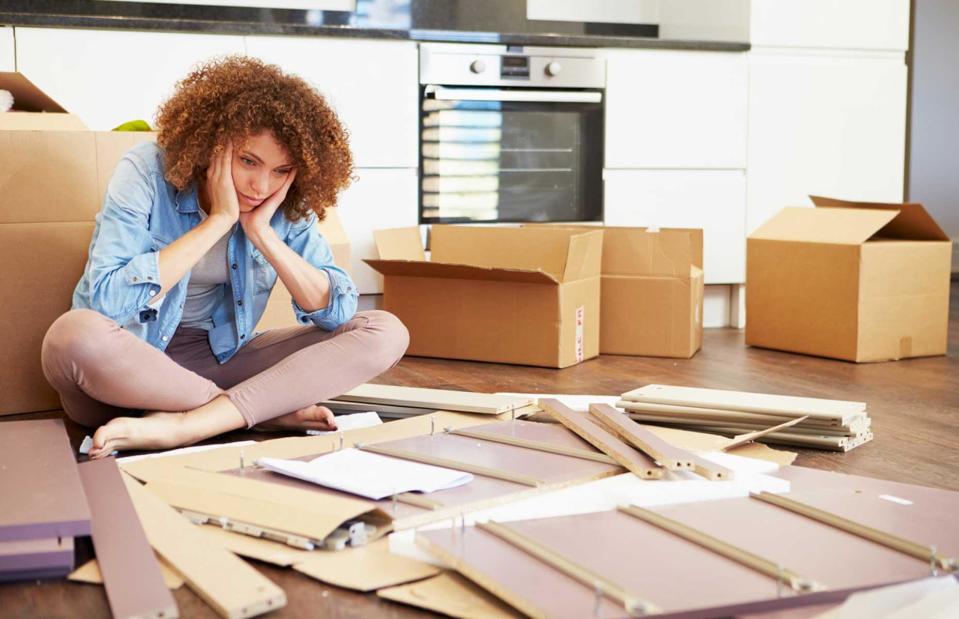
Monkey Business Images / Shutterstock
Flat-pack furniture is certainly a more economical option when buying furniture but assembling the jigsaw puzzle of pieces can be a headache. So much so that IKEA now offer an assembly service that matches contractors in your area to build flat-pack furniture for you at a cost.
Build flat-pack furniture
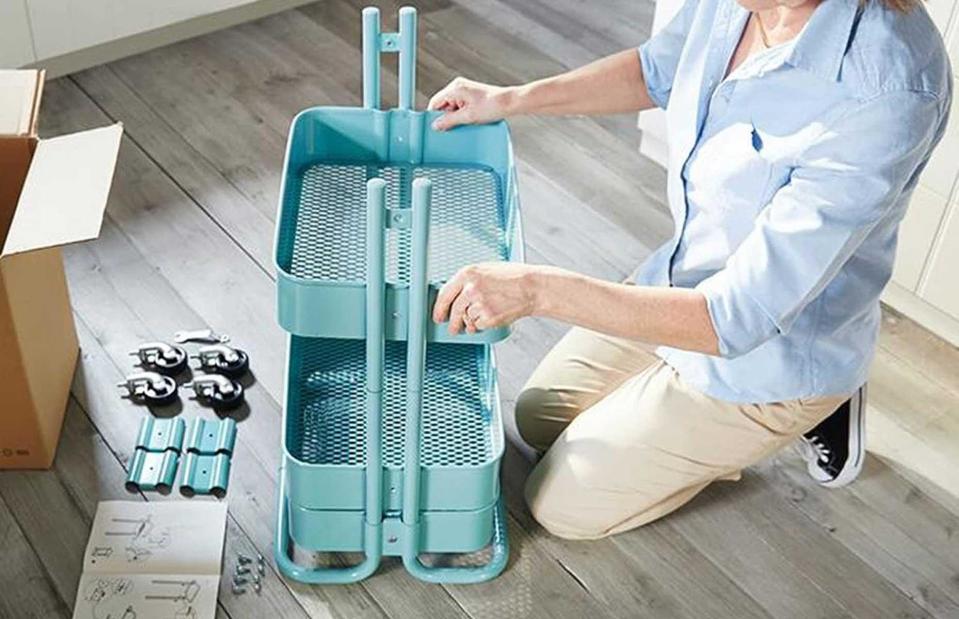
IKEA
As many genius IKEA hack creators would tell you, flatpack furniture can be built stress-free when following a few rules. First, ensure you have plenty of time to finish the job without distractions. Ensure all the fixings are in the box and are close to hand. Lay the sections out if preferred. Finally read the instructions first and whilst building. Sometimes buying mass-produced furniture pays off – check online as there may be a YouTube video tutorial on how to build your recent purchase.
Paint a wall
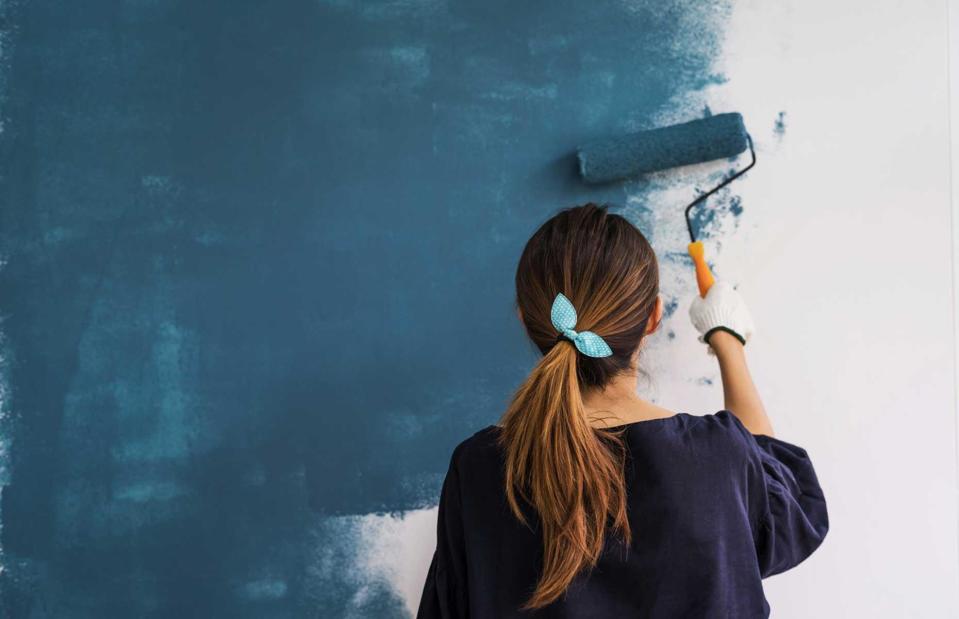
kitzcorner / Shutterstock
Painting a wall may seem like an easy job but simply slapping a coat onto a wall may end in a mess. UK TV presenter turned self-taught DIY enthusiast Dom Wood told Hippowaste.co.uk: "Painting a room is a guaranteed way to make an instant impact in your home, but it's one of the jobs we look forward to the least." Dom has a few tips to make painting a wall a breeze....
Paint a wall
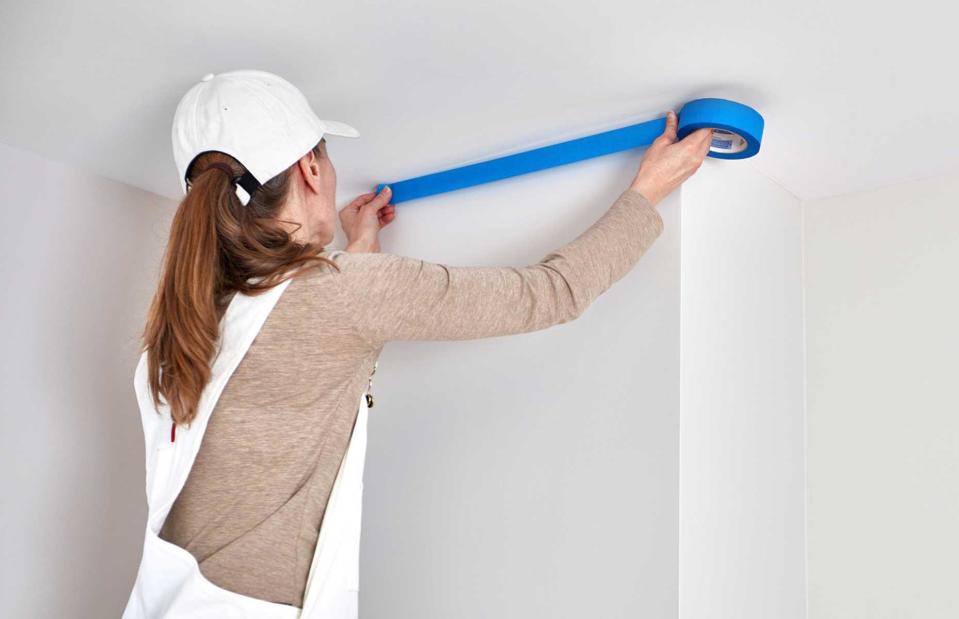
kurhan / Shutterstock
When painting a wall preparation is key. Mask edges with decorating tape and ensure the painting area is kept nice and tidy. Dom Wood told Hippo: "Stretch an elastic band over the length of your paint tin and shift it across the middle to help you get any excess paint off your brush and avoid unwanted spillages. Make sure you cover your paint tray and brushes with cling film between painting sessions to help save time, energy and paint."
Fill a crack in the wall
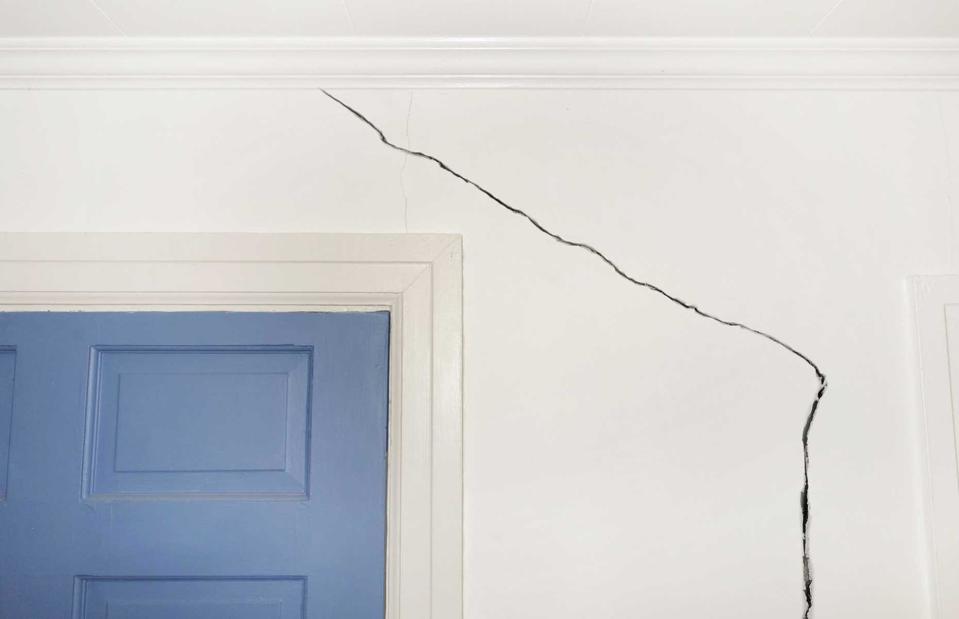
zimmytws / Shutterstock
Small cracks in walls aren't as shocking as you might first think. As foundations settle in new builds and extensions cracks can form in walls. Whereas in older houses changes in temperature and humidity will cause the structure to shrink leading to the same problem.
Fill a crack in the wall
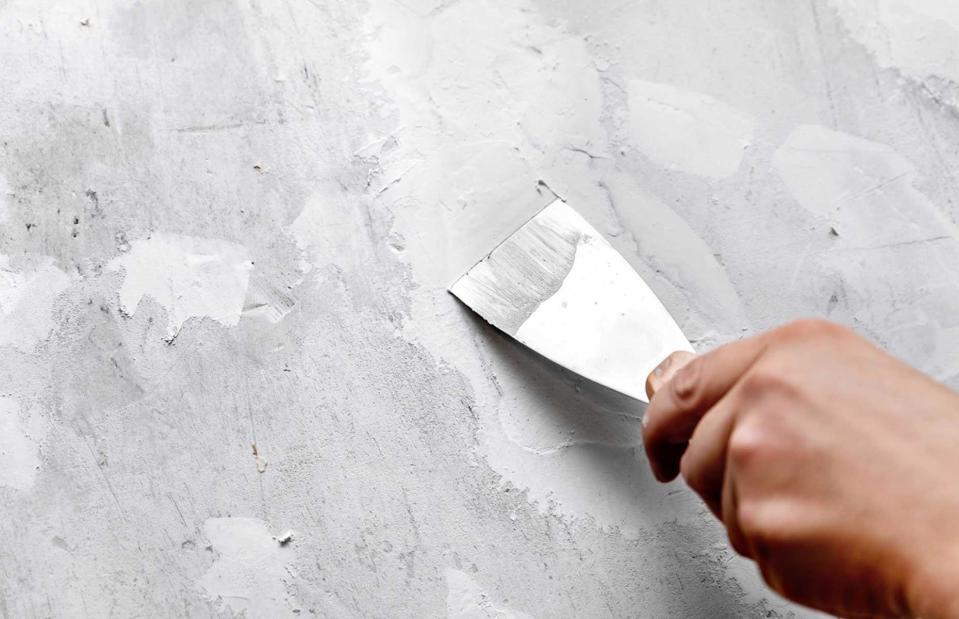
Miriam Doerr Martin Frommherz / Shutterstock
To fill a small crack start by washing the crack area with trisodium phosphate, also known as TSP, and removing any pieces of loose plaster. Apply filler to the crack in the wall with a filler knife. Scrap the access off and allow it to dry. Finish by sanding down the surface whilst wearing a dust mask. Then it's ready to paint.
Change a lightbulb

Sevda Ercan / Shutterstock
Is it time to change the lightbulb that's blown? Candlelight may be ambient and atmospheric but knowing how to change a lightbulb is a lifeskill that everyone needs to know. Plus, it's probably the easiest DIY job to do – once you know how.
Change a lightbulb

Rasstock / Shutterstock
Changing a lightbulb is simple when you know how. Every time you change a light bulb the first and most important rule is to switch off the fixture. If you are changing a lamp light, remove the plug from its socket. The new bulb must be the correct wattage that is recommended for the light fixture. Ensure the bulb has cooled and either unscrew or push and turn anti-clockwise to remove the finished bulb. To insert the new bulb screw into place or push it gently or firmly, turning clockwise.
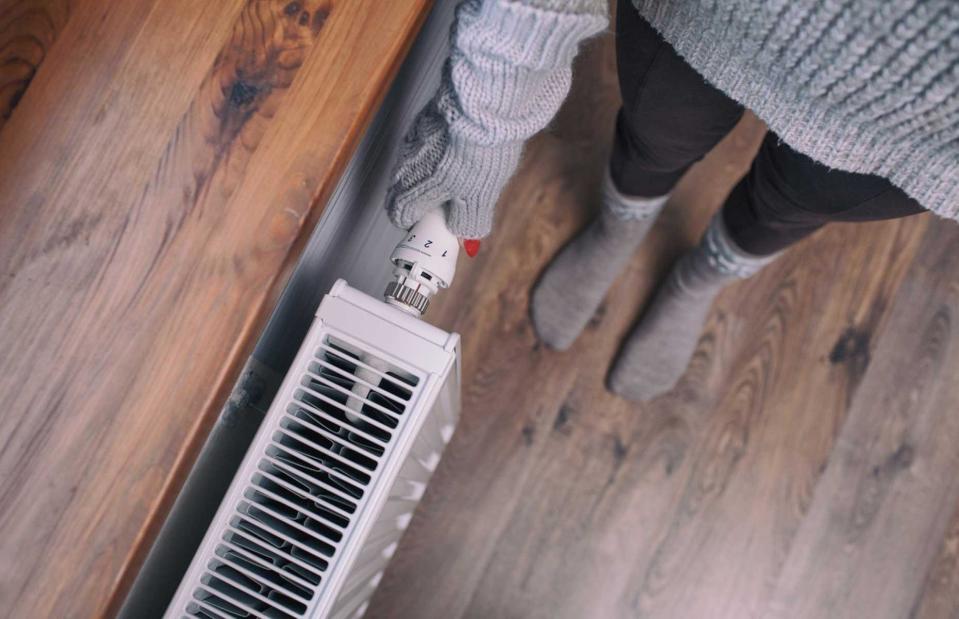
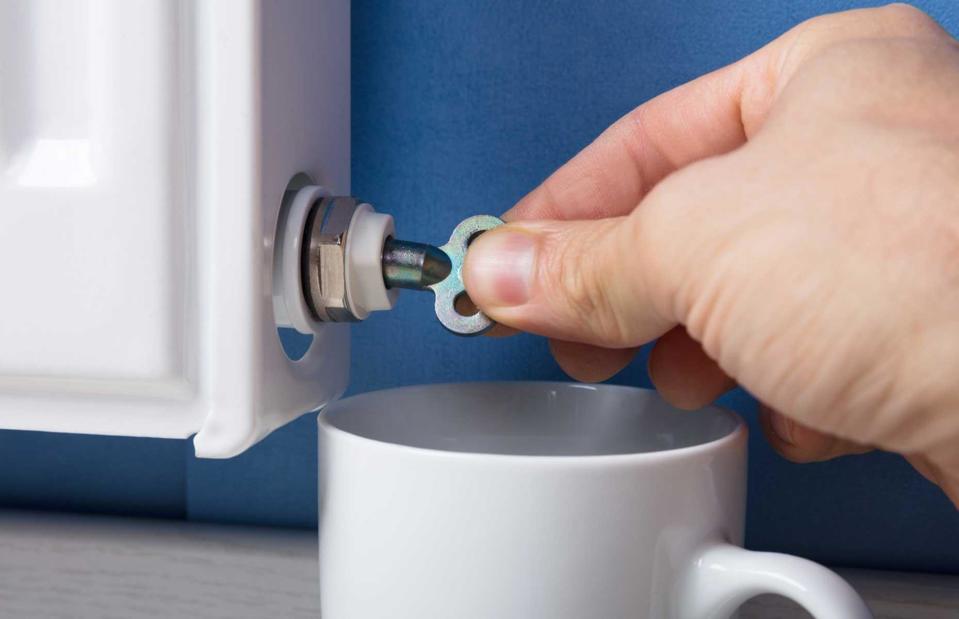
Bleed a radiator
NinaMalyna / Shutterstock
Live in an older property? As summer ends and nights turn chilly, it may be time to turn the heat back on. But, as the seasons change, do you notice the radiators aren't quite doing their job? If the heating has been off for a while, air may have become trapped inside radiators, preventing the warm water from circulating when they are switched back on.
Bleed a radiator
Andrey_Popov / Shutterstock
Many issues with home heating stem from the heat emitters rather than the source, so checks should be carried out. Check for cold spots, usually at the top. To bleed a radiator, make sure the heating is off and the radiators are cold. Hold an old cloth or cup under the bleed valve at the bottom side of the radiator. Turn the valve anti-clockwise and you should hear hissing as the air escapes. As soon as any water starts escaping, turn the valve clockwise to retighten.
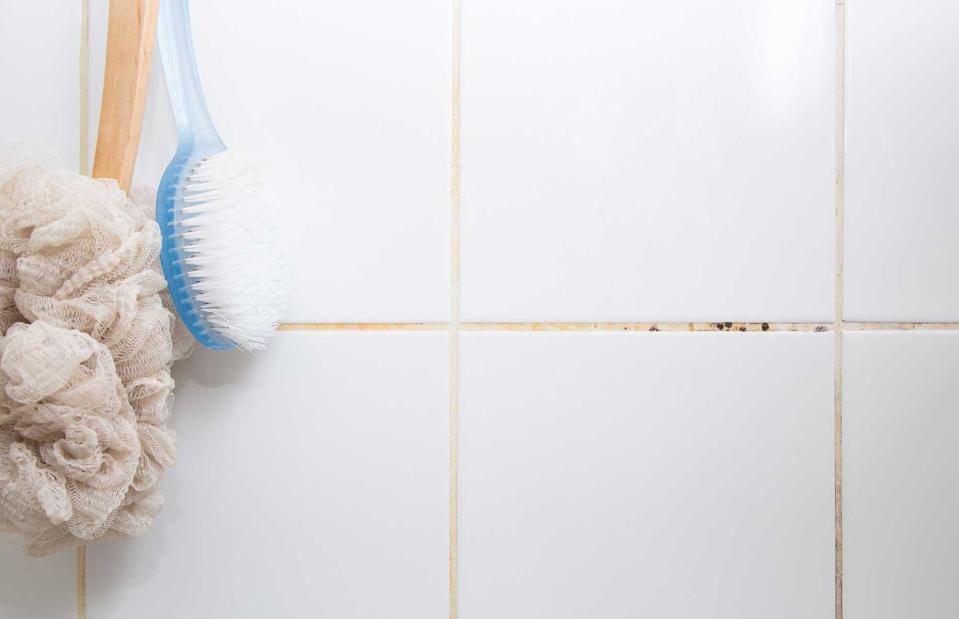
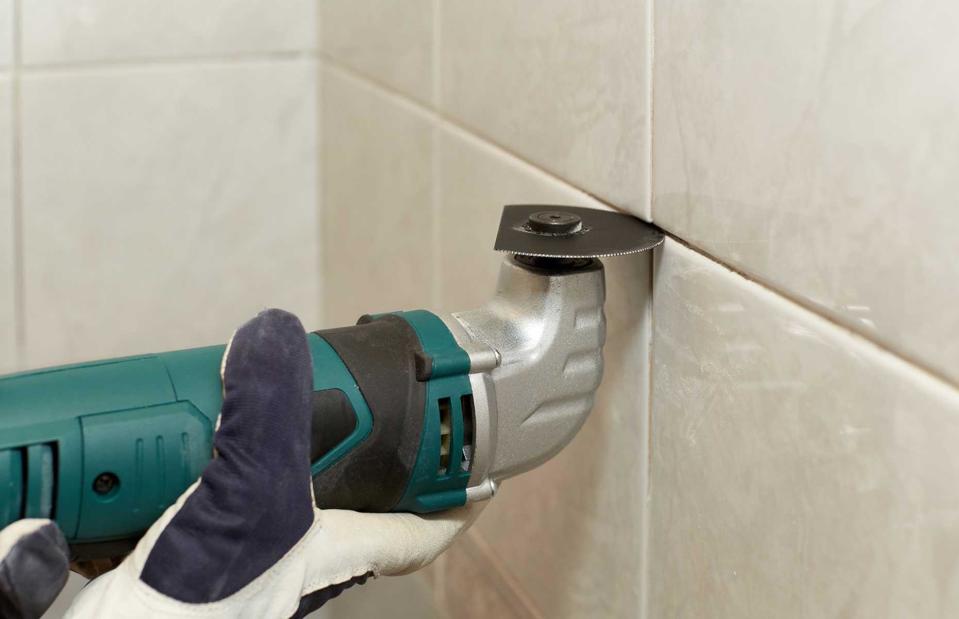
Replace grout
Tapati Rinchumrus / Shutterstock
While wall tiles make a long-term protective investment, the grout that seals them can gradually de-color as dirt, mold and mildew build up over time. If a good clean doesn't fix the problem, or the grout is starting to crumble away, you may need to take further action. Rather than taking on the mammoth task of retiling a whole room, removing and replacing grout can refresh and make a kitchen or bathroom look new.
Replace grout
Dmitry Melnikov / Shutterstock
To remove grout the easier way, invest in a handy grout remover tool. The pneumatic action powers through old and discolored grout in no time. Manual tools can be used to scrape and chip away the grout but this method takes a lot more elbow grease to achieve. Once all the old grout is removed, apply new grout with a grout spreader. After grouting, clean the tiles.
Unblock a sink
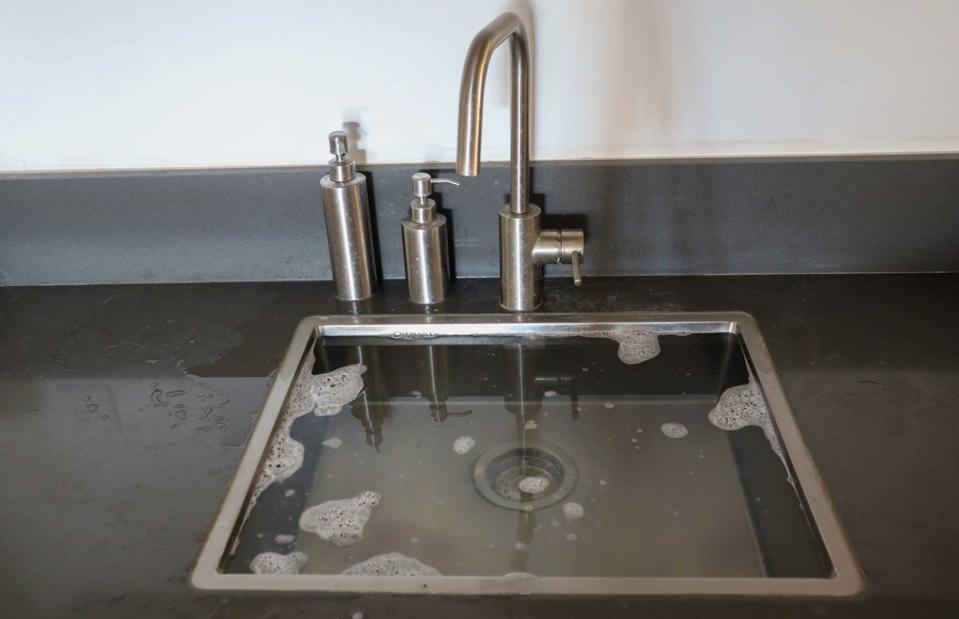
Igal Vaisman / Shutterstock
Kitchen and bathroom sinks get a lot of use, so it's no surprise that blockages occur from time to time. Before you reach for your mobile to phone an emergency plumber with expensive call-out charges, there are a few DIY tricks that might unblock the pipes you can try.
Unblock a sink

New Africa / Shutterstock
A natural remedy to unblock a sink is a mixture of baking soda and white vinegar. A wire tool or metal hanger may pull out the blockage, but take care not to damage pipes. A blast of hot water may push the debris down and away down the drain. Alternatively, a plunger will most likely do the trick. Mike Scott Plumbing advises covering the overflow with a rag to create a stronger suction. Place the cap of the plunger over the drain and make a tight seal, then, using firm pressure pull the plunger up vertically.
Hang pictures on a wall

New Africa / Shutterstock
What's not to love about a gorgeous gallery wall full of interesting prints and photos that adds character to your home? Learning how to hang pictures as a DIY project will open up a creative side that will benefit your home, and that you can use again and again.
Hang pictures on a wall
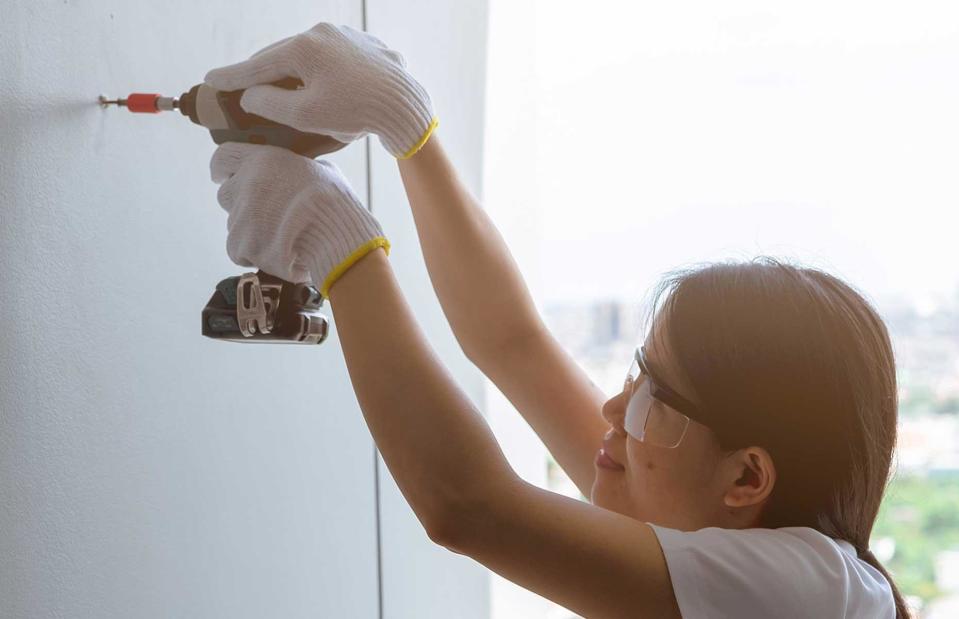
Fahroni / Shutterstock
To hang a picture on a heavy-duty brick wall requires a drill. Line up your frames and mark where you need pictures to hang. With an appropriate drill bit, drill a hole about an inch deep into the brickwork. Be prepared with the ultimate DIY hack: pop a folded sticky note underneath to catch the falling dust. Push an anchor into the hole and follow with the screw for hanging your beautiful art.
Put up a shelf
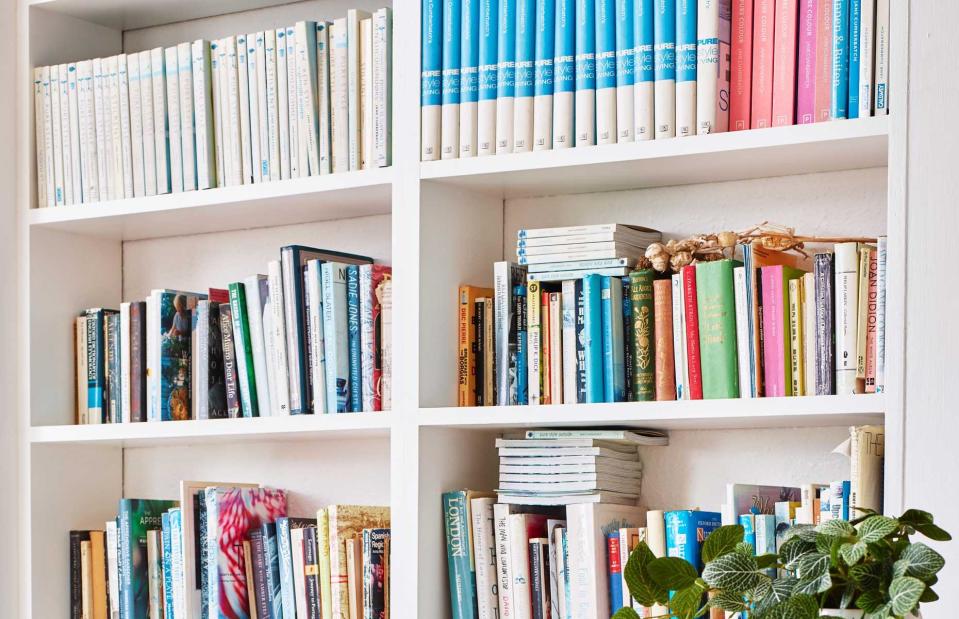
Oliver Bonas
While it's true that one can never have too many books, when your bookshelf is packed to the rafters, it may be time to learn how to put up a few shelves on another wall. With choices ranging from floating shelves, to fixed bracket shelves, to top-hung shelves, there is sure to be a style to suit your look.
Put up a shelf
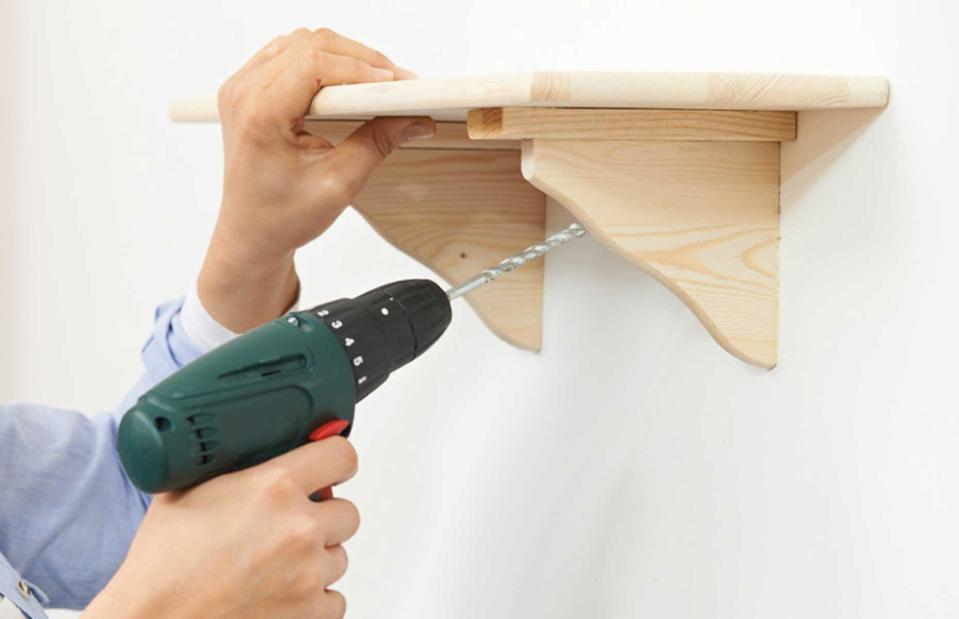
SpeedKingz / Shutterstock
There are two main types of wall-hung shelves: visible brackets and floating. Check the wall area for pipes and cables – you can buy a gadget for this. If there aren't any, you're good to go. Floating shelves are perfect for light accessories. For heavier items, it's best to choose a shelf with supporting brackets. Masonry walls offer the best support. If using a drywall, try to drill into the timber supports or use anchors.
Paint furniture
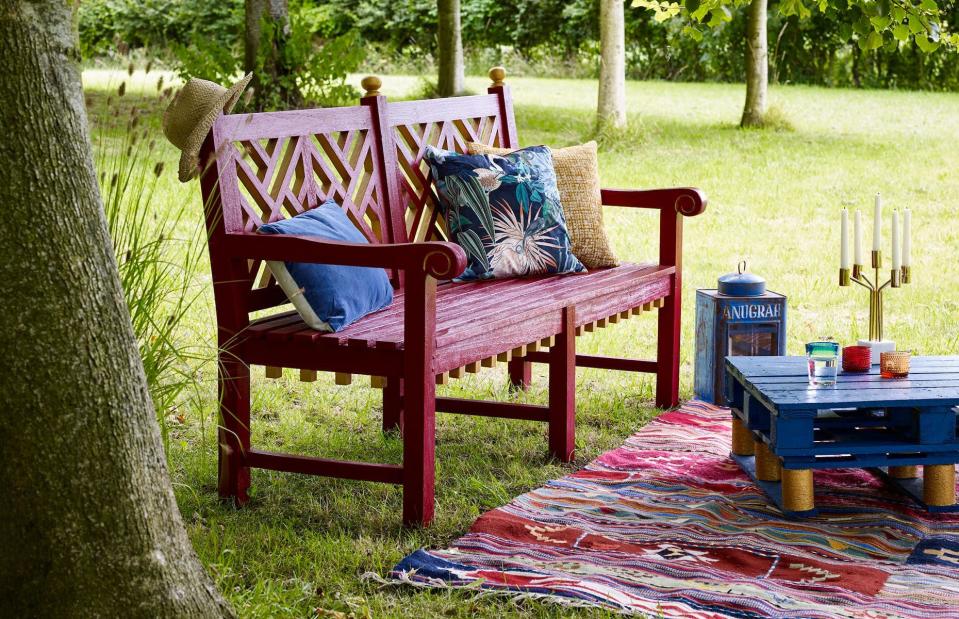
Protek
Repainting furniture is an easy and fun DIY weekend project that can make a difference. You can either keep the look simple by adding a layer of protective varnish or paint, or upcycle an unloved item with a bright colour to give it a whole new look.
Paint furniture
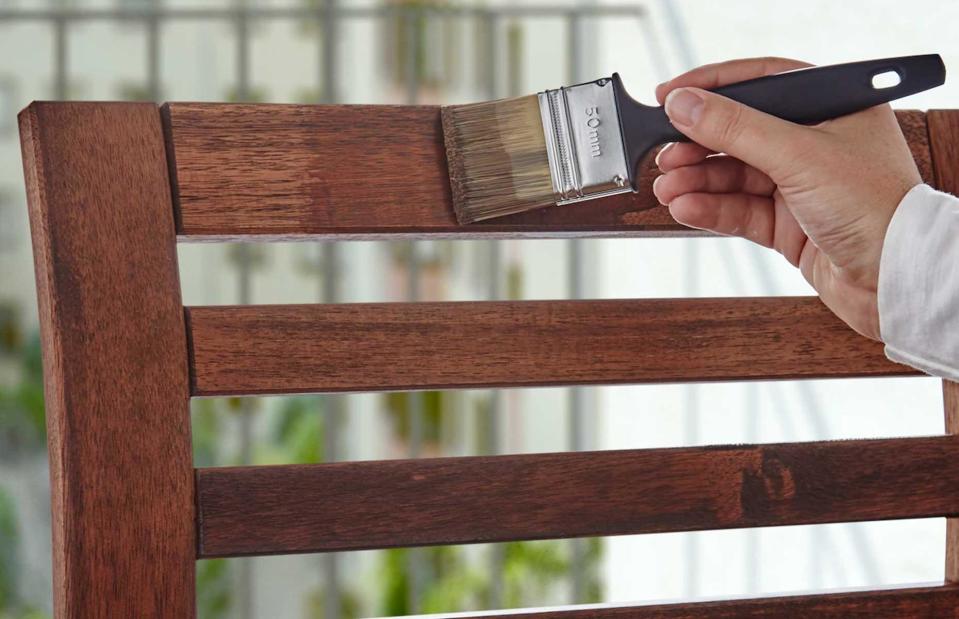
IKEA
Furniture that's made from aluminium, plastic, plastic rattan and steel needs to be cleaned with soapy water, prior to painting with an appropriate paint. Wooden furniture needs a little extra care. IKEA recommends re-staining wood furniture with a paintbrush to extend its lifetime. To paint wood furniture a brand new color, sand down the surface and paint two coats with a clean, dry paintbrush. Chalk paint is great for furniture upcycles.

