
You're cooking these 15 everyday foods WRONG
Tweak your techniques

Gayvoronskaya_Yana/Shutterstock
Cooking can be rewarding, and even relaxing – but it can also be incredibly frustrating. When you’ve invested time and money into making something special for your friends or family, you want it to come out perfectly. Yet, despite your best efforts, sometimes the chicken is chewy, the cake is dry and the mash is lumpy. To help you get your dishes right every time, we’ve rounded up some clever ways to avoid common mistakes. Here are the wrong (and right!) ways to prepare 15 everyday foods.
Pasta: the wrong way

Leka Sergeeva/Shutterstock
If you don't season your cooking water correctly, your pasta will taste bland. There's little or no salt in most pasta, so you'll need to add a good amount to the pot; in Italy, they say pasta water should taste like the Mediterranean Sea. Most of it will end up in the sink when you drain the pasta anyway – your farfalle or fettuccine will absorb as much as it needs to be properly seasoned. On the other hand, adding oil to the water is pointless, as it will make your pasta slippery and prevent sauce from clinging to it.
Pasta: the right way

DronG/Shutterstock
Make sure you transfer your pasta from its cooking water into your pan of sauce before serving, instead of simply plating it up and dumping the sauce on top. Toss and stir everything together in the pan for a minute or two, so the pasta has enough time to become coated with the sauce. Adding a little pasta water will elevate your dish, as the starch will make the sauce glossy and silky.
Indian curries: the wrong way

Jag_cz/Shutterstock
If you don't temper your spices, your homemade madras or korma is likely to be a bit of a let down. Tempering – the process of frying whole or ground spices in cooking fat before adding any of the other ingredients – brings out the essence of the spices and infuses the oil, providing a flavourful base. Untempered spices can produce a flat, bitter flavour, so adding the cumin or coriander straight into a half-cooked curry isn't a good idea.
Indian curries: the right way

Bartosz Luczak/Shutterstock
While it’s not always easy to find, ghee – a clarified butter commonly used in Indian cookery – is the ultimate fat to use in your curry. While you can use a neutral oil (like vegetable, sunflower or light olive), ghee is best, as it has a rich and distinctive flavour that'll take your curry to the next level. To make the base for a tasty curry, temper your spices in melted ghee before softening onion, garlic and ginger in the mixture.
Steak: the wrong way

Valentyn Volkov/Shutterstock
If you’re salting your steak just before you throw it into the pan, you’re missing out on a great opportunity to boost its flavour and texture. Salting meat at least an hour before cooking allows the seasoning to distribute itself evenly throughout, instead of simply sitting on the surface. Even better, it creates tenderness by increasing the moisture level in the steak.
Steak: the right way

Mironov Vladimir/Shutterstock
For the perfect colour, make sure your pan is smoking hot before adding your steak – and, once it’s cooked to your liking, it’s important to let it rest properly. If you slice up an unrested steak, you can say goodbye to the tenderness and moisture in the meat; the juices will drain right out and on to your plate, leaving your steak dry and chewy. A good guide is to rest your meat for at least as long as the time it took to cook it. If you're slicing a large sharing steak into strips before serving, cut across the grain of the meat rather than with it, as this will ensure it stays succulent.
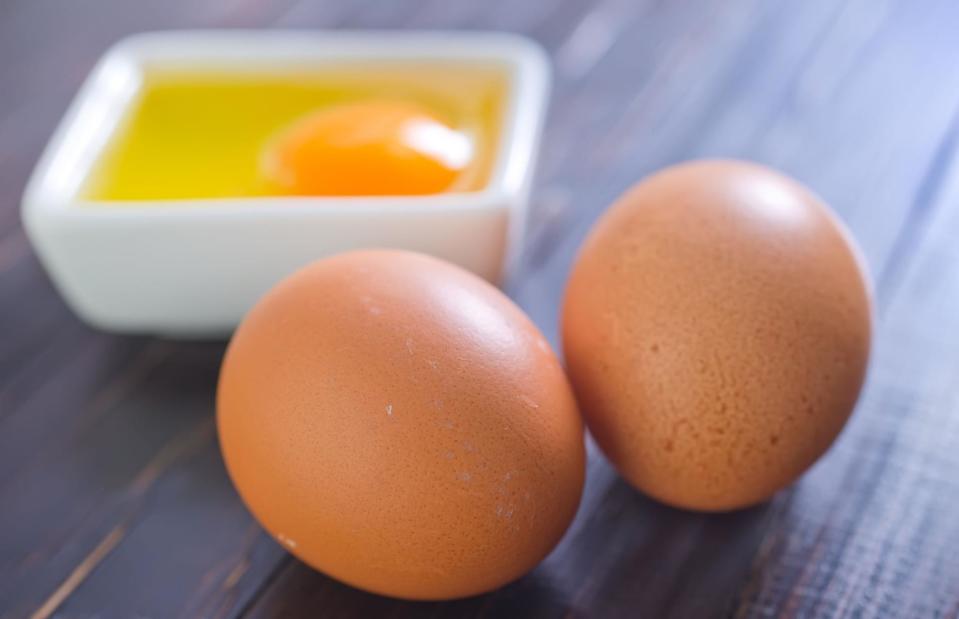
Sponge cakes: the wrong way

ninikas/Shutterstock
Baking can be a real minefield, and a split cake batter is one of the many ways you can trip up; no matter how much you beat the mixture, those lumps just won’t disappear. This is usually because the ingredients are at different temperatures, so they won’t emulsify and bind together. A split mix will affect the texture of your cake, so make sure ingredients like butter, milk and eggs are all at room temperature before you begin.
Sponge cakes: the right way

AS Foodstudio/Shutterstock
We all know about inserting a skewer into a cooked sponge and making sure it comes out clean – but cakes very quickly overcook and dry out, so check frequently. A good tip is to pull the cake out of the oven when there are still one or two crumbs attached to your skewer; the cake will continue to cook as it cools, so removing it at this point means you’ll end up with the perfect moisture level.
Mashed potato: the wrong way

Christin Klose/Shutterstock
Potato mashers are obviously the best tool for this task, right? Actually, no. Mashers should be your last resort, as using them on your spuds can lead to an overworked mixture with a gluey consistency – and they're also not great at getting all the lumps out. Instead, a potato ricer creates perfect results, and is less work to use. If you don’t have a ricer, press your cooked potatoes through a fine sieve with a spatula. Either of these methods will create a fluffier, smoother end product.
Mashed potato: the right way
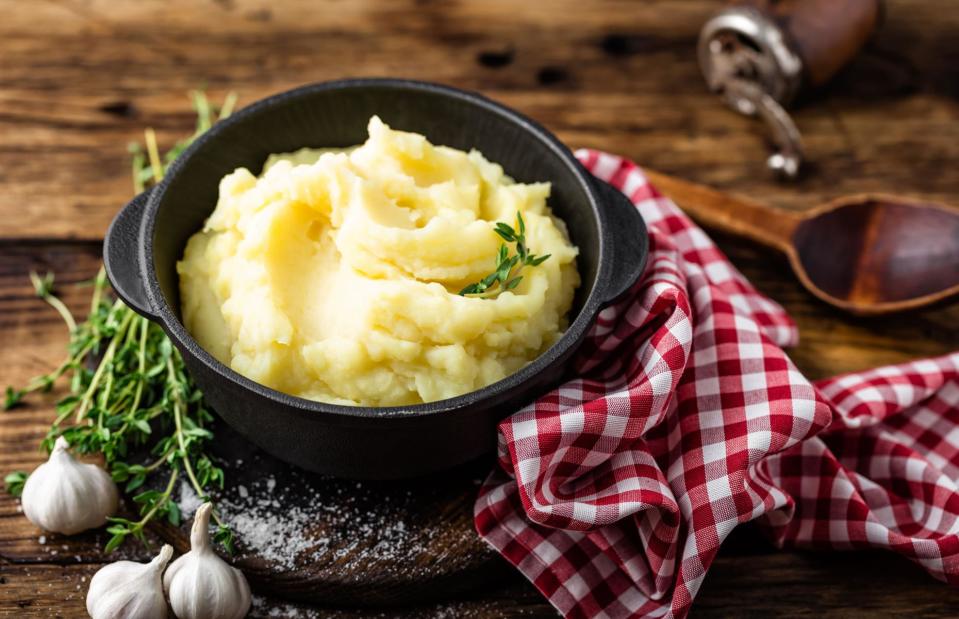
Sea Wave/Shutterstock
The way you boil your potatoes is important. Put them into cold water, then bring them up to temperature. This way, the potatoes will cook more evenly, resulting in perfectly smooth mash. Make sure you salt your cooking water well too – it will permeate the potatoes as they cook, making them more flavoursome. After all, no one wants bland mash.
Mac 'n' cheese: the wrong way

Arina P Habich/Shutterstock
A classic mistake with mac 'n' cheese – or, indeed, any pasta bake – is to overcook the pasta at the beginning. The pasta needs to be taken out of the boiling water when it’s still al dente. Remember that it's going to be cooked again when combined with the sauce and baked, and therefore softened further. If you cook the macaroni fully before it meets the cheese, your end product is going to be mushy and a bit sad.
Mac 'n' cheese: the right way

Tatiana Bralnina/Shutterstock
Creating a silky smooth cheese sauce is essential for perfect mac 'n' cheese. The base is a béchamel, made with flour, milk and butter (top tip: browning the butter before adding the flour will make your sauce even tastier). Once the flour has been mixed in to create a roux, toast it in the pan for a few minutes before adding the milk; this will eliminate the raw flour flavour. Pour the milk in gradually, whisking vigorously after every addition to make sure no lumps develop. Want to give your dish some extra oomph? Add some Worcestershire sauce and mustard to the sauce.
Fish fillets: the wrong way

Marian Weyo/Shutterstock
When it comes to pan-frying fish, not allowing the oil to heat up properly before adding the fillets is a common error. The skin of the fish will stick to the pan when you try to flip it over, tearing the delicate fillets apart. Ensuring the oil is hot first will not only make sure there’s no sticking, but it will also help to create delicious, crispy skin.
Fish fillets: the right way

Magdanatka/Shutterstock
To pan-fry fish perfectly, always start by cooking it skin-side down. When the skin first touches the pan it can tighten and curl up, ruining the shape of the fillet – and, with it, your chances of achieving nicely crisped skin. The solution here is to score three of four diagonal lines into the skin with a sharp knife before frying; this way, it will stay flat to the pan.
Pizza: the wrong way

Lana_M/Shutterstock
Homemade pizza can be chewy and disappointing – nothing like the deliciously crispy pies you find in Italian restaurants. This is often because domestic ovens don’t get hot enough to cook pizza bases properly. The solution? Avoid cooking the base, sauce and toppings all in one go. The hack is to briefly cook the base ‘blind’, with nothing on it. After a few minutes of crisping up, add your tomato sauce and favourite toppings, then put the pizza back in the oven to finish.
Pizza: the right way

V. Matthiesen/Shutterstock
Toppings are important. Use hard mozzarella, rather than the softer version that comes stored in water; the latter will cover your pizza with liquid as it melts, making it soggy. For your pizza sauce, use good quality tomato passata, seasoned with salt (if you make a cooked sauce, you'll lose the fresh tomato flavour). Lastly, consider adding toppings like thinly sliced Italian salami and prosciutto only after the pizza is cooked. This way, they'll melt gently into the pizza, and won’t get burnt or overly salty.
Risotto: the wrong way
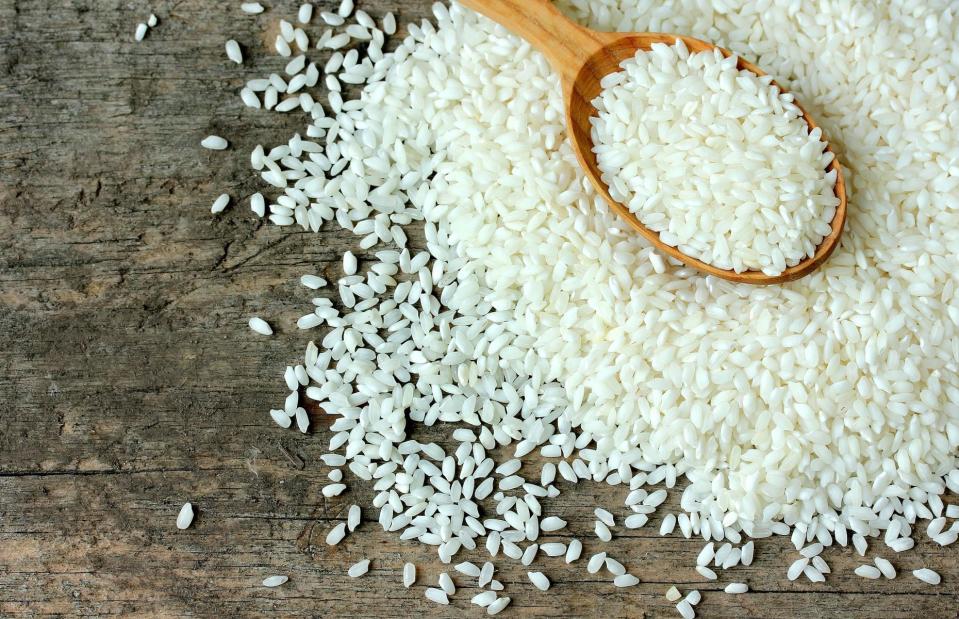
Anastasia_Panait/Shutterstock
There’s nothing worse than a dry, stodgy risotto. At its best, risotto should have plenty of sauce and spread out to fill the plate, instead of standing up in a solid lump. Risotto is usually taken off the heat before a little butter and cheese is added at the end. Remember that this will thicken the mixture, while the rice will also continue to cook off the heat, firming the dish up further. So, to make sure your risotto has the perfect consistency, remove it from the stove while it’s still quite loose and saucy.
Risotto: the right way

OlgaBombologna/Shutterstock
The usual order of business is to fry off your onions before adding your rice, followed by wine and stock. You can take your risotto to the next level by making sure the rice toasts in the pan for a few minutes with the onion and oil (before the liquids are introduced). This seals and compacts the grains, meaning they'll retain their bite, and won’t break apart as they cook. Also, don’t forget to keep the stock hot – it will make the whole process much quicker.
Green vegetables: the wrong way

leonori/Shutterstock
When overcooked, the flavour, texture, colour and even nutritional content of green vegetables like broccoli, asparagus and beans all suffer. Simply blanch these vegetables in boiling salted water until they're just cooked, but still retain some bite, then immediately put them into a colander under cold, running water. This will halt the cooking process and ensure they stay tasty and vibrant.
Green vegetables: the right way

Anna Hoychuk/Shutterstock
Once your vegetables are blanched and cooled, they can be stored in the fridge, ready for use. You could prepare them Mediterranean-style – by heating them up in a frying pan with olive oil, garlic and chilli – or even pair them with soy or oyster sauce, sesame oil and ginger for a punchy, Asian-style side dish.
Roast chicken: the wrong way

Natasha Breen/Shutterstock
Overcooking a chicken is easily done. The solution? Invest in a meat temperature probe. The moment the meat exceeds a certain internal temperature, it will start to lose moisture – so keep checking with your probe so you know when to pull your chicken out of the oven. If you prefer a more traditional approach, you'll know your chicken is perfectly cooked when the top of the legs start to gently detach and loosen from the body.
Roast chicken: the right way

Larisa Blinova/Shutterstock
Initially, you'll need to cook your chicken in a hot oven to create that golden skin we all love – but once it has a good colour, cool things down to a medium/low temperature. The meat will relax and lose less moisture when cooked at a lower heat, meaning your roast will be much juicier and more tender. As with steak, you should also ensure you salt your chicken at least an hour beforehand for maximum flavour.
Fruit crumble: the wrong way
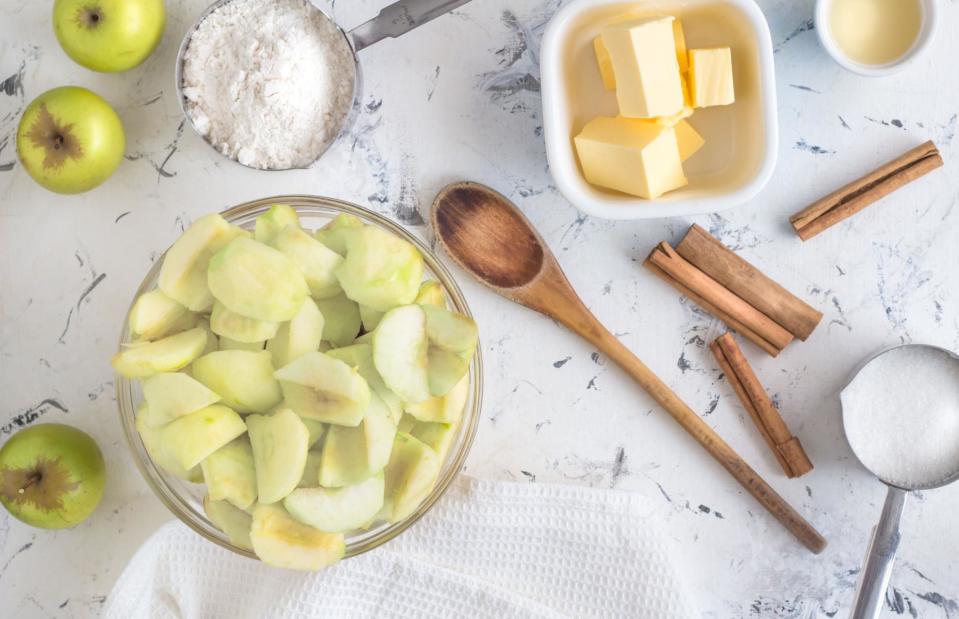
Madele/Shutterstock
Crumble topping is usually made with butter, flour and sugar, which you can either combine together between your fingers, or using a food processor. However, if the mixture is too fine, you'll end up missing out on those delicious crunchy bits – so don't be afraid to leave a few chunks. A very fine crumble mixture will also absorb too much of the fruit and its juice, so you can end up with a soggy dessert.
Fruit crumble: the right way

Tatiana Volgutova/Shutterstock
Add some oats and even nuts into your crumble topping to give it a good range of textures. Choose the fruit for your dessert wisely too; the best crumbles are made with really tart fruits, as they perfectly balance out the rich and buttery topping. Think plums, rhubarb, apples, blackberries or gooseberries.
Roast potatoes: the wrong way

Natallia Ploskaya/Shutterstock
Parboiling your potatoes first is essential for crispy roasties, but too often they’re put into the oven straight after being drained. Water is the enemy of crispiness, so it’s best to leave them in a tray on a kitchen surface (or even better, in the fridge) to dry out for a while. As the potatoes cool, much of the water picked up during the boiling process will escape in the form of steam. Once they're chilled and dry, they'll be primed to develop that perfect crunch.
Roast potatoes: the right way

Alex Bayev/Shutterstock
Before putting your potatoes in the oven, heat some oil in a roasting tray until it's sizzling hot. This way, once the potatoes are added in, they'll immediately start to crisp up. The type of oil you use is also important. Use peanut or sunflower oil rather than olive oil – their burning point is higher, which means they can reach much hotter temperatures, creating the best cooking conditions for crispy roast potatoes.
Prawns: the wrong way

Bigc Studio/Shutterstock
First off, if you’re cooking with pre-cooked prawns, they’re going to get tough quickly. Instead, choose uncooked prawns, which will stay tender for longer when sautéed or added to sauces and curries. Uncooked prawns are grey in colour, unlike the ready-to-eat pink ones that dominate supermarket shelves. Planning on pan-frying your prawns? Get the pan and its oil hot first, and fry them in batches rather than all in one go. If overfilled, the temperature in the pan will drop, meaning the prawns will start to release moisture and boil in their own liquid.
Prawns: the right way

nblx/Shutterstock
Make sure you remove the intestinal tract from raw prawns before cooking. This black vein runs along the back of the prawn from head to tail – if left in, it can give off an unpleasant flavour. Cut a shallow slit along the back of each prawn to expose the tract, then simply pull it out. Top tip: sauté your prawns with garlic and chilli, then pour a good glug of white wine into the pan to deglaze it. The wine will soak up the delicious seafood flavours to make a beautiful sauce.
Poached eggs: the wrong way
Gayvoronskaya_Yana/Shutterstock
Whatever egg-poaching technique you use, you’re already doomed to failure if you’re not using fresh eggs. Fresh eggs tighten up in boiling water much quicker, meaning the whites won’t disperse into wispy pieces as they poach. You’ve also been missing a trick if your poaching process doesn’t involve adding a glug of vinegar into the cooking water – this will help to hold the egg together neatly as it cooks.
Poached eggs: the right way
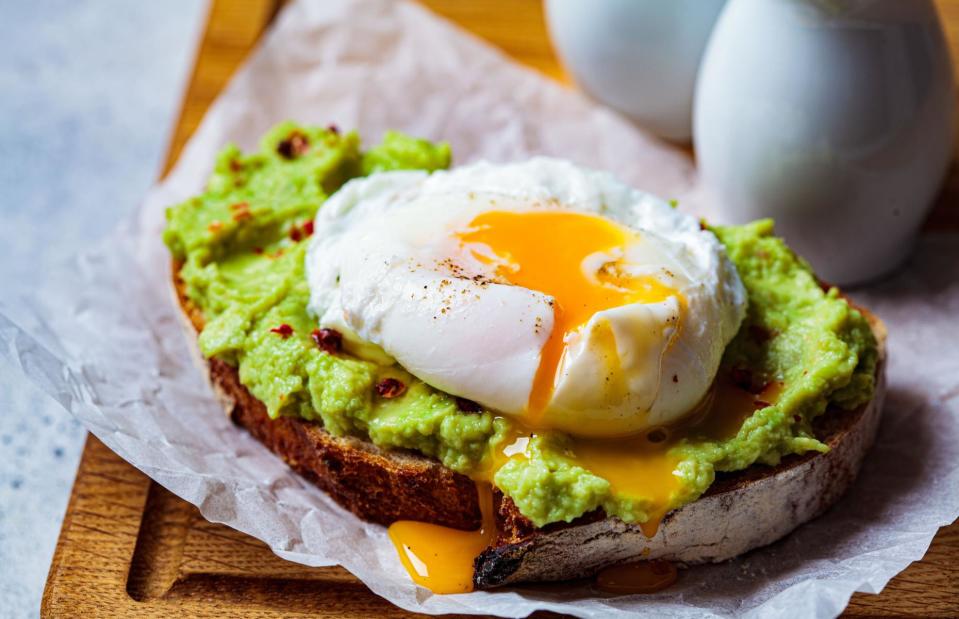
Nina Firsova/Shutterstock
Crack your eggs into ramekins before adding them to the boiling water, rather than poaching them straight from their shells. This way, the eggs will enter the poaching liquid more rapidly and in one go, resulting in a rounder and more compact poached egg shape. Another good tip is to create a vortex in the water by stirring it in a circular motion just before adding the egg.

