
Get started with embroidery
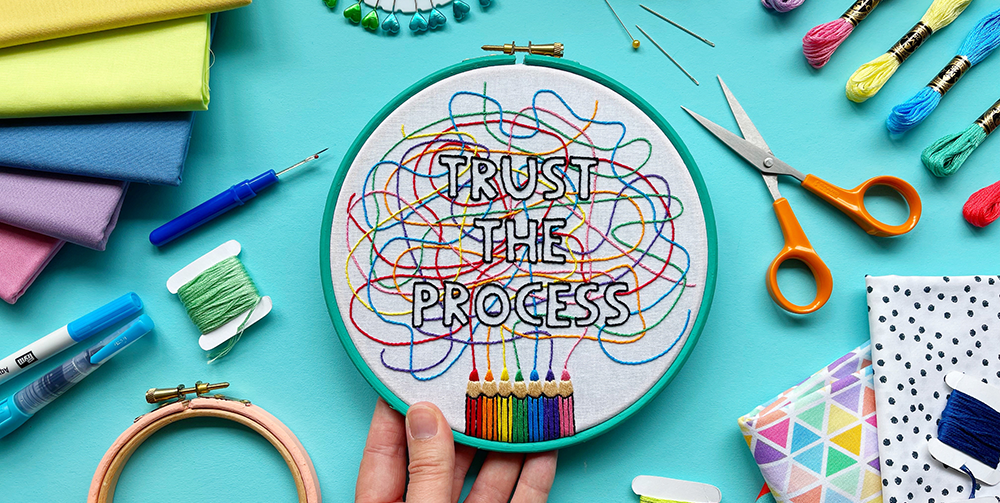
Embroidery has made a big impact on the crafting world over the last few years, and it’s easy to see why. In this beginner’s guide to embroidery, we’ll explain everything you need to know about embroidery including how to get started with basic embroidery stitches.
You don't need any previous craft experience to enjoy embroidery, but many sewers and knitters enjoy the process. It's also similar to bargello – which you can get started with by reading our guide here.
What is embroidery?
Embroidery is essentially a method of decorating fabrics using a needle and thread, and is very accessible as a beginner. Using just a few simple embroidery stitches you can create fun and modern designs, and (like many other crafts) it is a mindful activity that can also have a positive impact on your mental health, too.
While most embroidery uses thread on fabric, many people have pushed boundaries with the craft of embroidery, stitching on art canvas, wood, tennis rackets and so much more. You can also add embellishments with beads, sequins and pearls for extra sparkle. The possibilities are endless!

What you’ll need to embroider
Fabric
It’s possible to embroider on most fabrics, but avoid anything with stretch until you feel more comfortable! Quilting cottons come in a huge variety of colours and patterns – try Kona Cotton which is available in over 300 colours. Linen is also lovely to stitch on, and Essex or Washer linens are available in a variety of colours.
Other fabrics often used for embroidery are calico, felt, tulle, denim, wool and silk. After a bit of practice, you can embroider on clothing to add your own creative touch to garments and make something totally unique.
Embroidery thread
Embroidery thread has six strands which can be divided for stitching. The two big brands are DMC and Anchor, which are stocked widely in shops and online. Although you can buy cheap thread packs, it’s worth paying a little more for these brands, particularly if you’re stitching on clothing as they are colourfast, meaning it will not lose or change colour when washed.
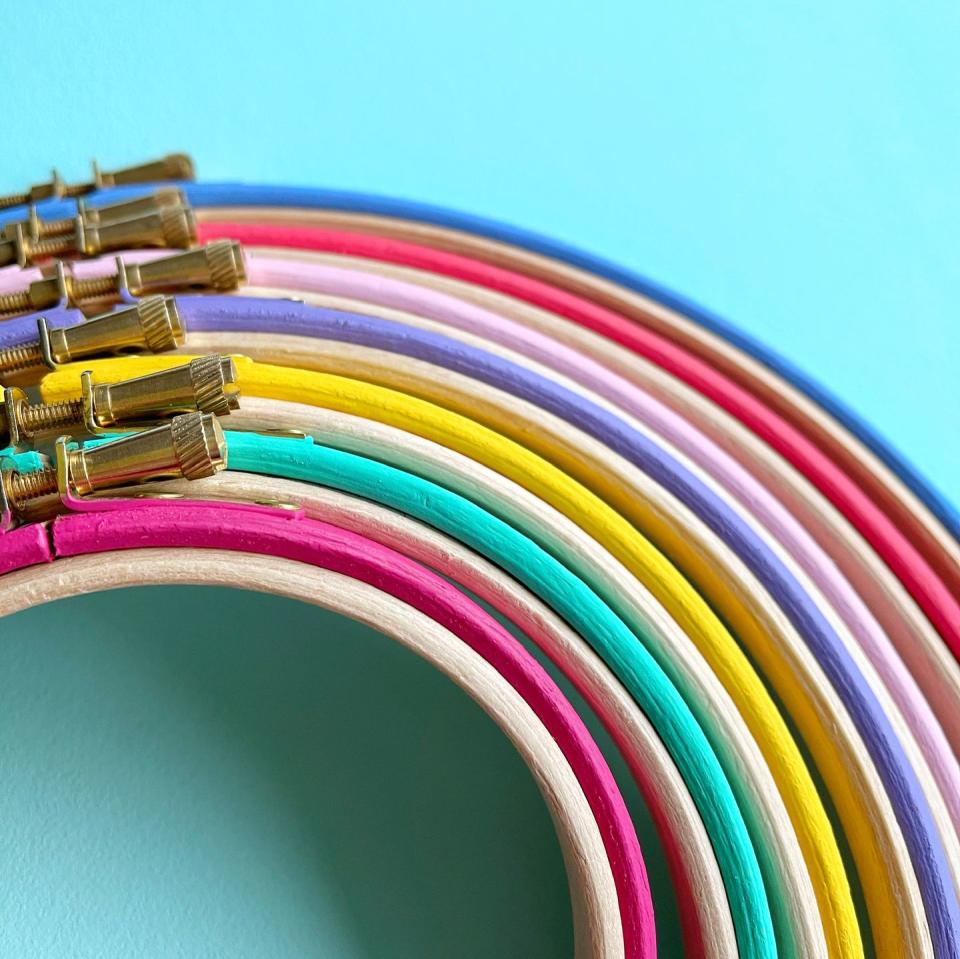
Embroidery hoops or frame
Embroidery hoops come in a variety of sizes and materials. Bamboo hoops are a great budget option, and you can often get them in bulk. Plastic hoops come in a greater variety of shapes and colours, and it’s great to have the option of stitching in oval or square hoops. For larger projects, consider using a clip frame so that you can see all the design whilst stitching.
Embroidery needles
The best way to choose a needle size as a beginner is to buy an assorted pack of needles. We all have different sized hands, and what works best for one person won’t for someone else!
Crewel needles are great for hand embroidery as they have a long eye. You could also try sharps, which are fairly long needles. Look out for brands such as Prym, Pony or Milward for quality, reasonably priced embroidery needles.
Scissors
A good pair of embroidery scissors is a stitching essential, and there are loads to choose from. Try these traditional stork scissors or these needlework scissors that are great for cutting felt, too.
Transfer pen
There are so many transfer methods, but look for semi-permanent methods at first. Air or water erasable pens are so handy and very easy to draw with on fabrics. You can also use Frixion pens as they disappear with heat, but be careful as they can also reappear in the cold!
Different types of embroidery
Many styles of stitching come under the umbrella of ‘embroidery’, but one simple difference is whether the stitching is done by hand or machine. Free motion machine embroidery is what you generally see on school uniforms and product branding. It’s a quick process, meaning it’s cost-effective and can produce identical items in bulk.
Hand embroidery is a much slower process, where each piece created is unique to the person who made it. The three main groups of hand embroidery are freestyle, counted thread and whitework.
Freestyle embroidery (also known as ‘surface embroidery’) includes any type of embroidery where the stitching isn’t determined by the weave of the fabric. This style is generally what you see in embroidery kits as it’s great for stitchers of all levels.
Counted thread embroidery includes any style of stitching using a fixed number of stitches to make a pattern. This includes cross stitch, bargello and needlepoint.
Whitework is an advanced technique characterised by the use of white thread on white fabric, often using holes as part of the design (such as broderie anglaise).

Embroidery terms
Most embroidery terms are stitch names, but here are a few others that you might come across:
Anchor stitch – a very small, barely visible stitch over the top of another stitch to secure it in place.
Stabbing method – bringing the needle up through the fabric and then taking it right through the other side. In this method, you work the fabric front to back, unlike with the sewing method.
Sewing method – bringing the needle up through the fabric but then stitching with the needle on the surface, rather than front to back. This method is used in running stitch (see stitch guide below).
Tie off – tying a small knot at the back of your work to secure the thread. Always trim off any excess thread at the back.
Working thread – this is the part of the thread that is coming out of the fabric during stitching.
Stitch guide: Four basic embroidery stitches to get started
Here are four basic embroidery stitches to get started. Here, we've stitched each on white Essex linen using three strands of thread. Once you get confident with these stitches, you can master so many more. Check out our guide to embroidery stitches complete with step-by-step pictures.
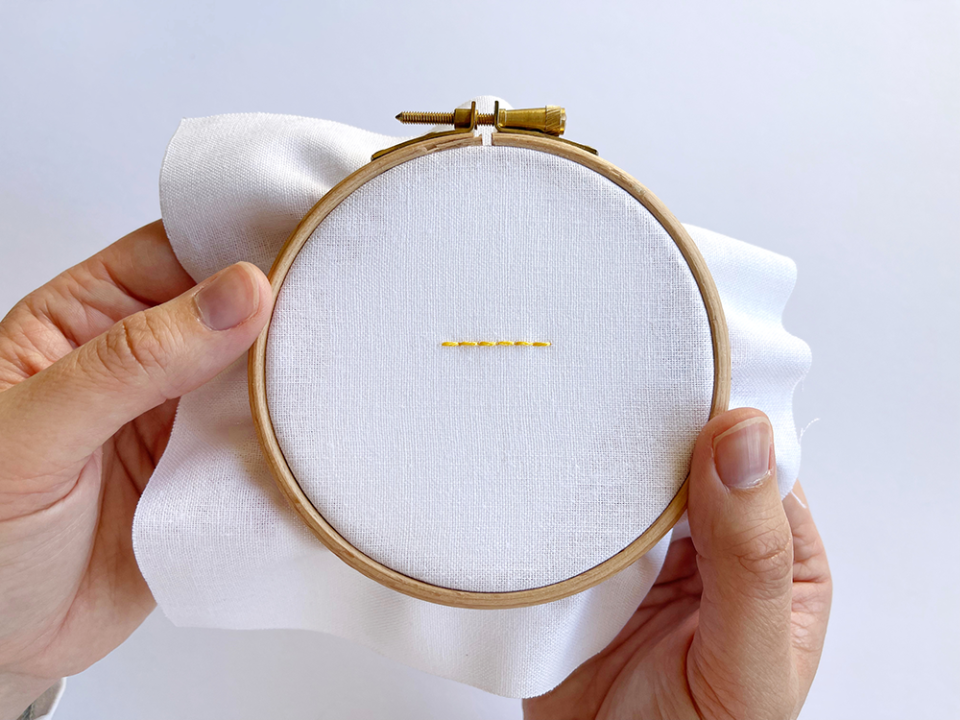
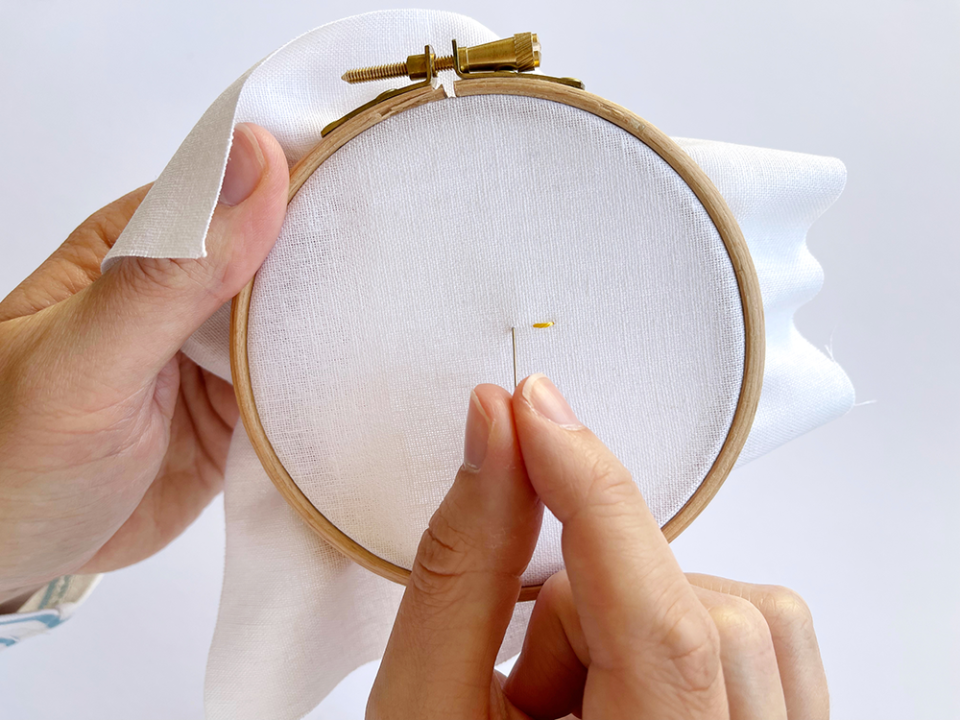
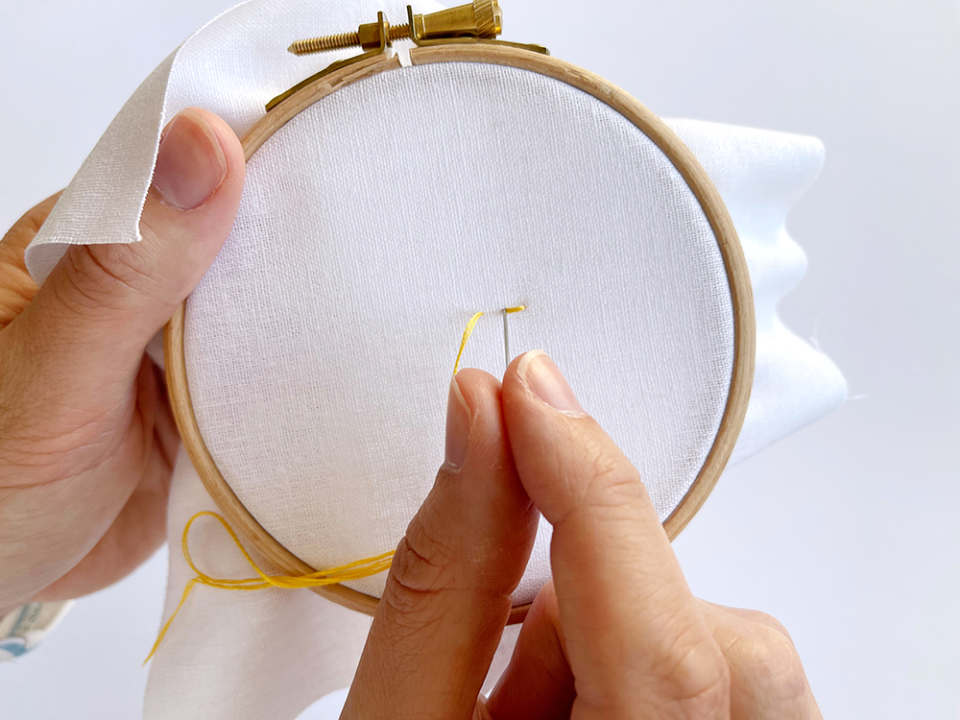
Running stitch
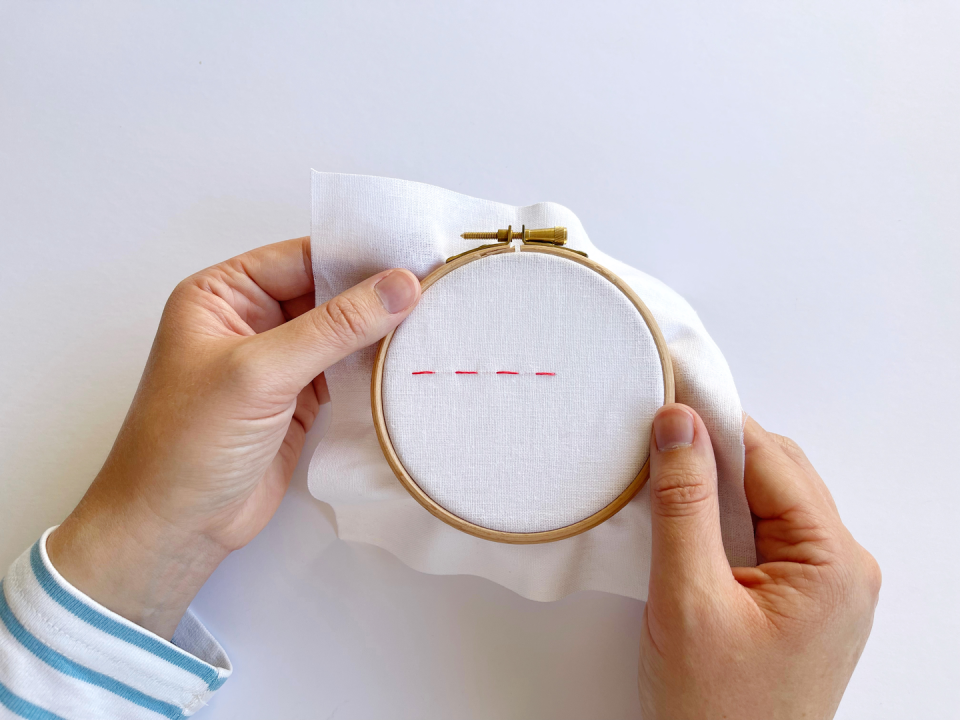
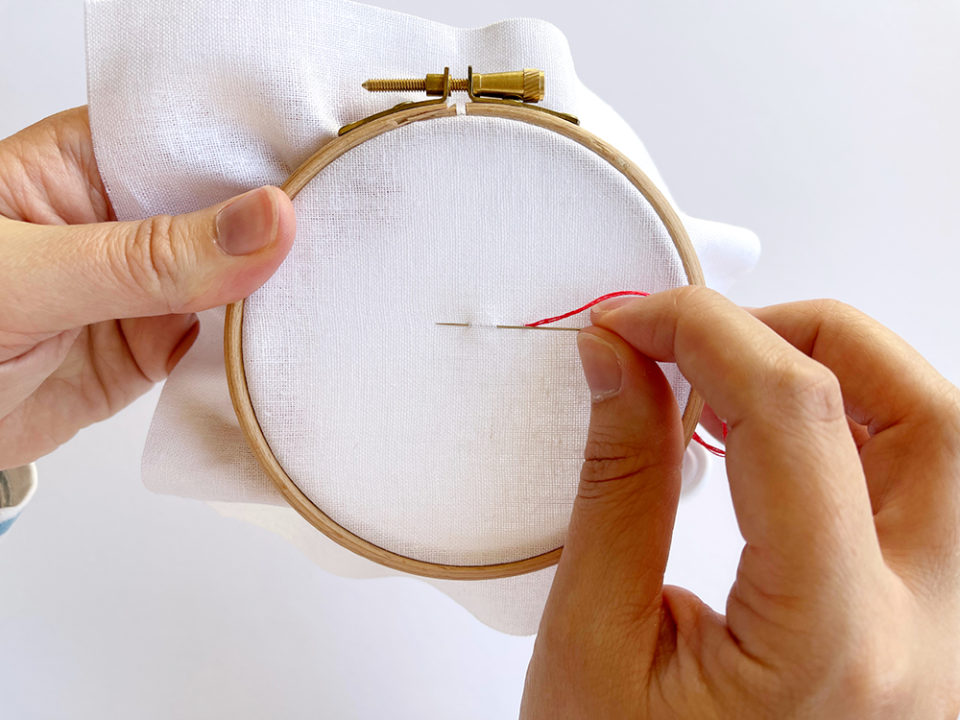
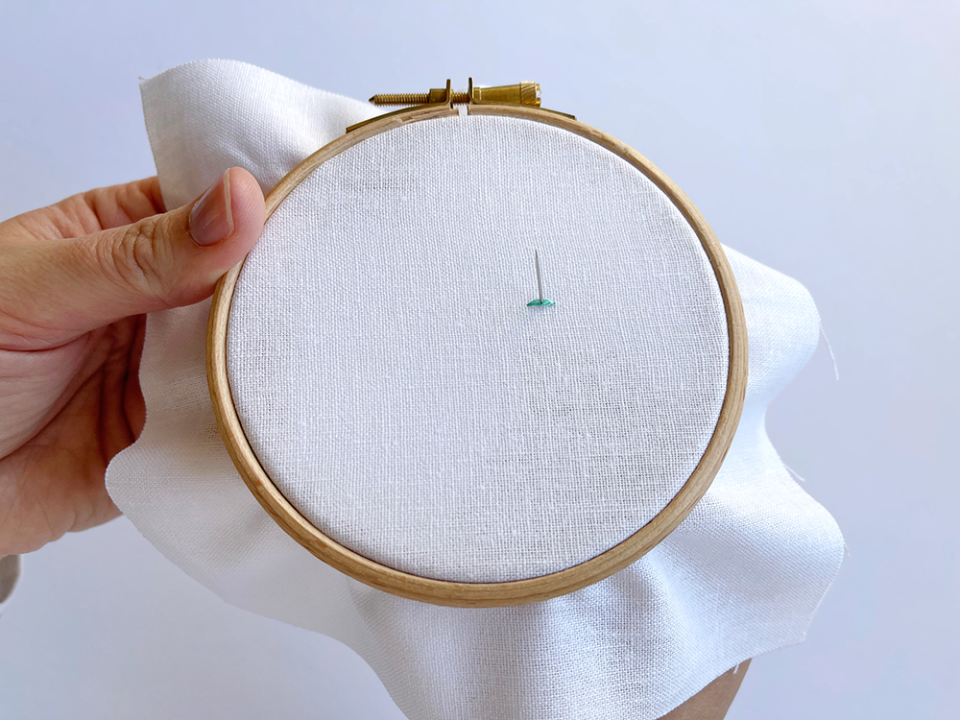
Step 1: Bring the needle up through the fabric at the beginning of the line to be stitched.
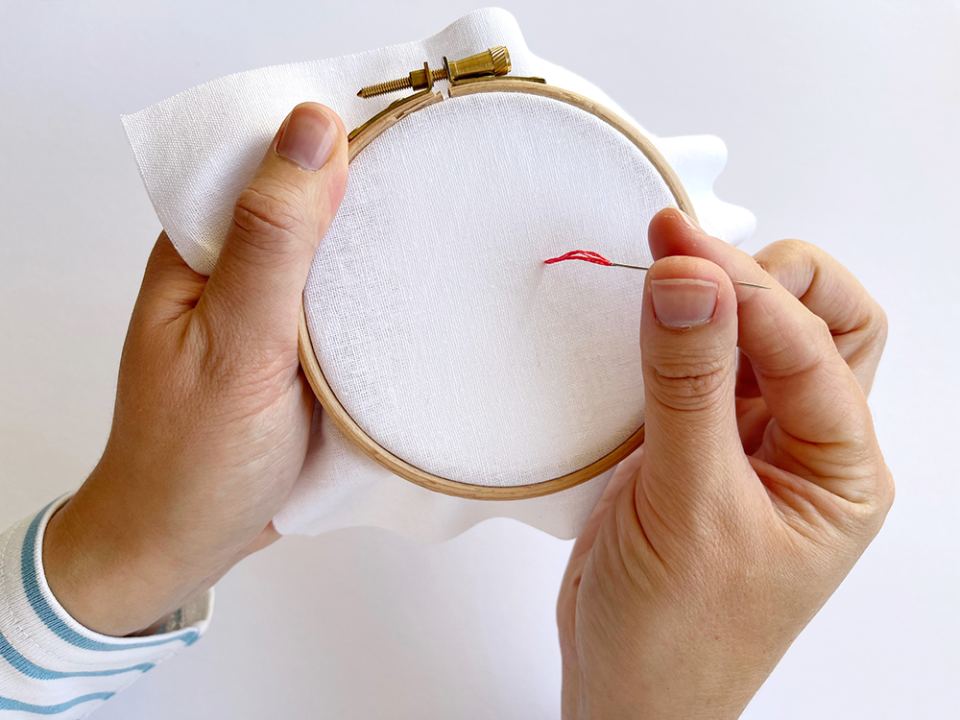
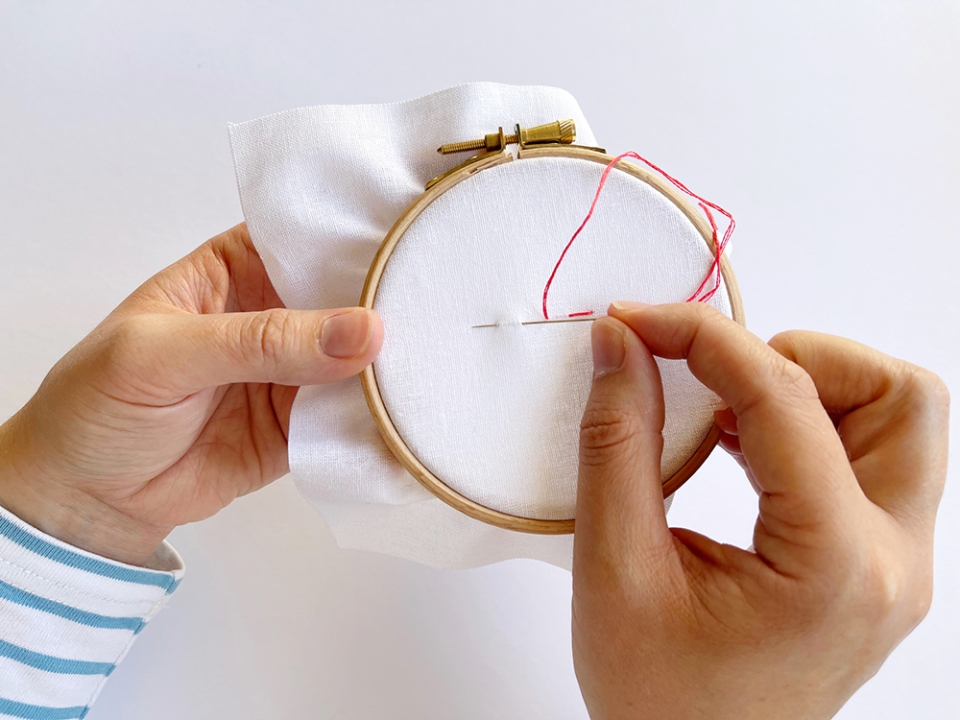
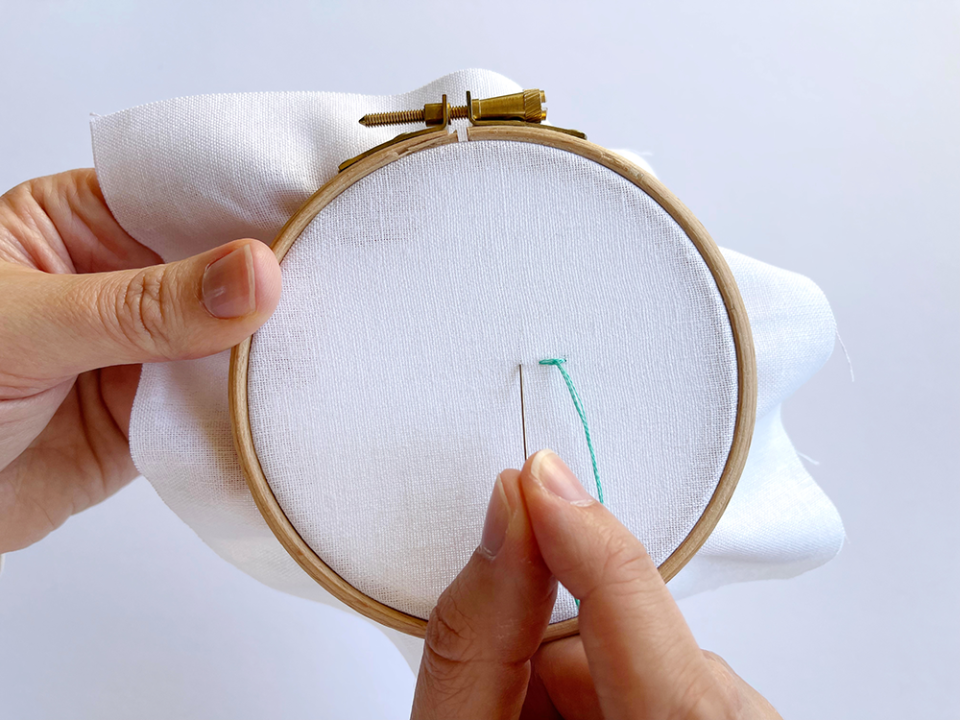
Step 2: Take the needle down from front to back one stitch length from where you have come up through the fabric, and then pull through.
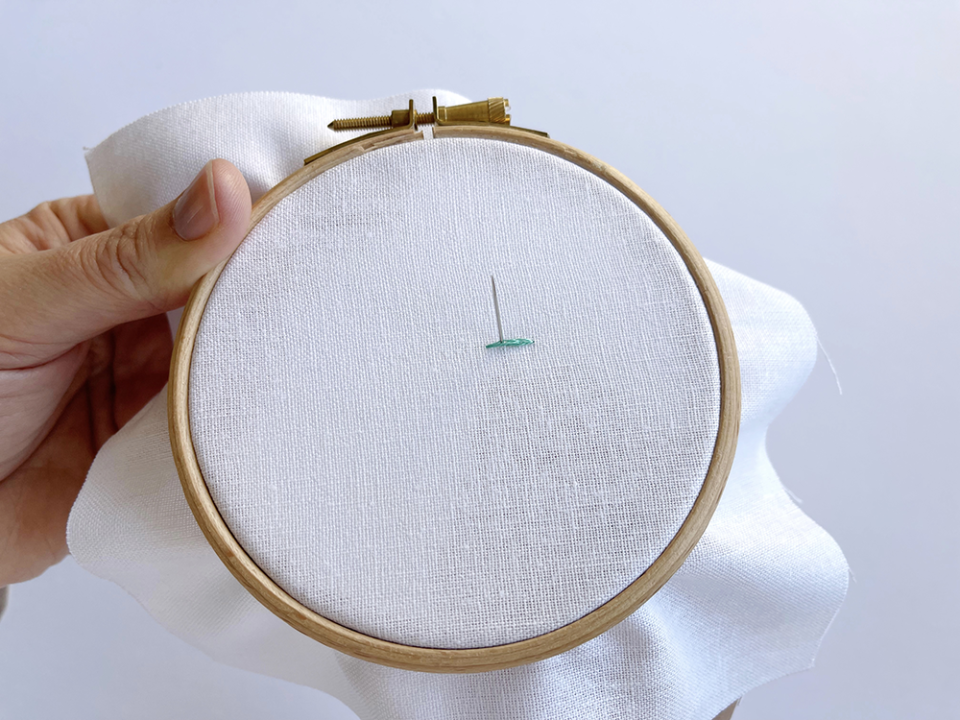
Step 3: Continue stitching in this way until you reach the end of the line to be stitched. On the last stitch, push the needle through the fabric and tie off at the back.
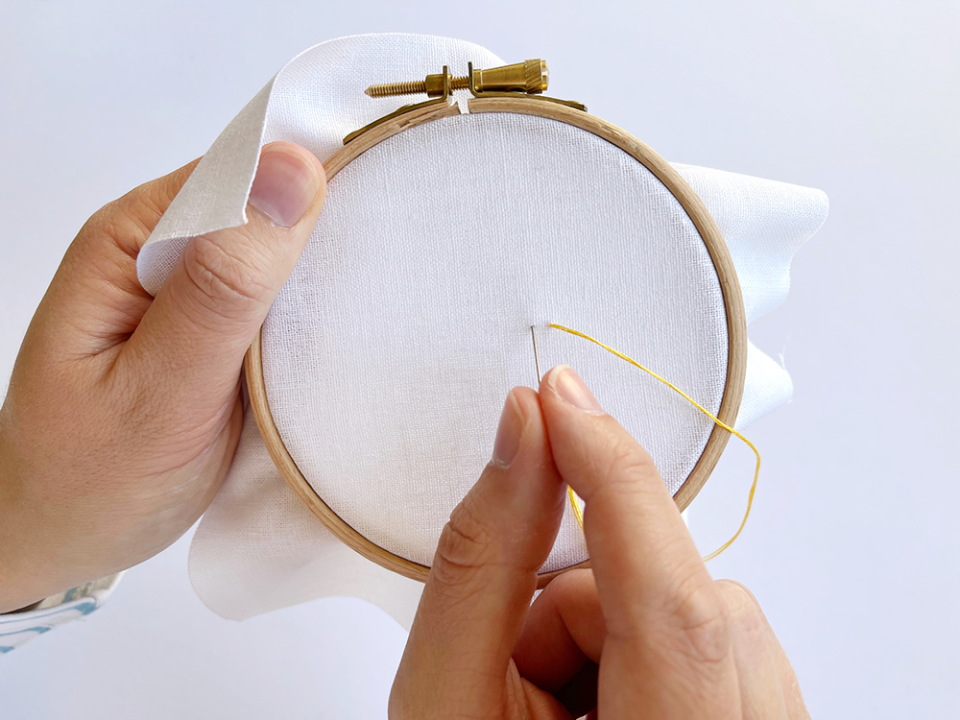
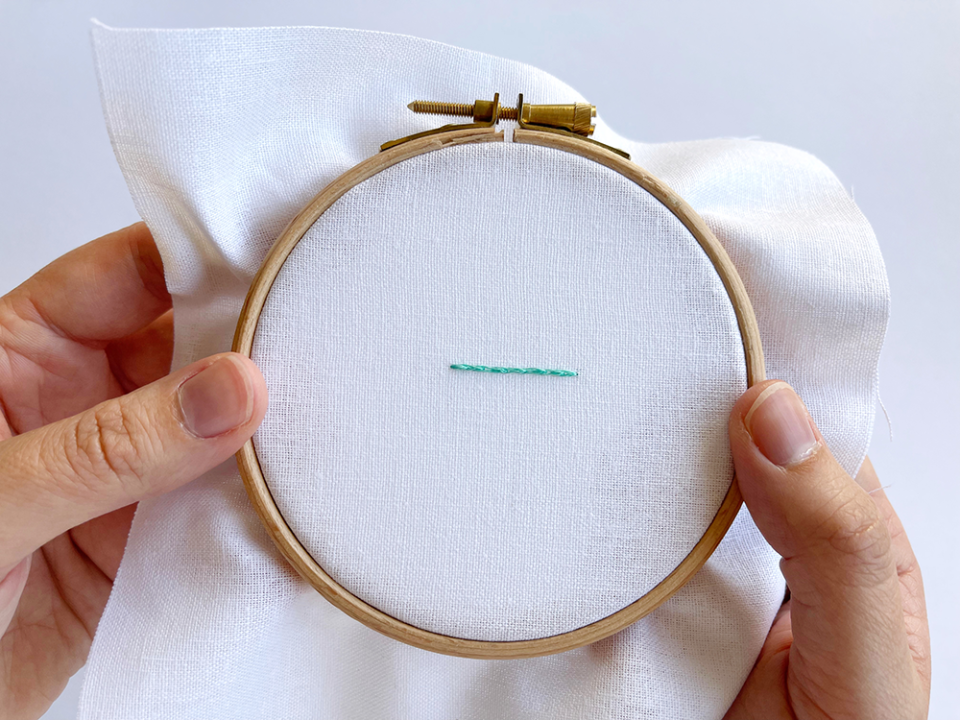
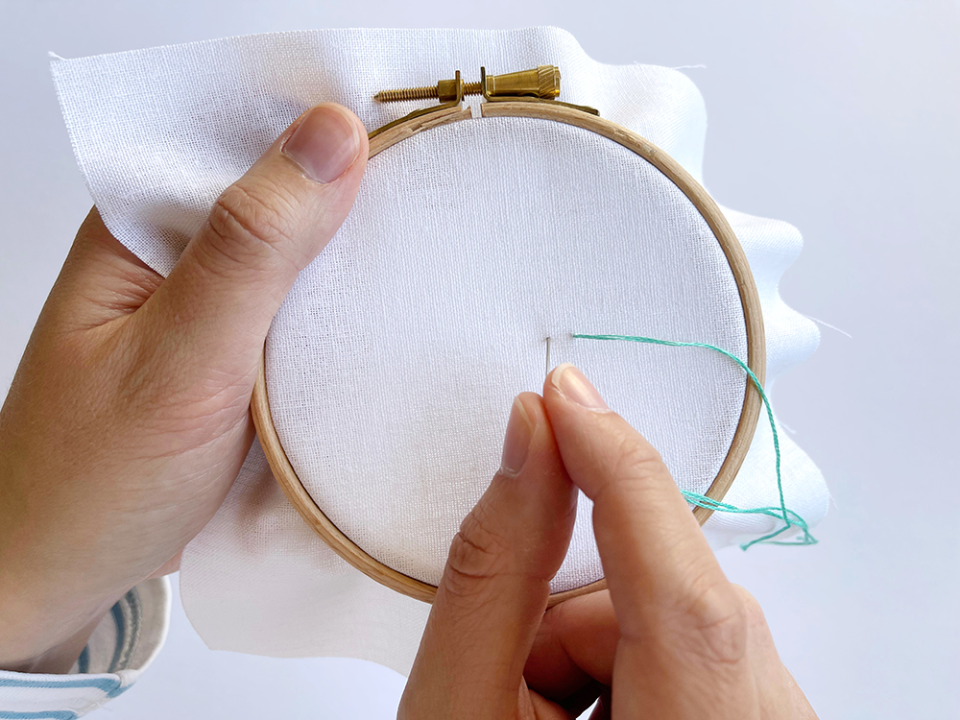
Back stitch
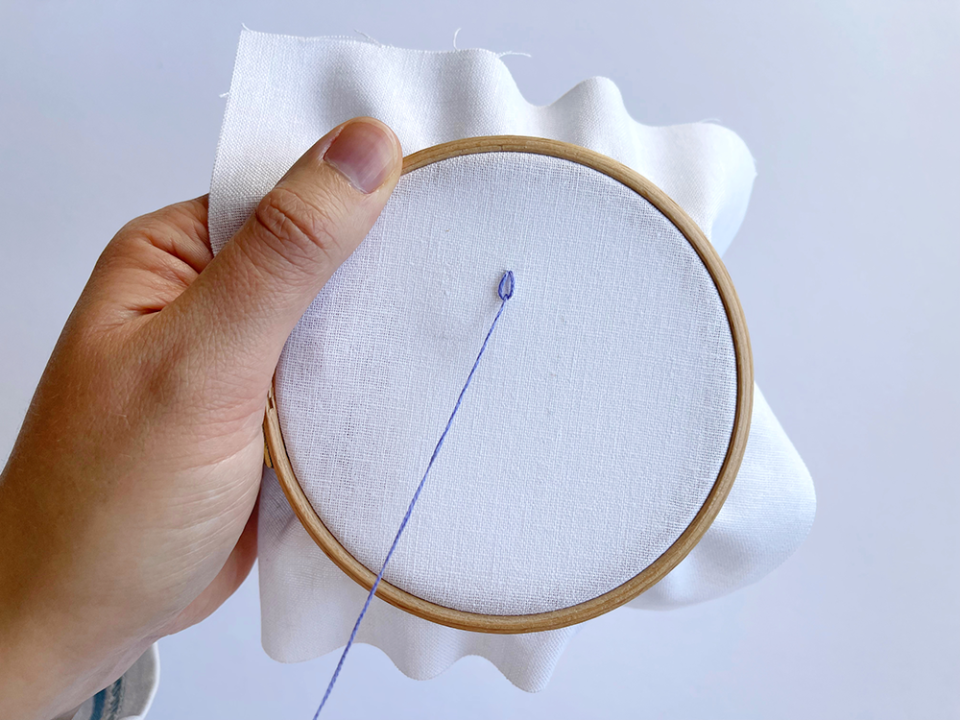
Step 1: Bring the needle up through the fabric, and push back through to create the desired stitch length.
Step 2: Come back through the fabric a little further along the line to be stitched, leaving a gap that is the same size as the first stitch.
Step 3: Then push the needle through the fabric at the exact point where the first stitch ended. This is really important to create the effect of a continuous line of stitches.
Step 4: Continue stitching in this way until you reach the end of the line to be stitched. On the last stitch, push the needle through the fabric and tie off at the back.

Spit stitch
Step 1: Make a simple stitch by bringing the needle up through the fabric and pushing back through at the desired stitch length.
Step 2: Bring the needle back up through the fabric in the middle of the stitch, making sure it goes through the thread to literally split the stitch.
Step 3: Finish this next stitch by pushing the needle through the fabric to create a stitch the same size as the first.
Step 4: Continue stitching in this way along the line to be stitched. Each time you come up through the middle of the stitch, it should be next to the end of the previous one.
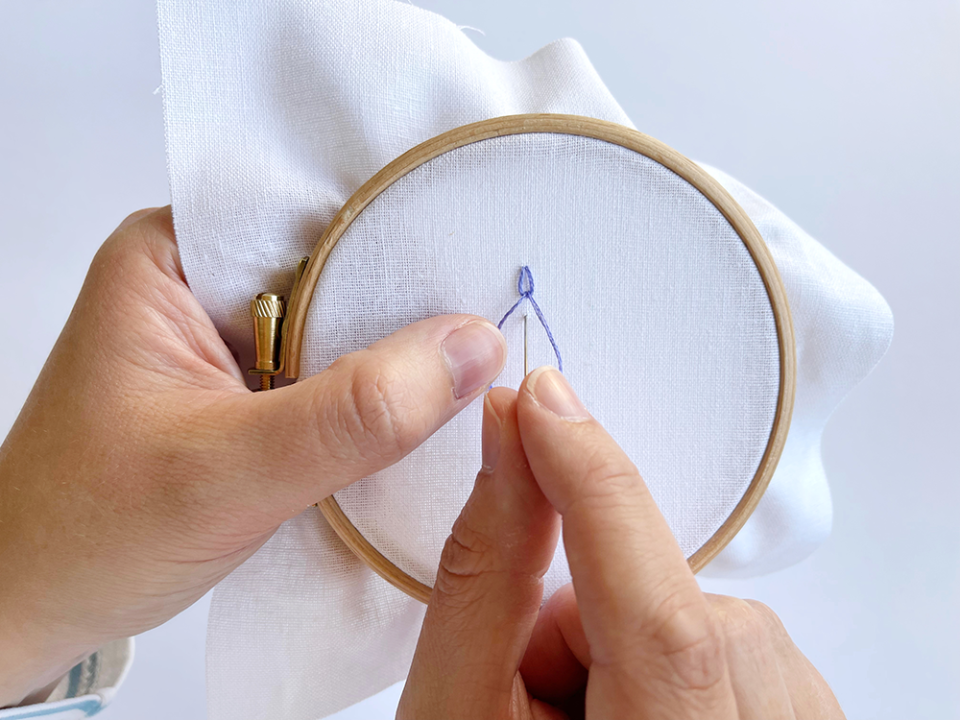
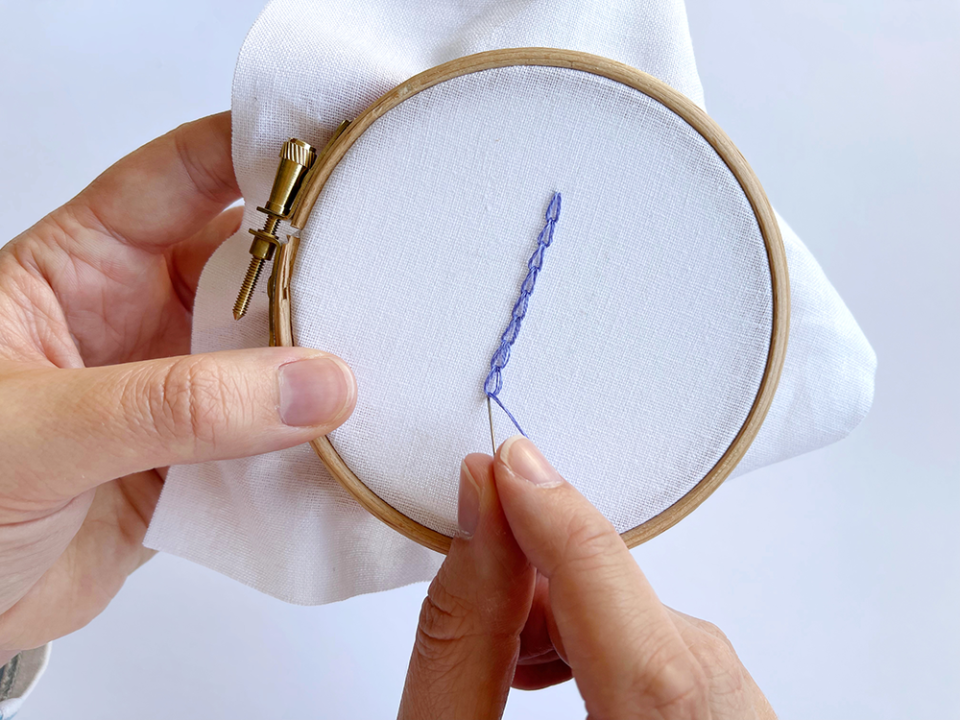
Chain stitch

Step 1: Come up through the fabric, and push the needle back through as close to where you came up as possible. Leave a loop of thread on top of the fabric.

Step 2: Bring the needle back up through the fabric at the bottom of the loop. Gently pull the thread so that the loop gets smaller and catches on the working thread. Then push the needle back through next to the working thread as you did in step one, leaving the next loop.
Step 3: Bring the needle back up through this second loop, pulling gently until it catches. Repeat this process creating each link of the chain until you reach the end of the line to be stitched.
Step 4: On the final loop, secure in place with a small anchor stitch – this is small stitch over the edge of final loop so that it doesn’t move out of place. Tie off gently at the back, being careful not to pull the stitches tightly.
How to use your embroidery stitches
Now that you've mastered for embroidery stitches for beginners – running, back stitch, slip stitch and chain stitch – it's time to put them into action. Buying an embroidery kit is a great way to get started – shop our favourites below.
Tips, tricks and troubleshooting
Before you get started on your first embroidery project here are some need-to-know tips to keep in mind.
● Always iron your fabric before starting
● If using a hoop, remember to check the tension of the fabric as you stitch. The fabric should remain flat but not pulled out of shape
● Try to stitch with good light, and avoid it when you’re feeling tired as you can make mistakes and get frustrated. The process is just as important as the finished make, so you want to enjoy it on the way
● Keep your threads organised in a box or on card bobbins
● Don’t worry about what the back looks like – nobody will see that anyway!
Now it's time to get stitching. Enjoy!
Do you love crafting? Share your creations with us by tagging @primamag in your pictures on Instagram!
You Might Also Like

