
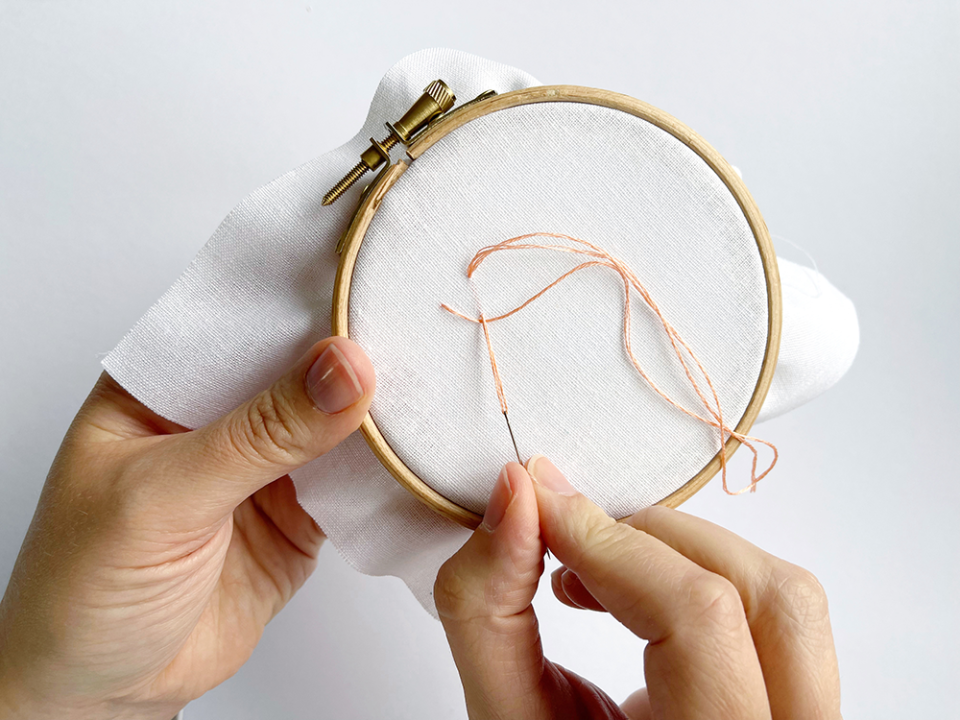
Get going with embroidery with these 16 easy stitches

Hand embroidery opens up a whole new world of craft possibilities for your sewing projects. It’s wonderfully accessible, and with just a few simple stitches you can create patterns, textures, lettering and so much more.
The term ‘embroidery’ covers lots of different styles, including freestyle embroidery (also known as ‘surface embroidery’), counted embroidery (such as cross stitch) and whitework, which is a more advanced technique.
You don’t need to know lots of embroidery stitches to get started. Although there is a huge variety of different stitches, most embroidery designs use a small number of basic ones. It’s not about how many stitches you know, it’s about what you do with them!
If you’re new to embroidery you can find out more about the basics in our beginner’s guide to embroidery. Then once you’ve mastering the embroidery basics, or if you’re already an embroider who would like to increase their knowledge of embroidery stitches, use this article as a guide to learn more embroidery stitches.
If you're wondering what to do with your embroidery project when you finish it, many crafters like to keep theirs in the embroidery hoop. This can then be hung on the wall or propped on your mantlepiece. Or you can put it in a frame, which makes a lovely gift for a special friend.
Below are the step-by-step instructions for the 16 embroidery stitches that will open up a range of embroidery possibilities. This guide to easy hand embroidery techniques will give you the confidence to get started with some of the most common stitches used in embroidery that you’ll be able to use in your own projects. Happy stitching!
Embroidery stitches: Step-by-step with pictures
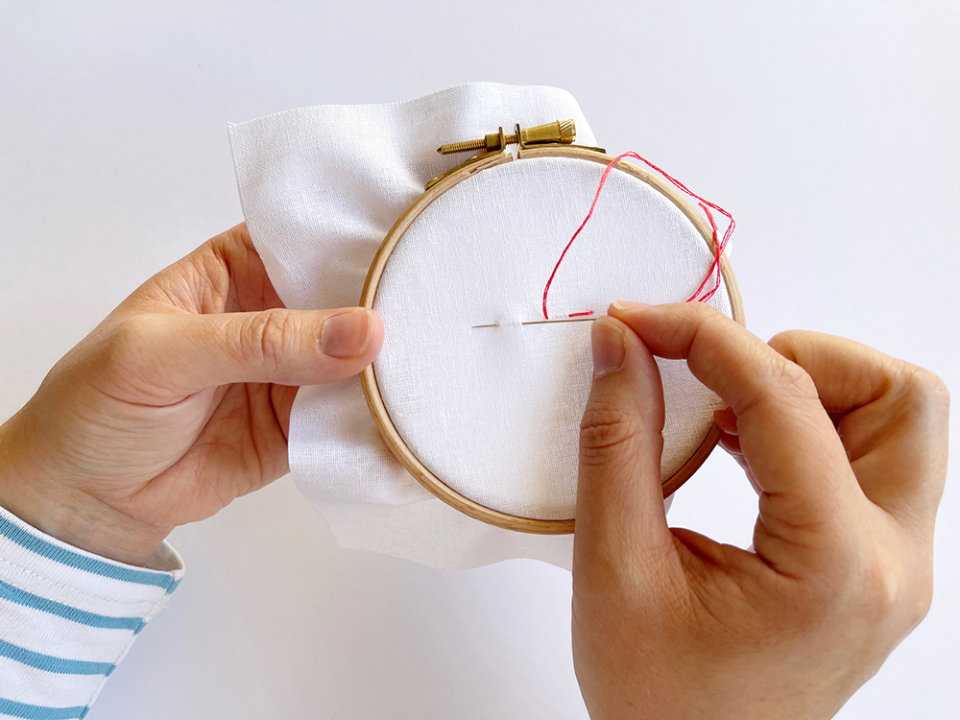
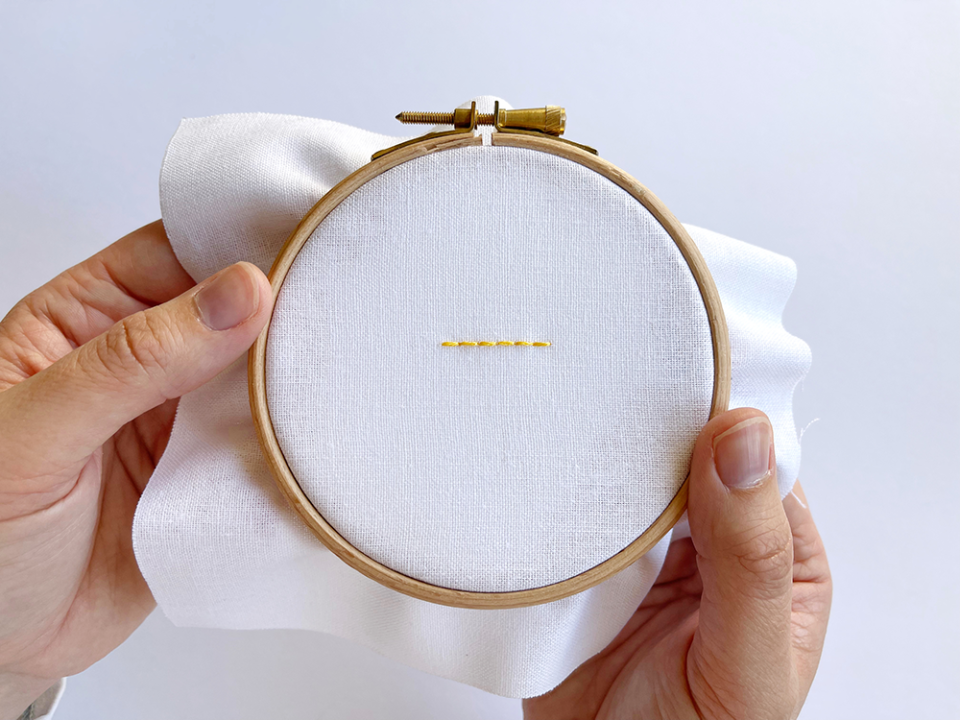
Running stitch
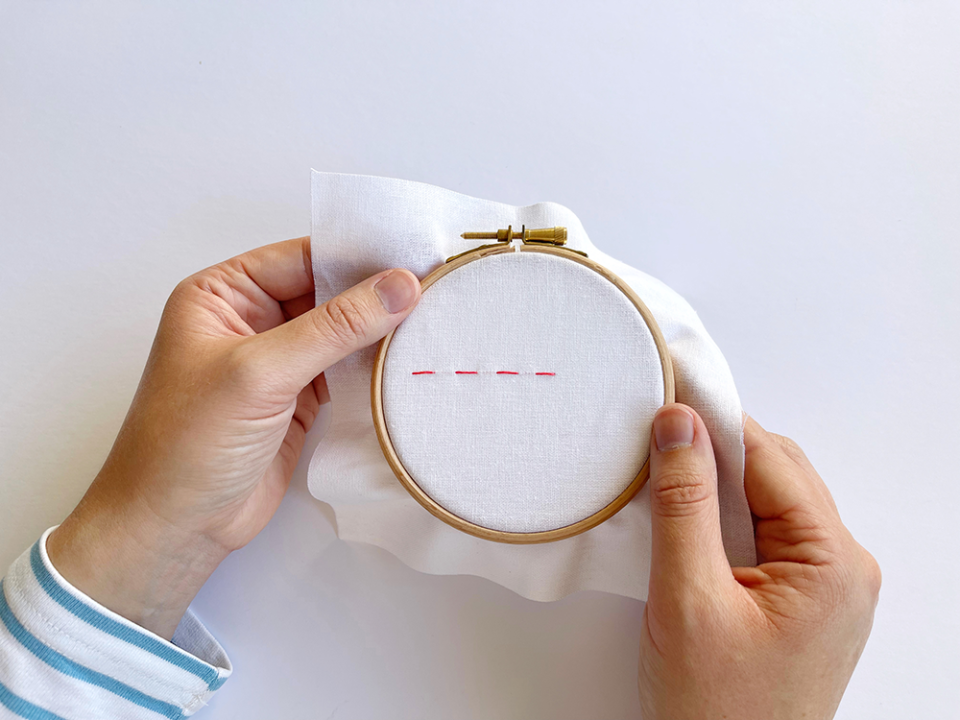
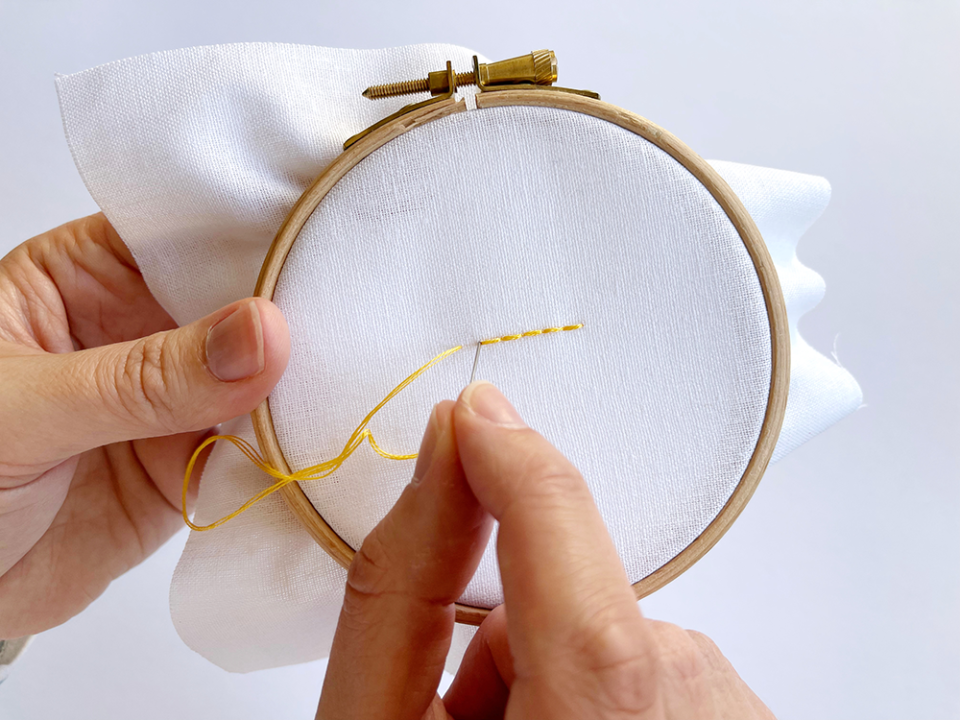
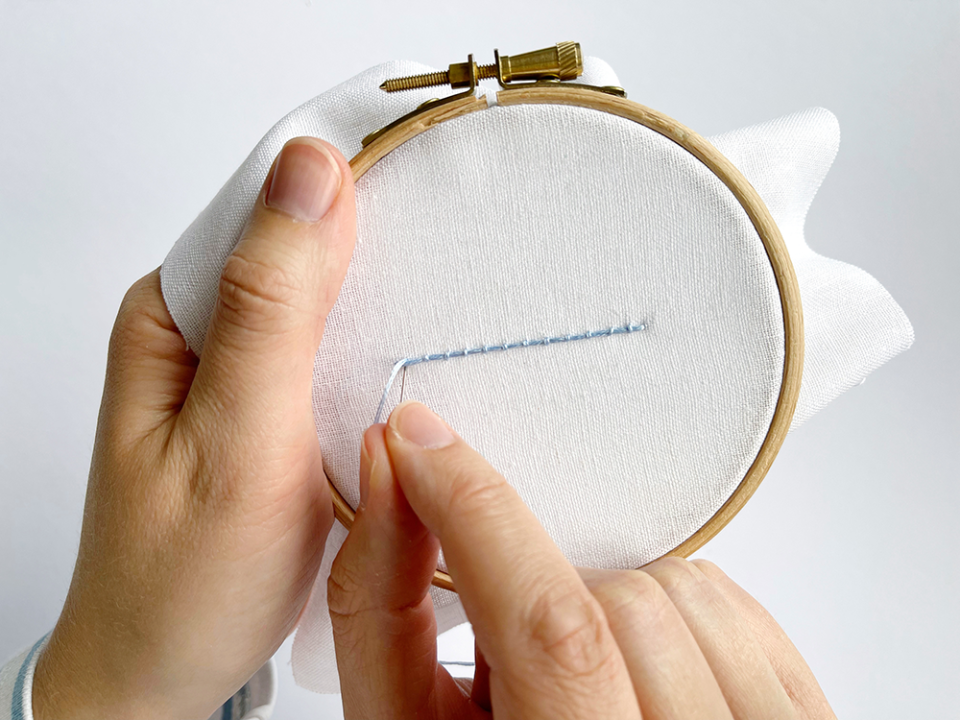
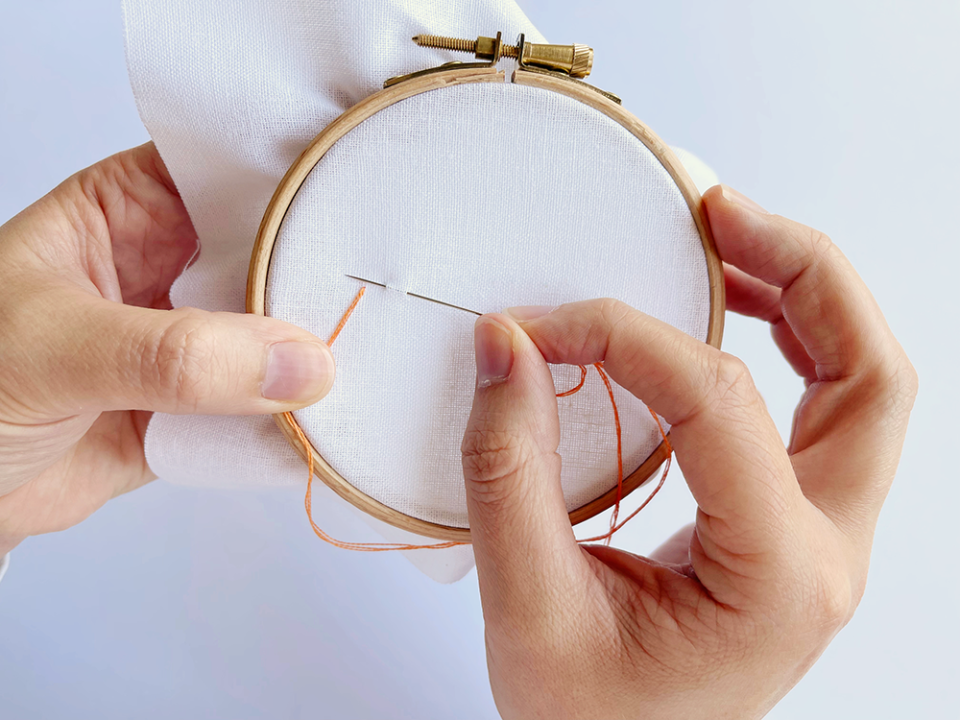
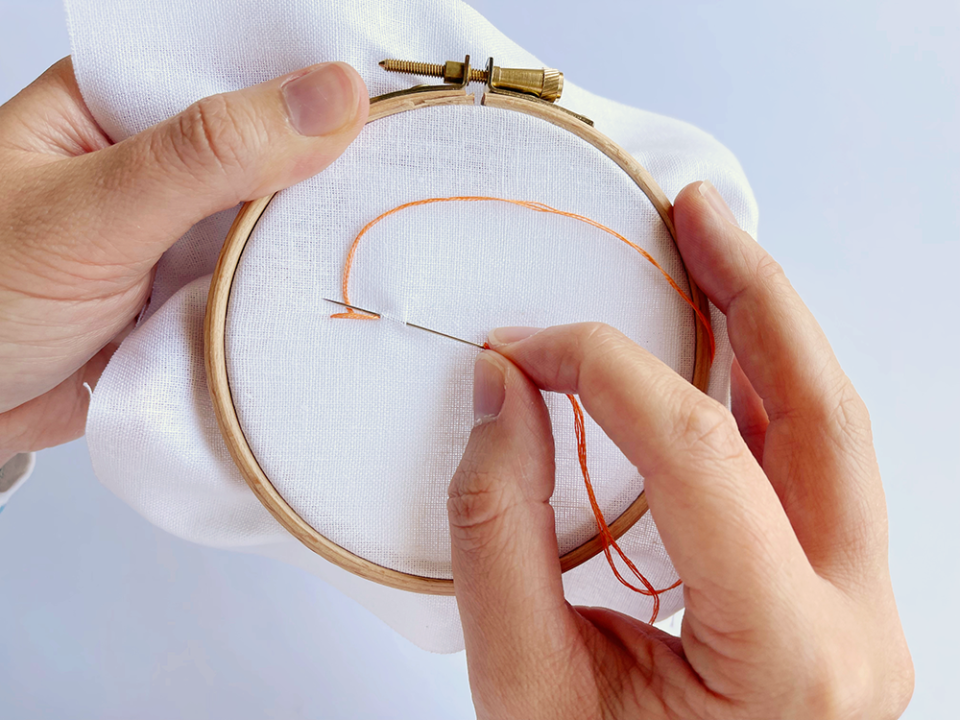
STEP 1: Bring the needle up through the fabric at the beginning of the line to be stitched.
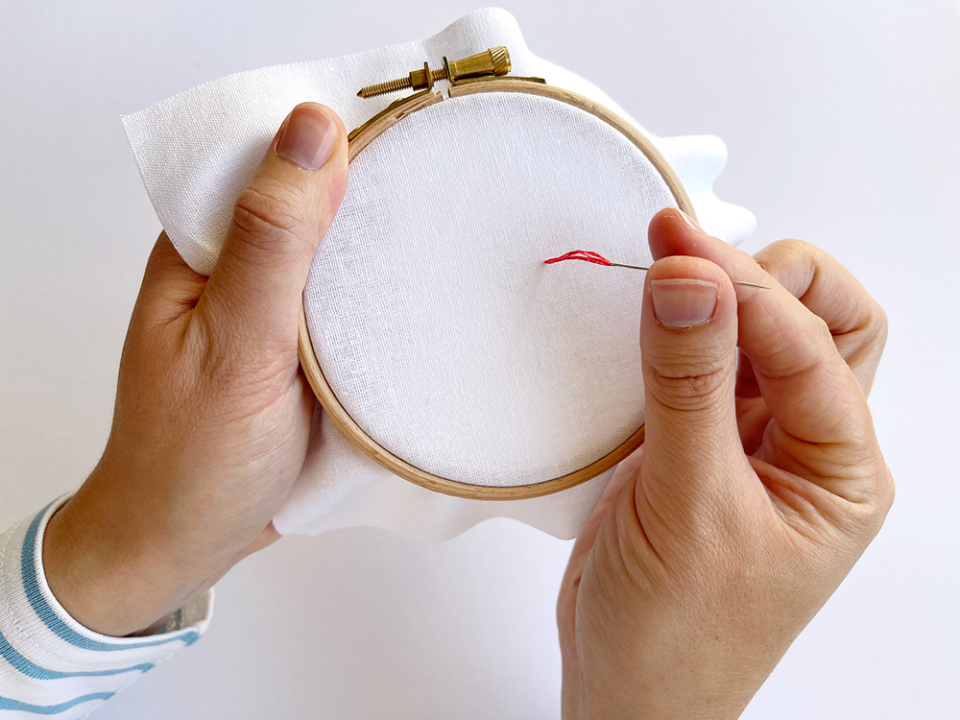
STEP 2: Take the needle down from front to back one stitch length from where you have come up through the fabric, and then pull through.
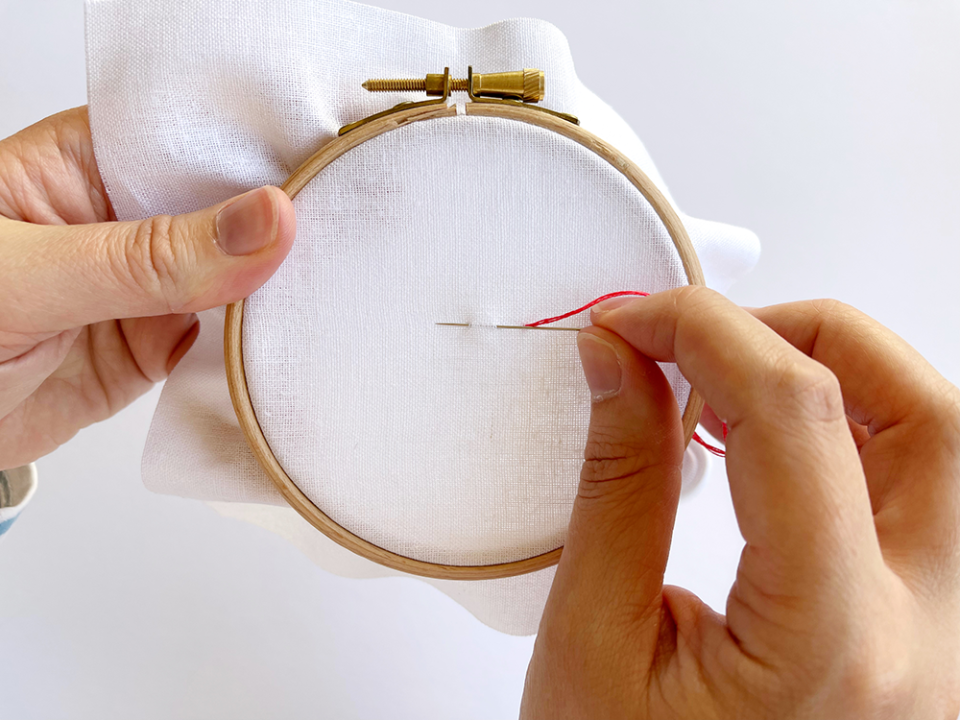
STEP 3: Continue stitching in this way until you reach the end of the line to be stitched. On the last stitch, push the needle through the fabric and tie off at the back.
This is the easiest stitch and you'll use it in so many project. Practise your running stitch with this embroidered bunny hoop project.
Back stitch
STEP 1: Bring the needle up through the fabric, and push back through to create the desired stitch length.
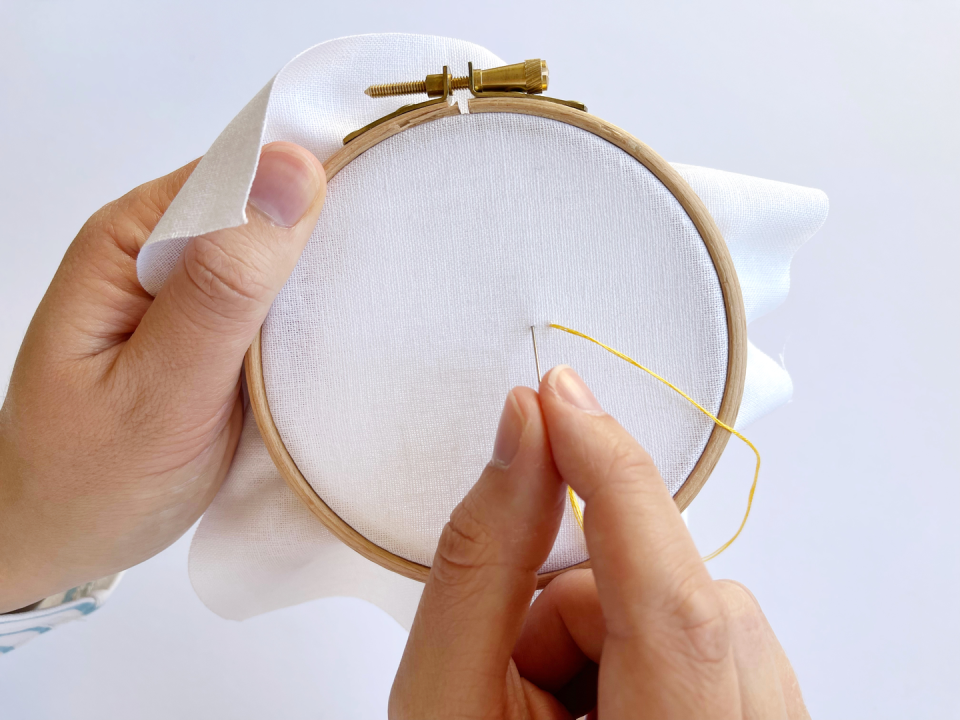
STEP 2: Come back through the fabric a little further along the line to be stitched, leaving a gap that is the same size as the first stitch.
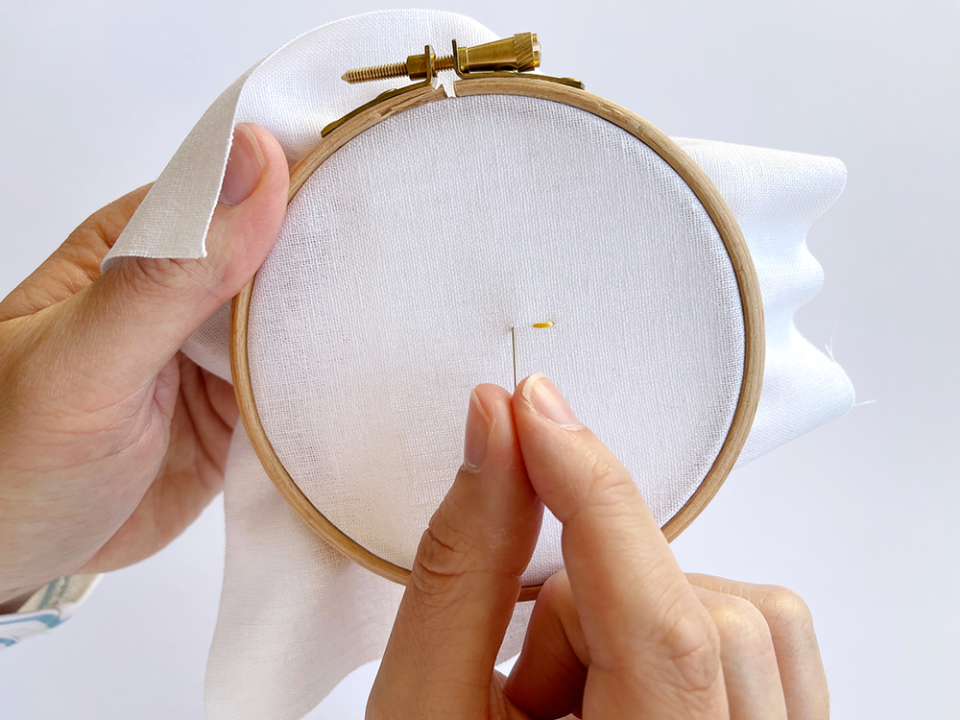
STEP 3: Then push the needle through the fabric at the exact point where the first stitch ended. This is really important to create the effect of a continuous line of stitches.
STEP 4: Continue stitching in this way until you reach the end of the line to be stitched. On the last stitch, push the needle through the fabric and tie off at the back.
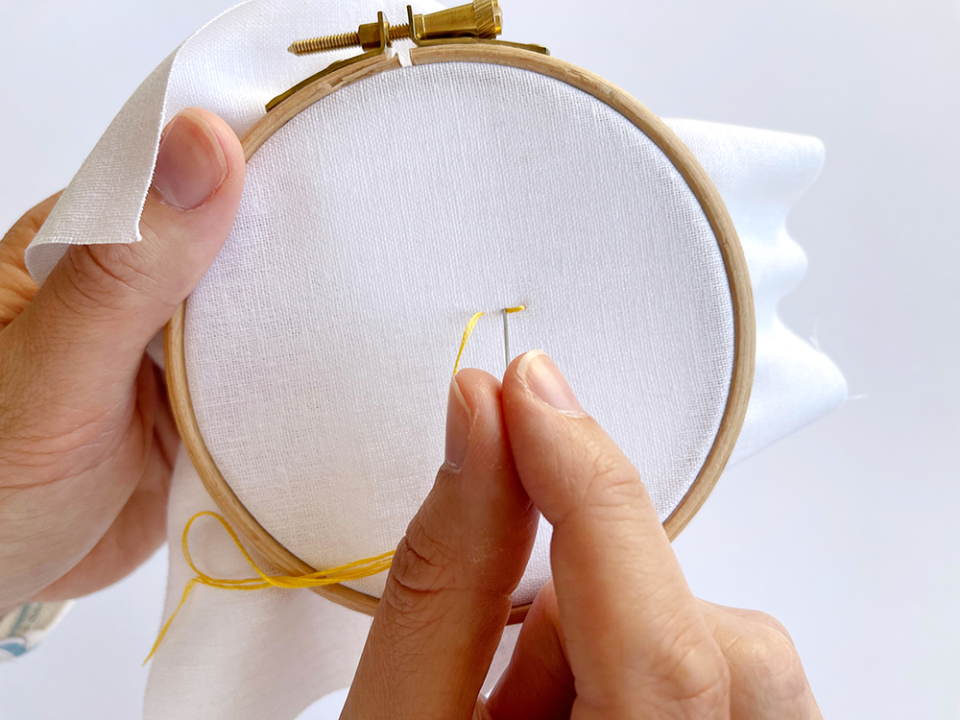
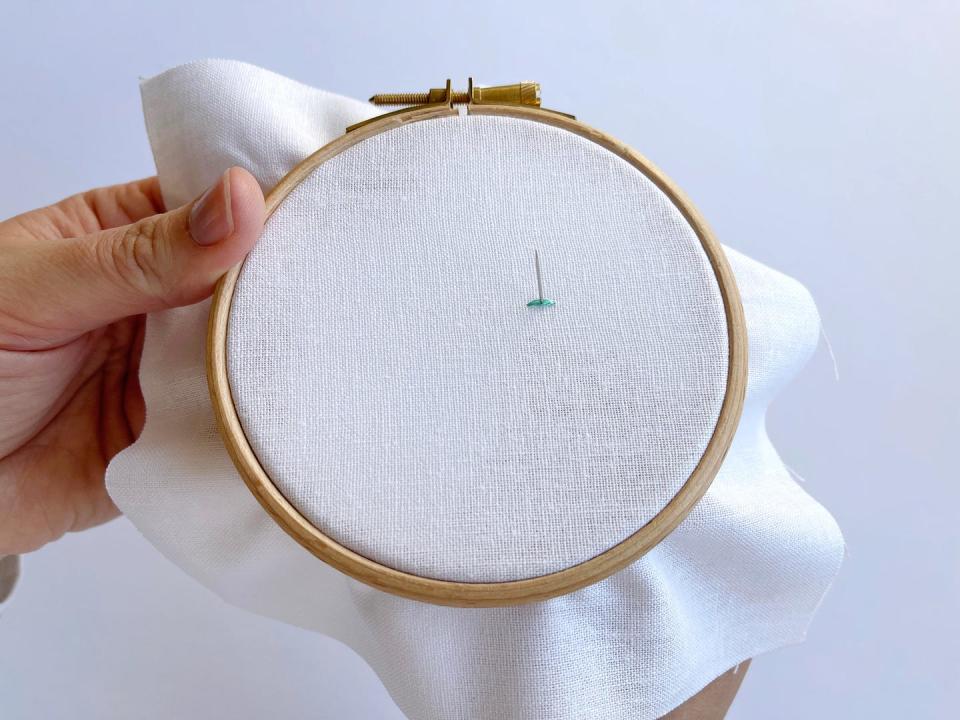
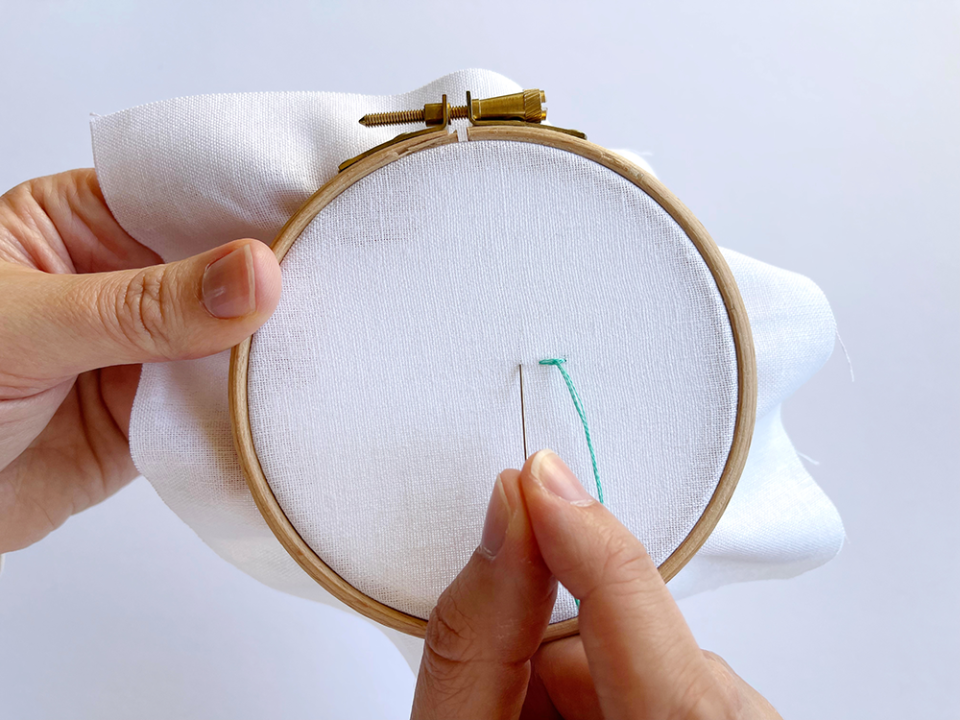
Split stitch
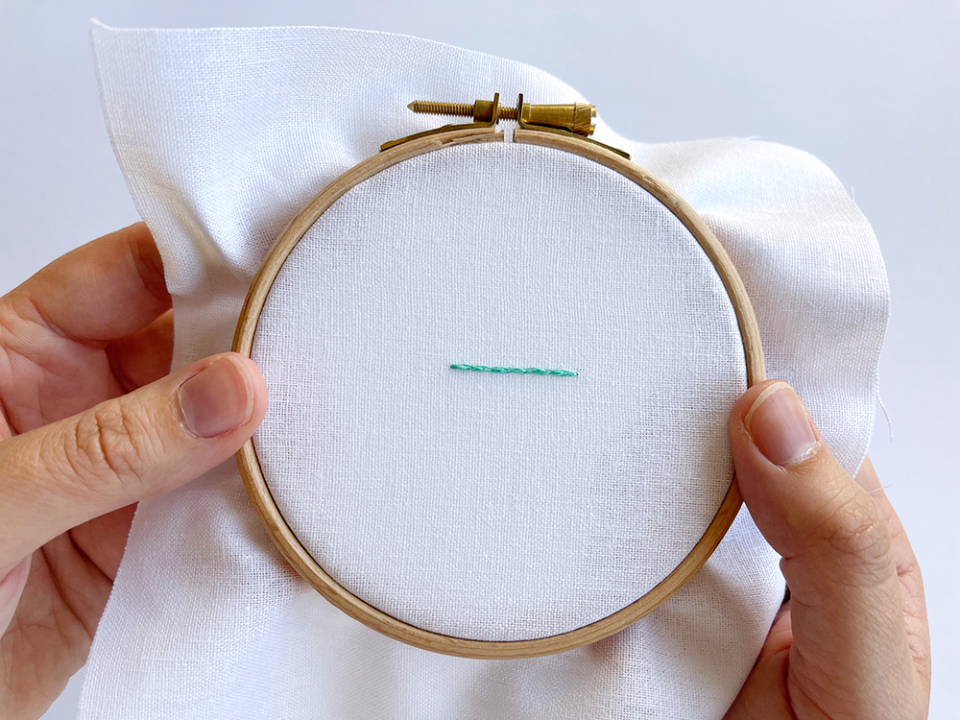
STEP 1: Make a simple stitch by bringing the needle up through the fabric and pushing back through at the desired stitch length.

STEP 2: Bring the needle back up through the fabric in the middle of the stitch, making sure it goes through the thread to literally split the stitch.
STEP 3: Finish this next stitch by pushing the needle through the fabric to create a stitch the same size as the first.
STEP 4: Continue stitching in this way along the line to be stitched. Each time you come up through the middle of the stitch, it should be next to the end of the previous one.

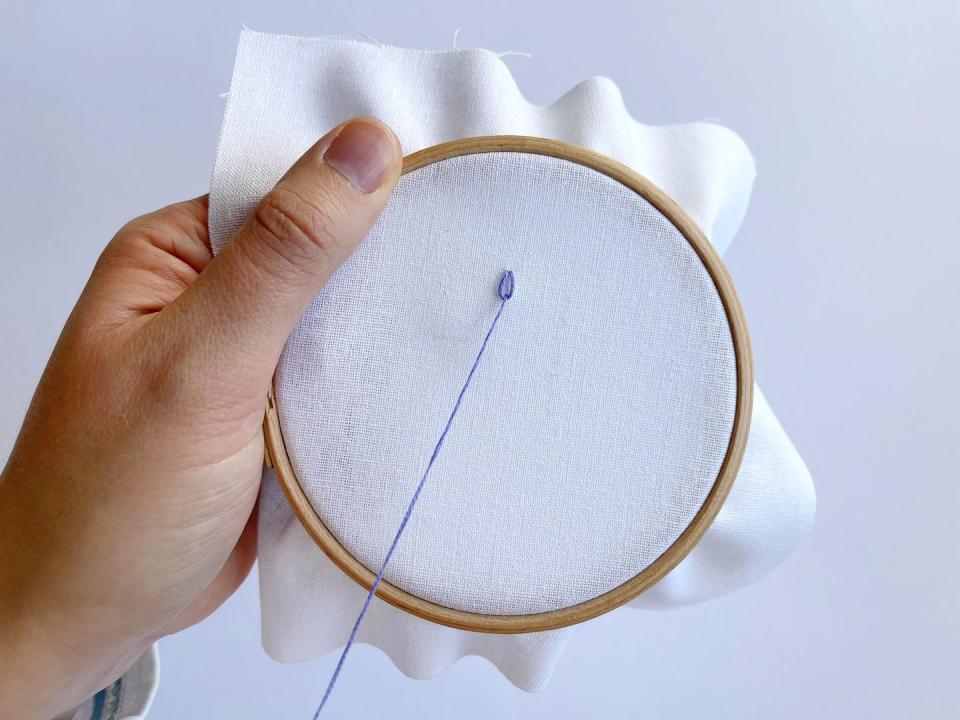
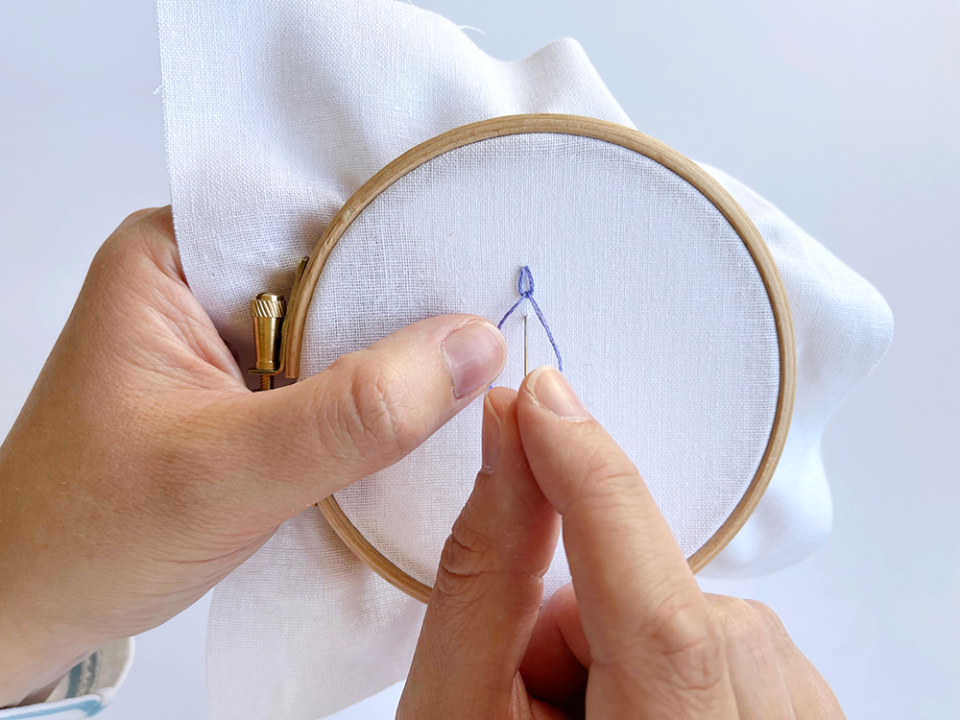
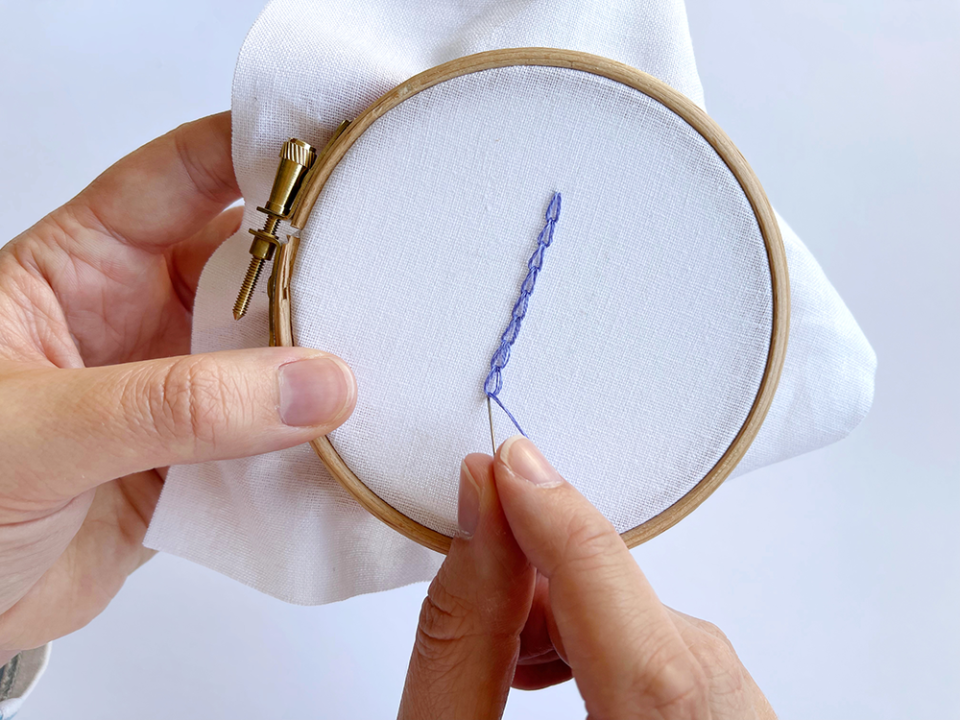
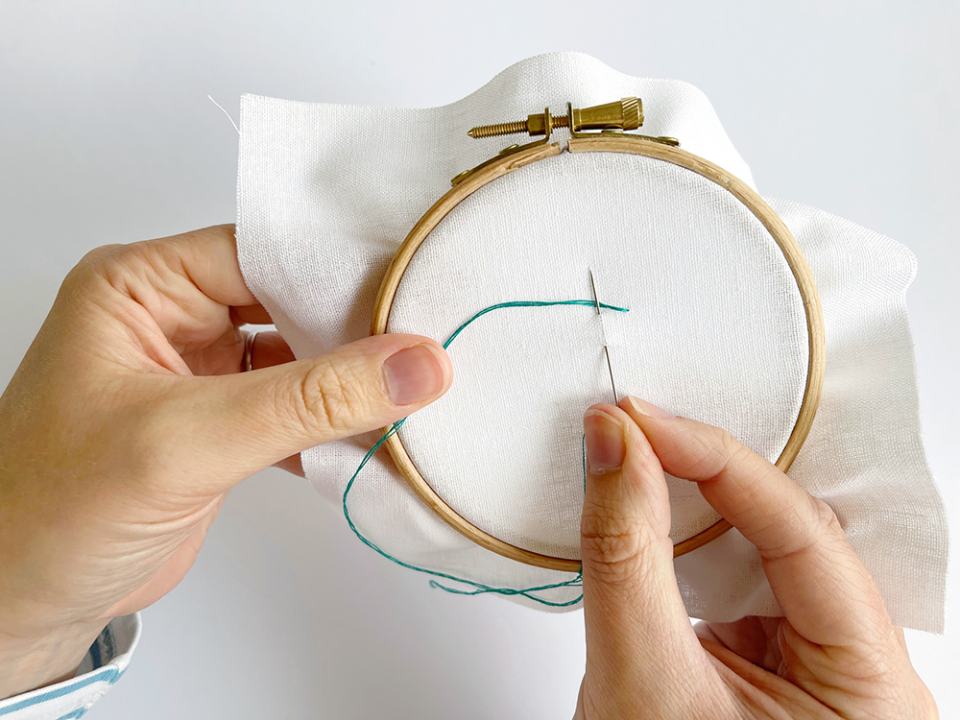
Chain stitch

STEP 1: Come up through the fabric, and push the needle back through as close to where you came up as possible. Leave a loop of thread on top of the fabric.

STEP 2: Bring the needle back up through the fabric at the bottom of the loop. Gently pull the thread so that the loop gets smaller and catches on the working thread. Then push the needle back through next to the working thread as you did in step one, leaving the next loop.
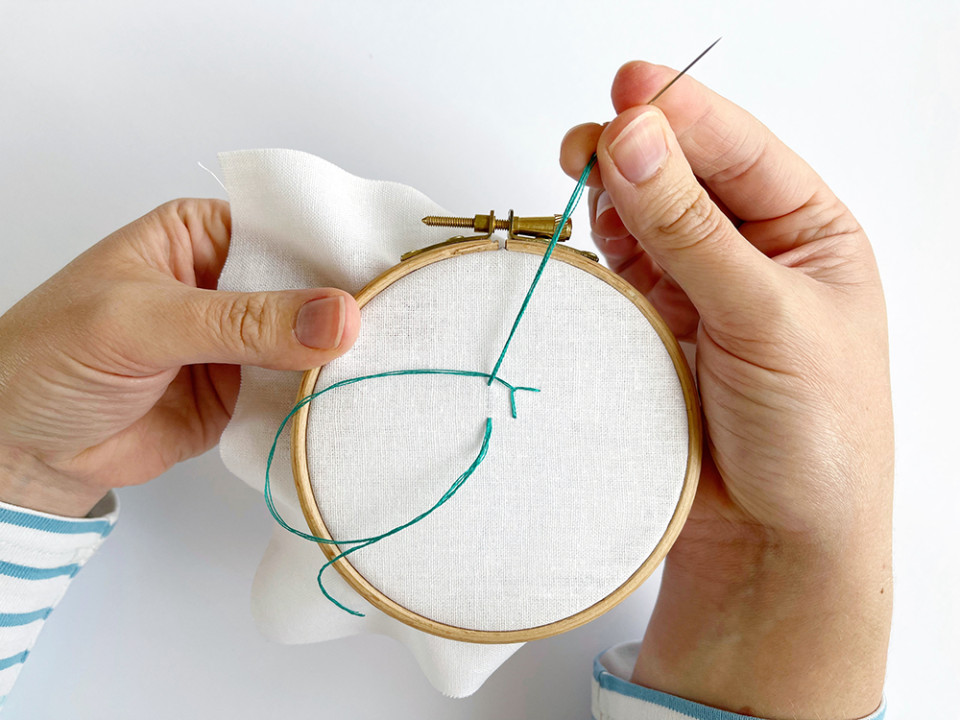
STEP 3: Bring the needle back up through this second loop, pulling gently until it catches. Repeat this process creating each link of the chain until you reach the end of the line to be stitched.
STEP 4: On the final loop, secure in place with a small anchor stitch – this is small stitch over the edge of final loop so that it doesn’t move out of place. Tie off gently at the back, being careful not to pull the stitches tightly.
French knot
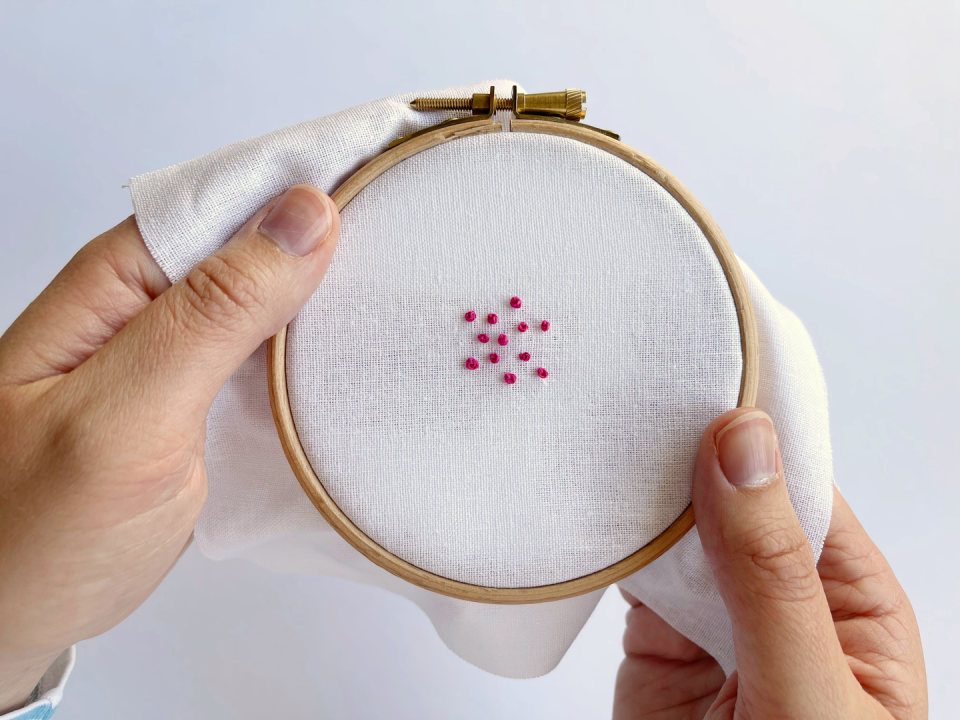
STEP 1: Come up through the fabric, and take your working thread in one hand with the needle in front in the other.
STEP 2: Wrap the working thread over the needle towards you and back up to the top, so that you have wrapped the thread around the needle three times in total. When you finish, the needle should still be in front with the working thread coming up behind.
STEP 3: Put the needle back through the fabric, close to where it came out but not in the same hole. Gently pull the working thread so it comes together around the needle. Move it to the bottom of the needle if it doesn’t naturally move there.

STEP 4: Carefully pull the needle and all remaining thread right through the fabric until the knot forms on the surface. Repeat for more knots, or tie off at the back.

Put your French knot skills to use on this stunning embroidered napkin project
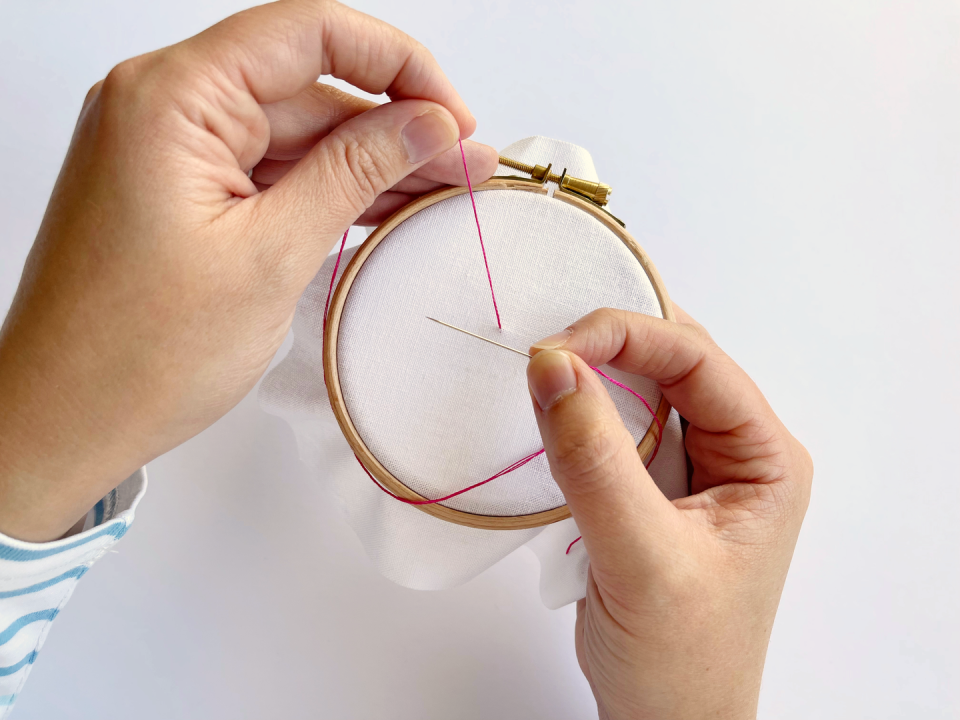
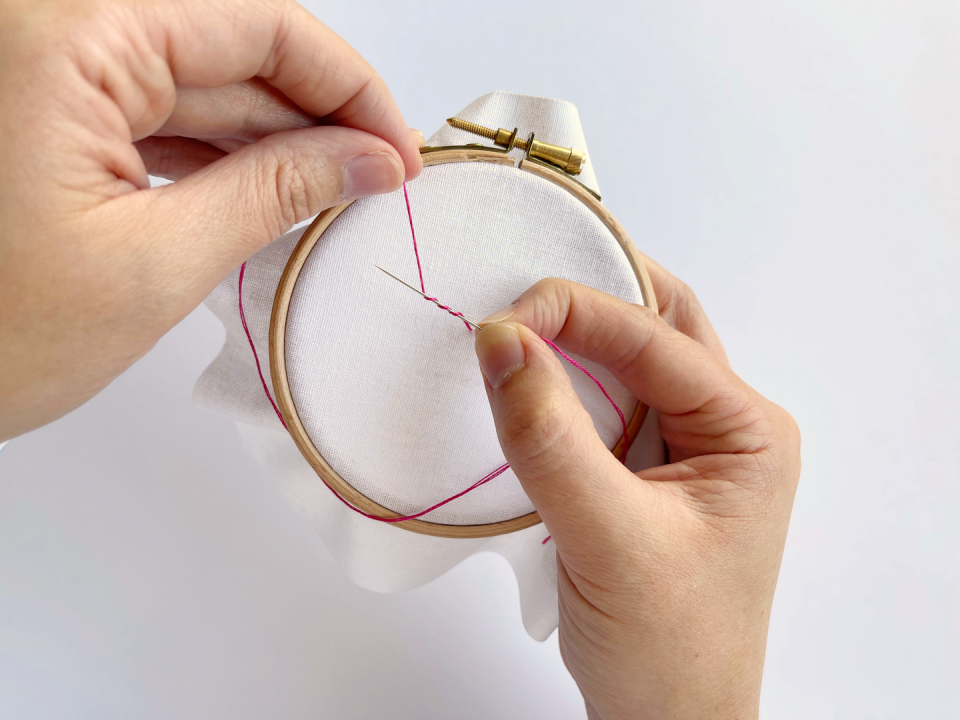
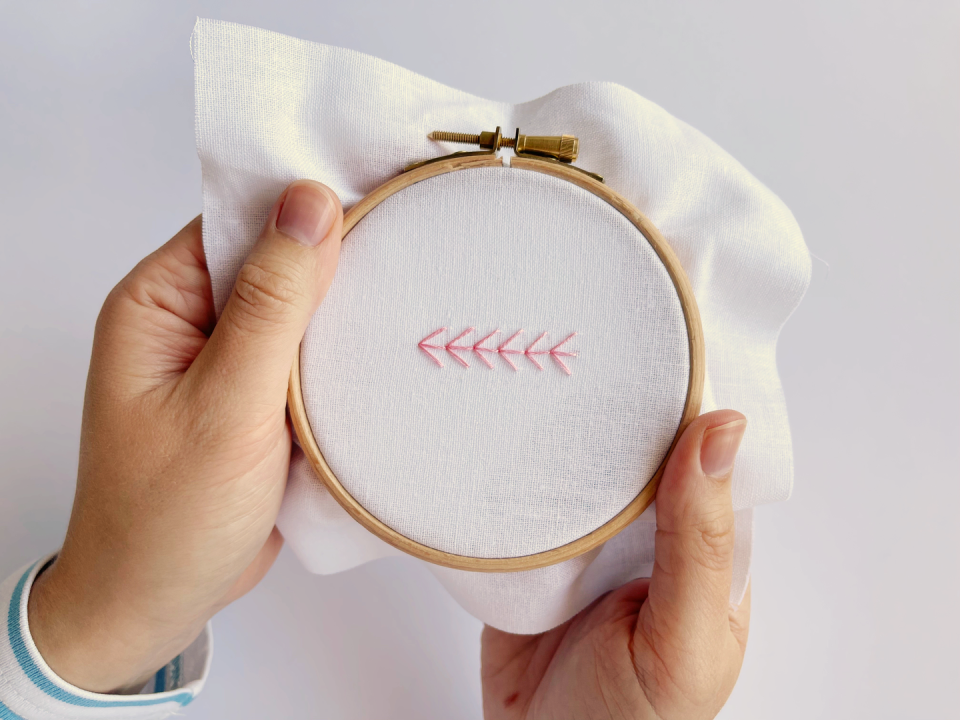
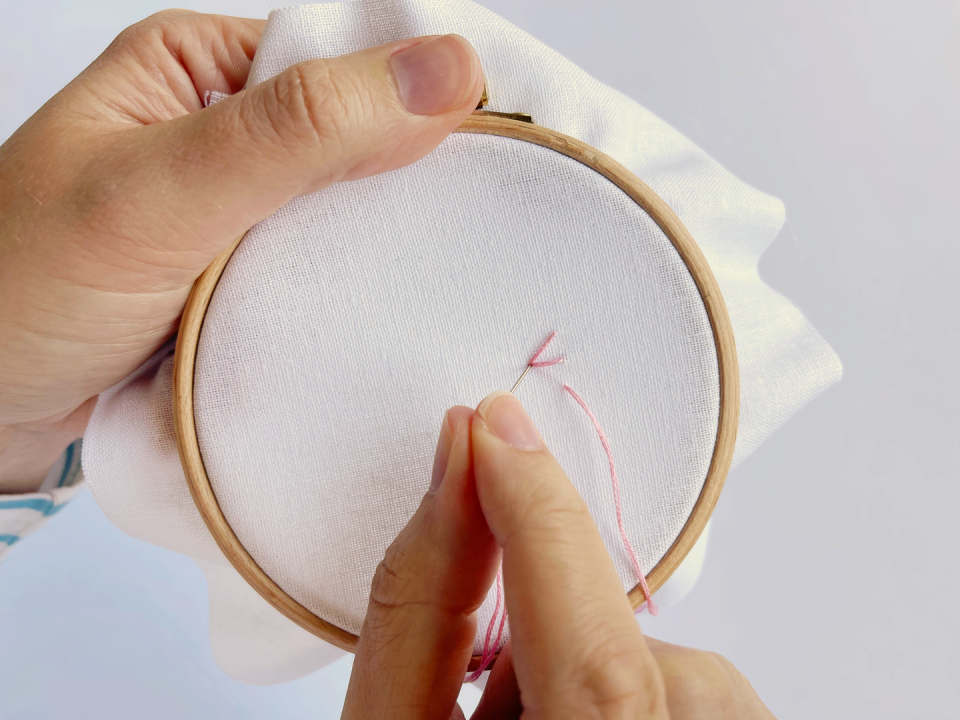
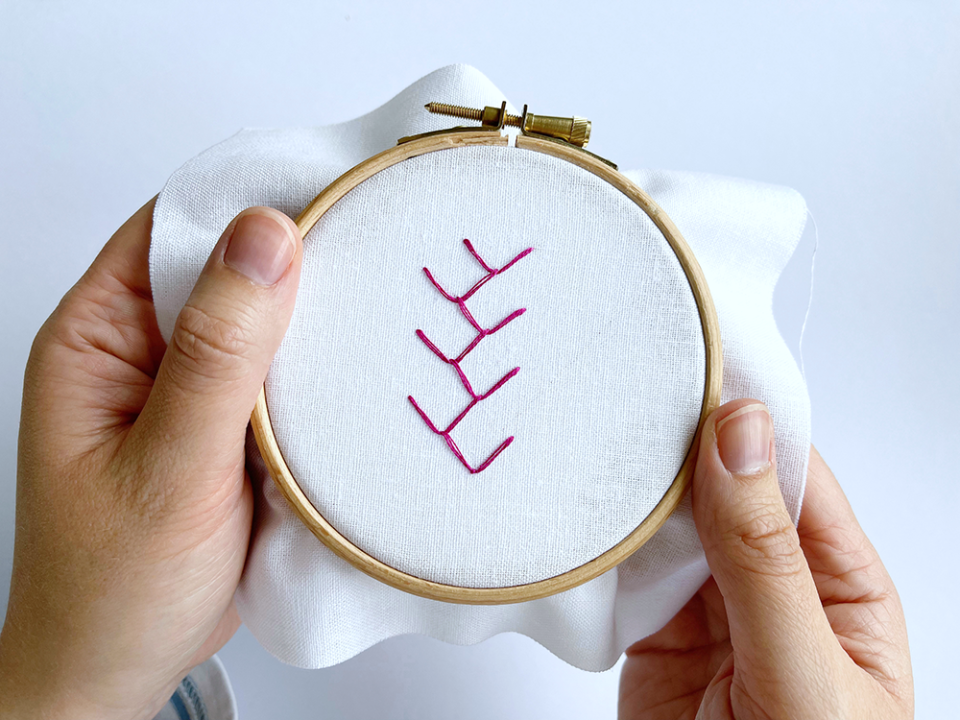
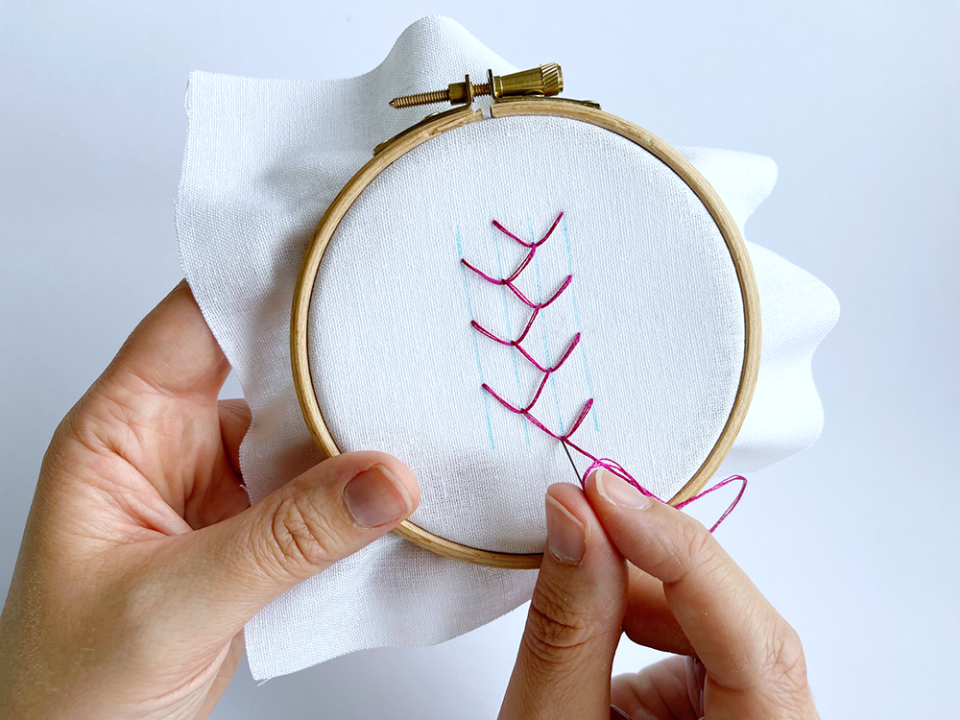
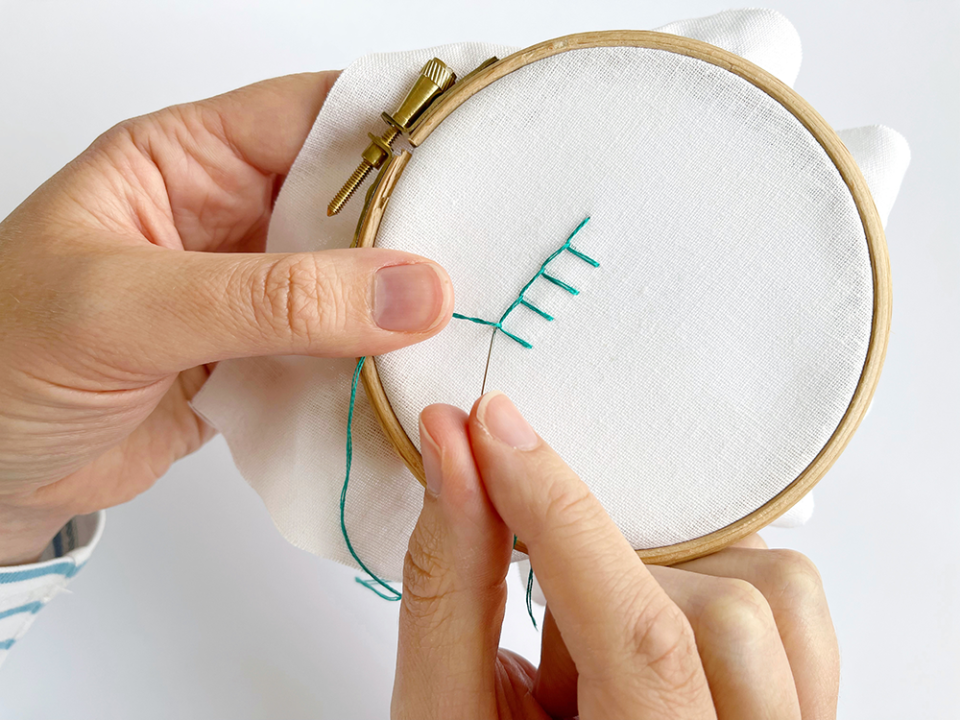
Fern stitch
STEP 1: Come up through the fabric, and stitch a single horizontal straight stitch.
STEP 2: Bring the needle back up through the fabric a little way above, and join it to where the first stitch ended to create a diagonal line. Repeat this diagonal line underneath, so that the three stitches meet at a point.
STEP 3: Stitch another horizontal stitch, joining it to the first as you would in backstitch.

STEP 4: Continue to stitch two diagonal lines joining up with each horizontal stitch as shown, until you reach the end of the line to be stitched. Tie off at the back when complete.

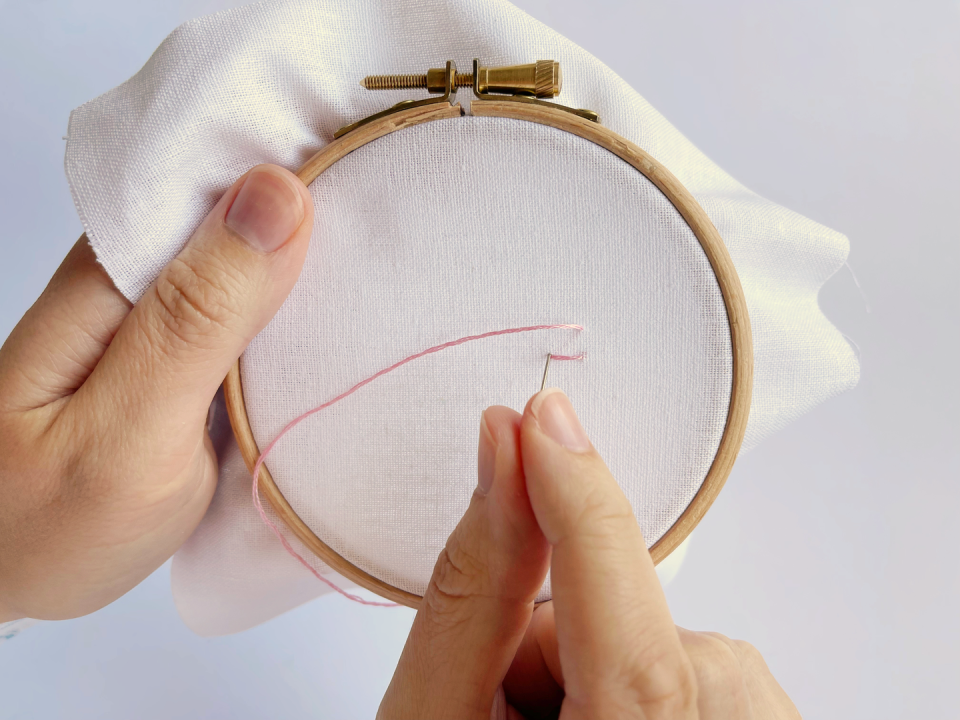
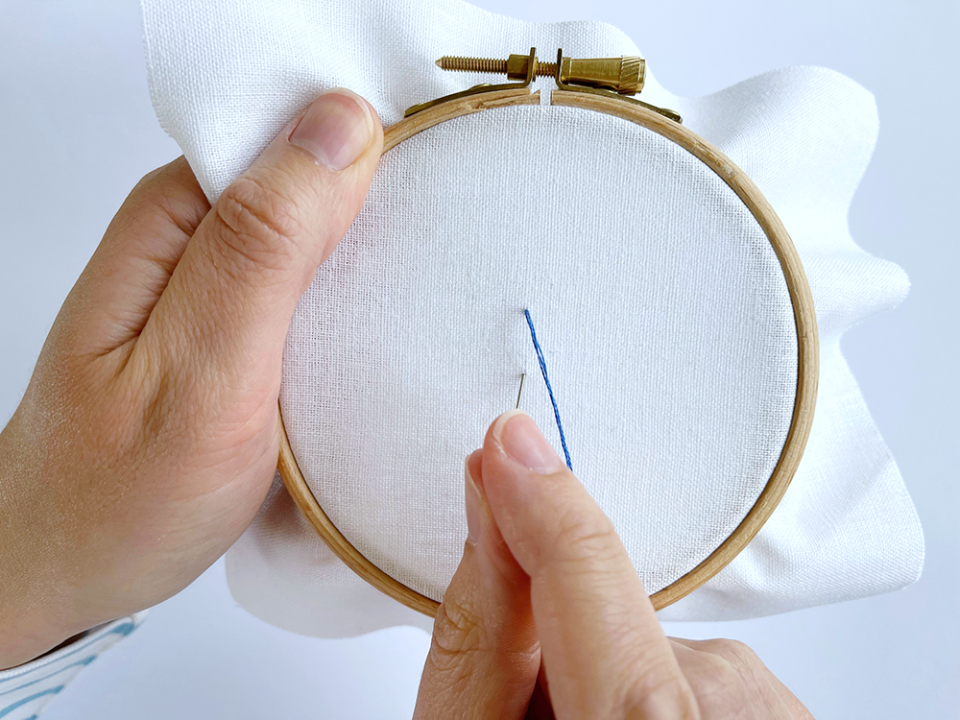
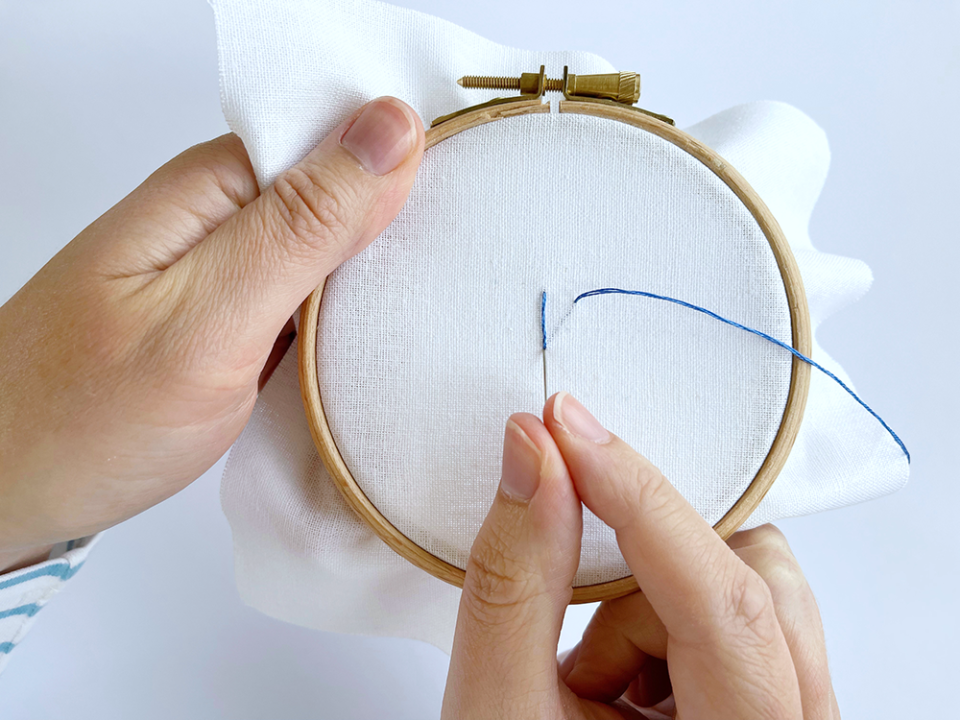
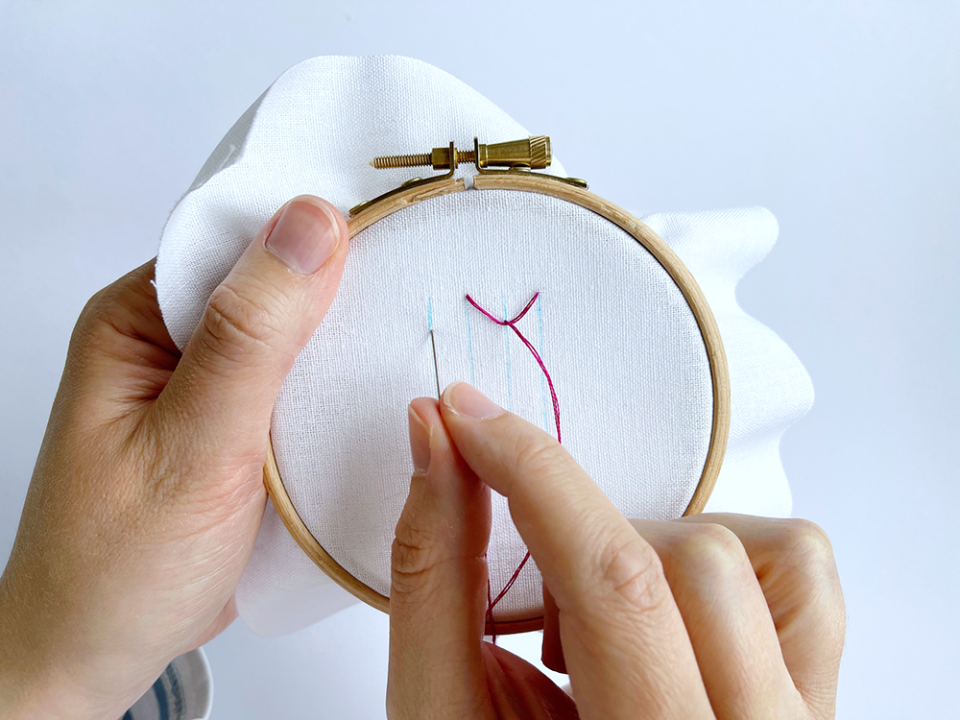
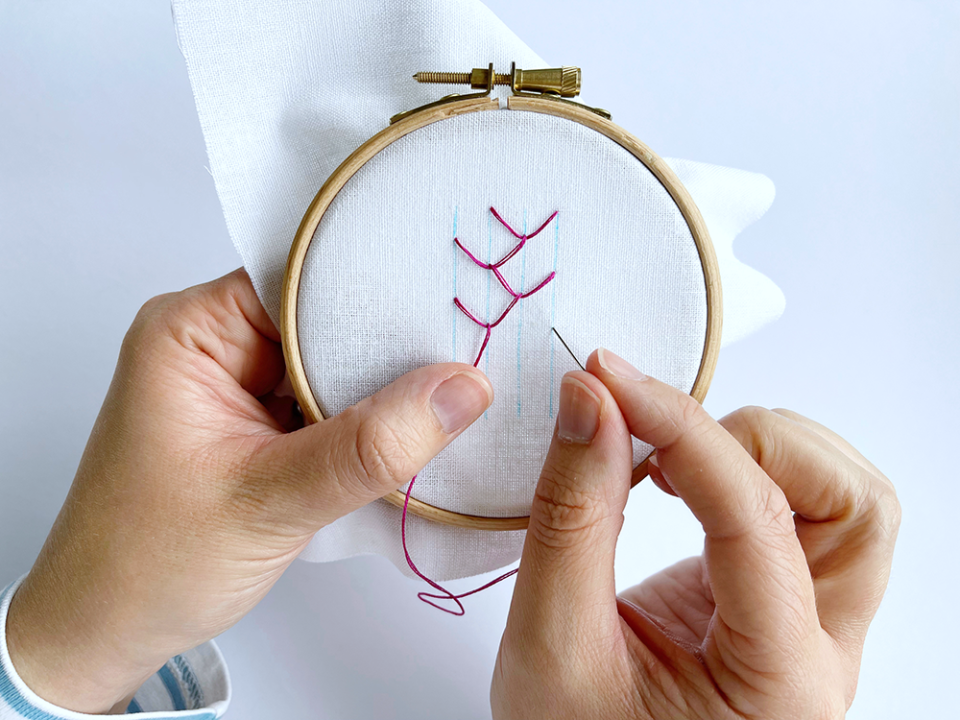
Double fern stitch
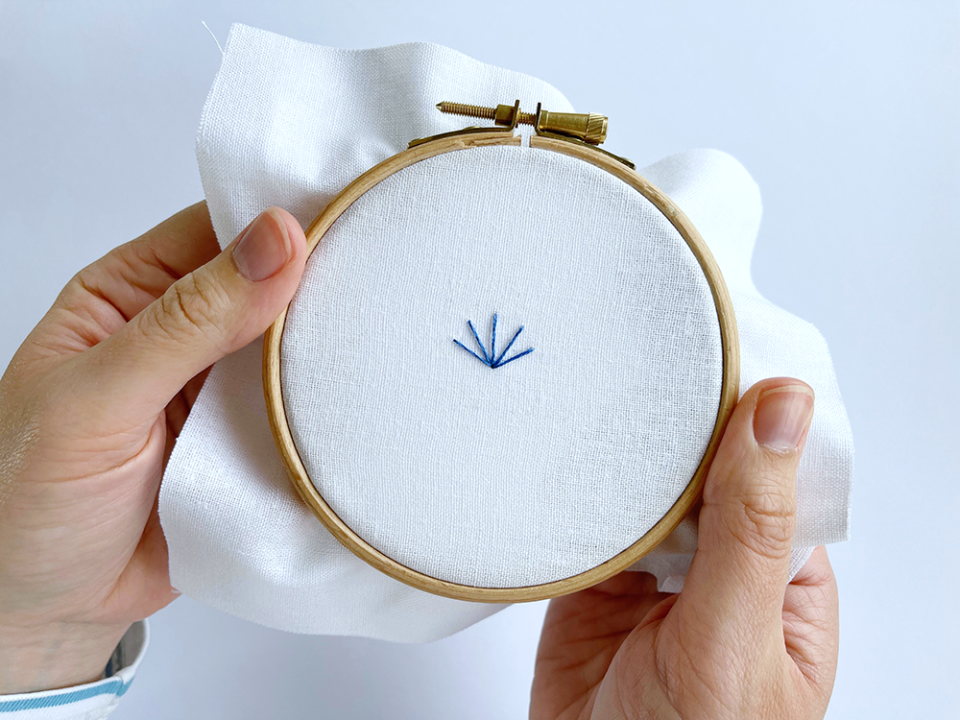
STEP 1: Come up through the fabric and create a vertical straight stitch.
STEP 2: To the right of the top of the line, stitch another stitch that joins the bottom of the first line. This will create a diagonal line joining in a point at the bottom.
STEP 3: Repeat step 2 on the other side of the vertical line. Add two more diagonal lines, one on each outer edge, to create the fan effect. Tie off at the back once complete.
Satin stitch

STEP 1: Start by drawing a shape you'd like to fill in with your embroidery stitches. You can do this with an air-dry pen. Then come up through the fabric, and stitch a single horizontal straight stitch.
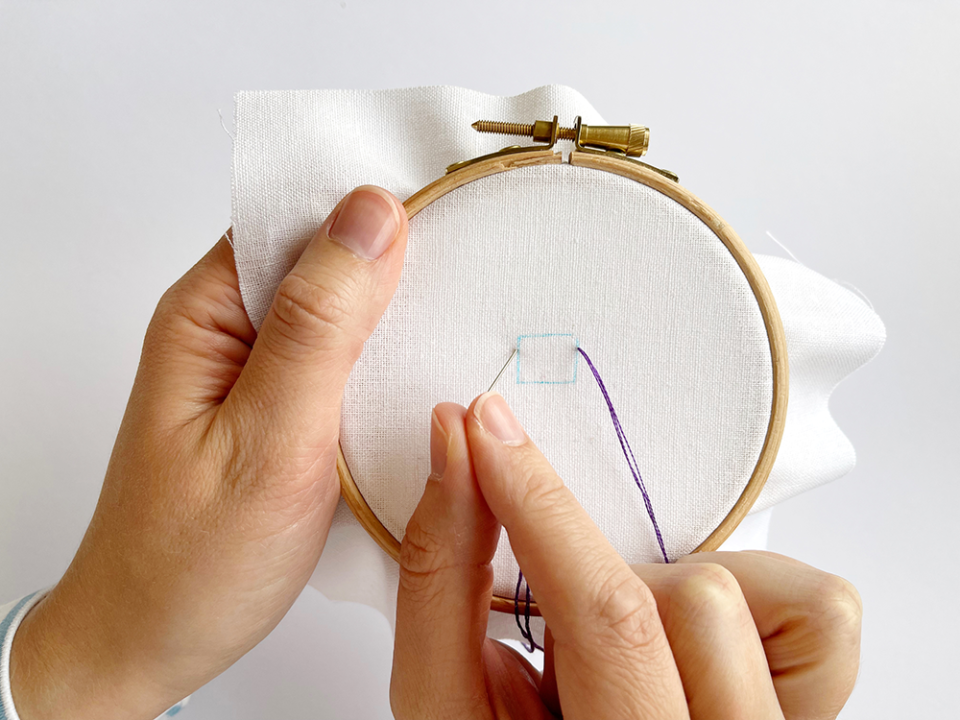
STEP 2: Repeat, leaving a small gap between the stitches.

STEP 3: Continue to stitch in this way, leaving gaps and then filling in each stitch in the top half of the area to be stitched.
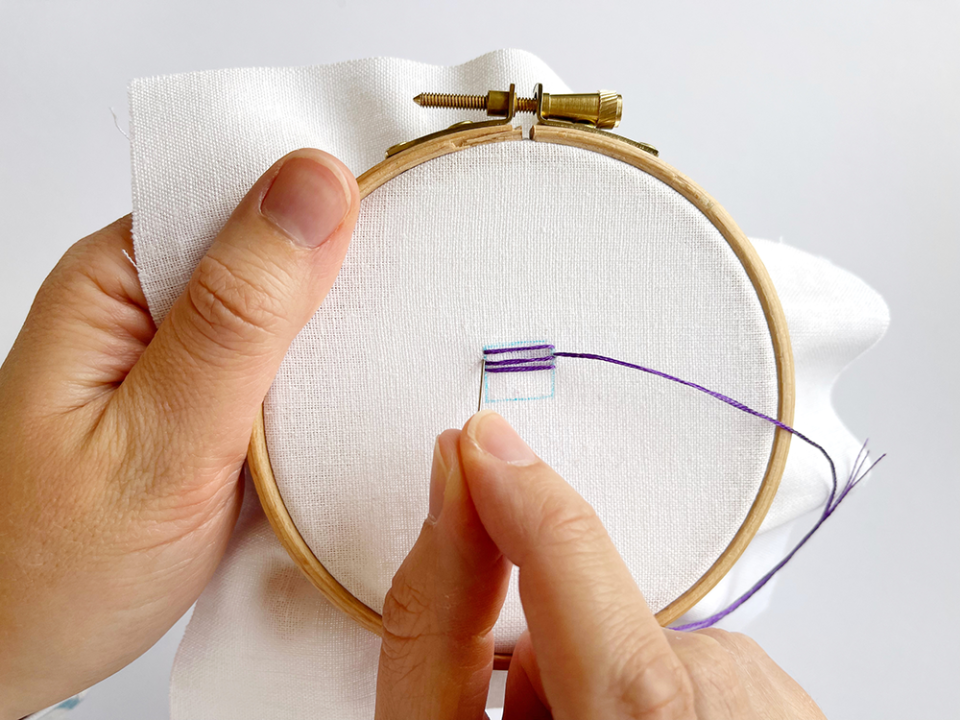
STEP 4: When complete, repeat this until the whole area is covered. If edges are a bit uneven, add one or two stitches to neaten it up.

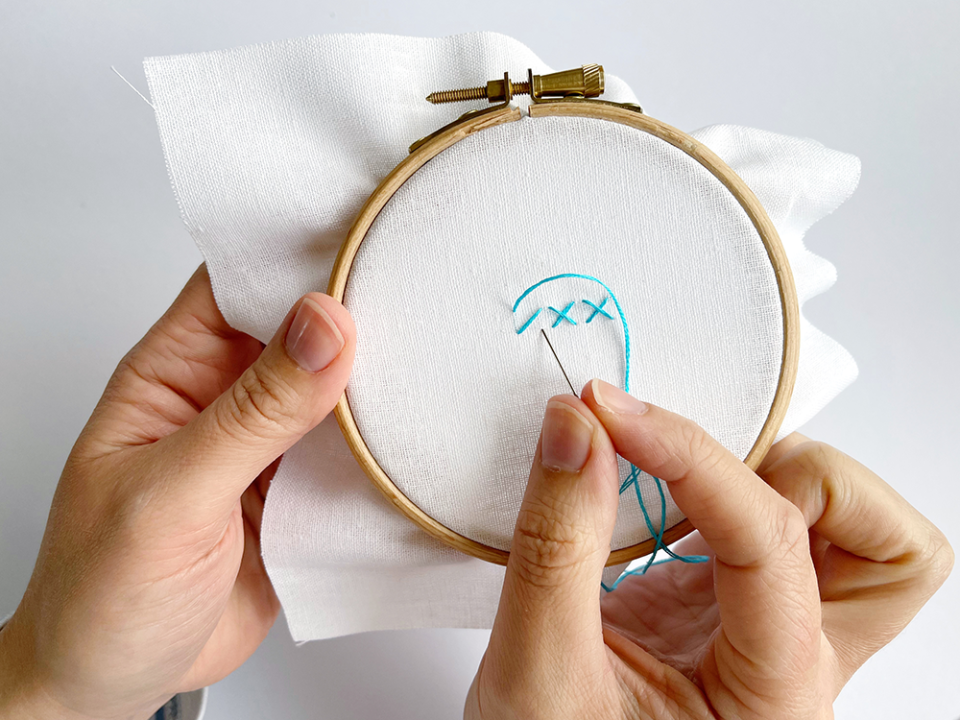
Cross stitch

STEP 1: Come up through the fabric and create the first stitch from the top right corner to the bottom left.
STEP 2: Repeat, this time from top left to bottom right to create the full cross stitch.
STEP 3: Add additional crosses along the area to be stitched. There are gaps between crosses here, but you can always join them together if you prefer.
Feather stitch
STEP 1: Using an air or water erasable pen, draw four equally spaced lines on your fabric which cover the length of the area to be stitched. Bring the needle up at the end of the line on the far right, then missing out a line to the left, push it back through the fabric leaving a loop of thread.

STEP 2: Bring the needle up through the loop on the line you just skipped, and gently pull so the loop tightens loosely around it. Skip one line to the left again, and push the needle back through the fabric on the far left line. Make sure to create another loop.
STEP 3: Come back up through the fabric one line to the right and repeat this pattern, moving across and down the fabric as you go.
STEP 4: When you get to the bottom of the lines, add a small anchor stitch to the final loop to secure, and then tie off at the back. Your anchor stitch is just a small stitch you do to hold your stitches in place.
Fly stitch

STEP 1: Come up through the fabric at the top left of the v-shape. Bring the needle through the fabric at the top right down to the point of the v.

STEP 2: Move the working thread under the needle as shown.

STEP 3: Pull the needle through gently to create the stitch.
STEP 4: Use a small anchor stitch to secure it in place. Repeat stitches as desired.

Couching stitch

STEP 1: In couching, you attach one thread to your fabric using a different thread by stitching over it. Use six strands of thread to create the main couching thread. Bring the needle up through the fabric, and back down at the end of the line (or leave free if stitching a curved line so that it will be easier to move). Do not tie at the back.

STEP 2: Thread a needle with three strands of thread, in the same or a contrasting colour. Come up through the fabric very close to the end of the couching thread with the knot at the back.
STEP 3: Stitch over the top of the couching thread, pushing the needle back through very close to the other side of the thread. Repeat a little further along.
STEP 4: Repeat at regular intervals along the line, moving the couching thread over curved lines if required. Once finished, tie off both threads carefully at the back.
Blanket stitch

STEP 1: Come up through the fabric, and move the working thread to one side in the direction of stitching.
STEP 2: Bring the needle through the fabric from bottom left to top left from where the thread came through the fabric. Make sure that the working thread stays behind the needle here, then pull through to make the stitch.

STEP 3: Move the working thread in the direction of stitching again, and repeat step two until the line to be stitched is covered.
STEP 4: On the final stitch, add a small anchor stitch to secure in place. Alternatively, you could always end on a horizontal line at the top to balance the other end, or join to previous stitches if stitching around a piece of fabric.
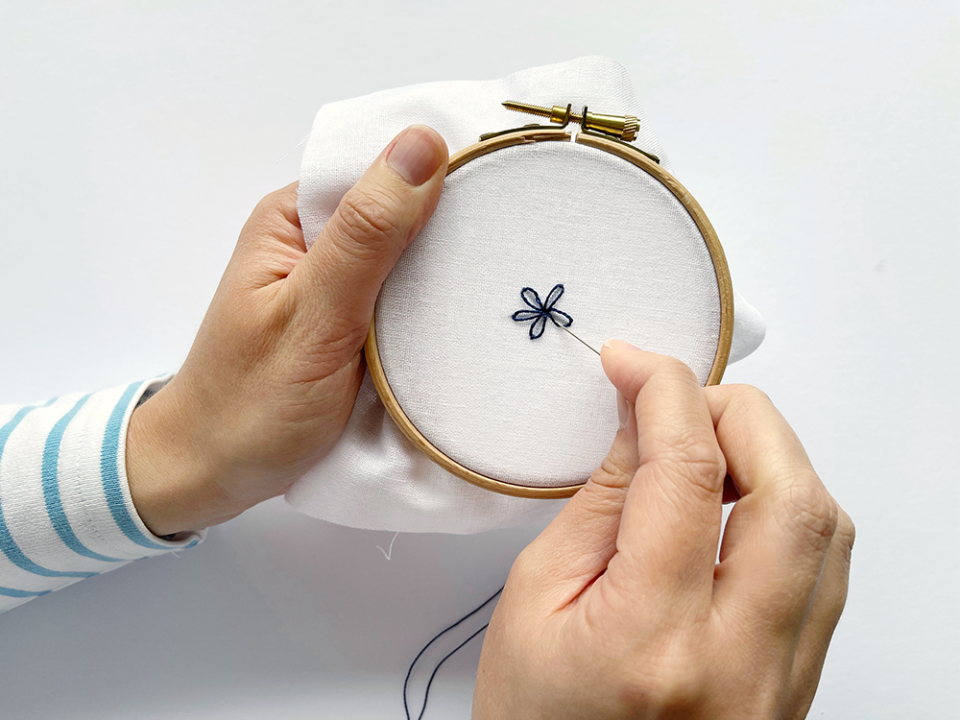
Lazy daisy
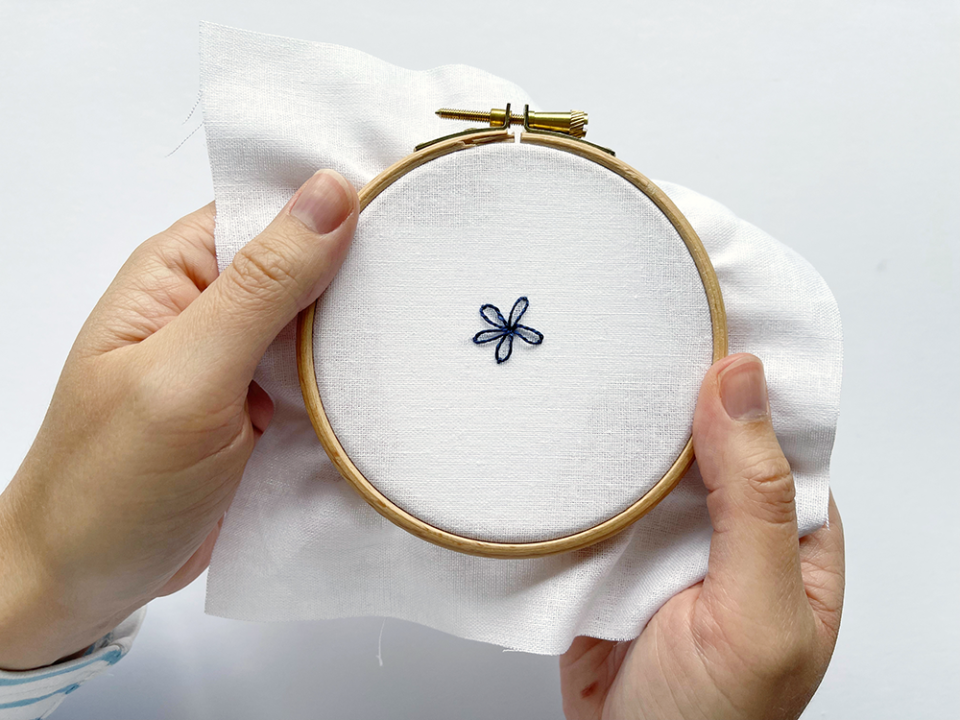
STEP 1: Come up through the fabric, and push the needle back through as close to where you came up as possible. Leave a loop of thread on top of the fabric.

STEP 2: Bring the needle back up through the fabric at the bottom of the loop, and pull gently before securing in place with a small anchor stitch.

STEP 3: Bring the needle back up through the fabric in what will be the centre of the flower. Repeat previous steps, making loops and securing in place until there are five petals altogether.

STEP 4: Tie off gently at the back. If any of the petals have moved slightly, use a needle to carefully move them back into position.
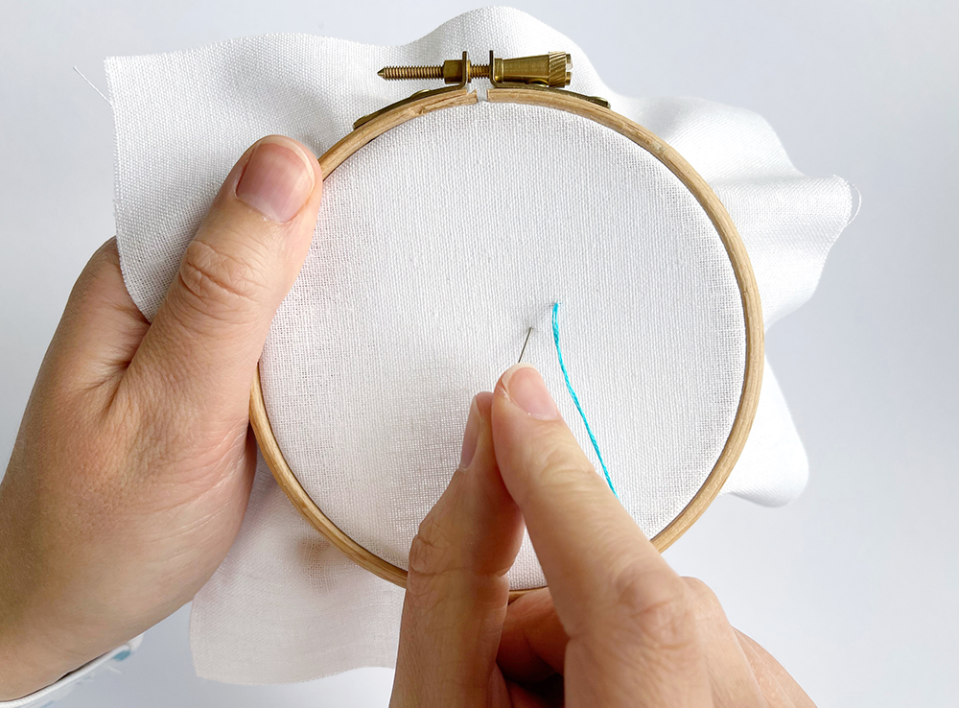
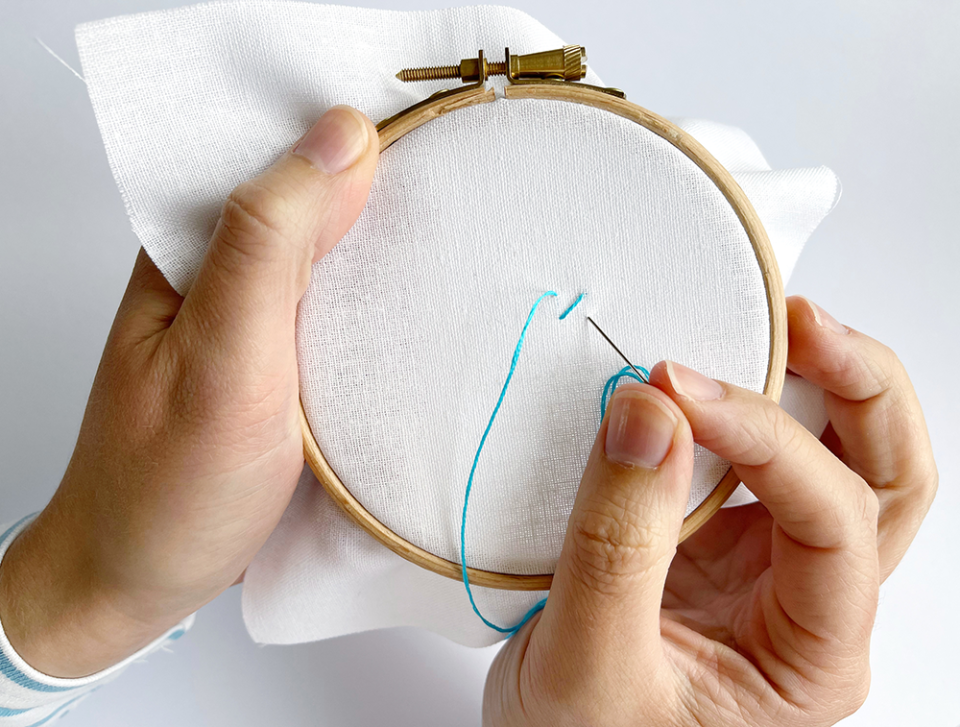
Seed stitch

STEP 1: Stitch a single straight stitch on the fabric.
STEP 2: Repeat, stitching another stitch fairly close by but on a different angle. Keep each seed stitch the same length, and continue until the whole area is covered.
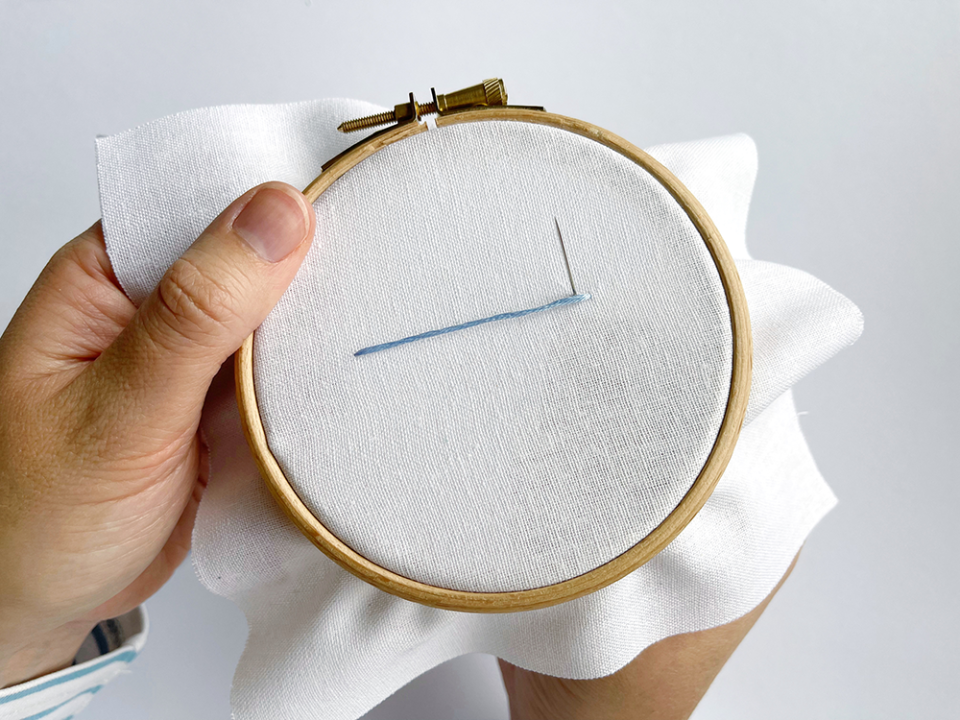
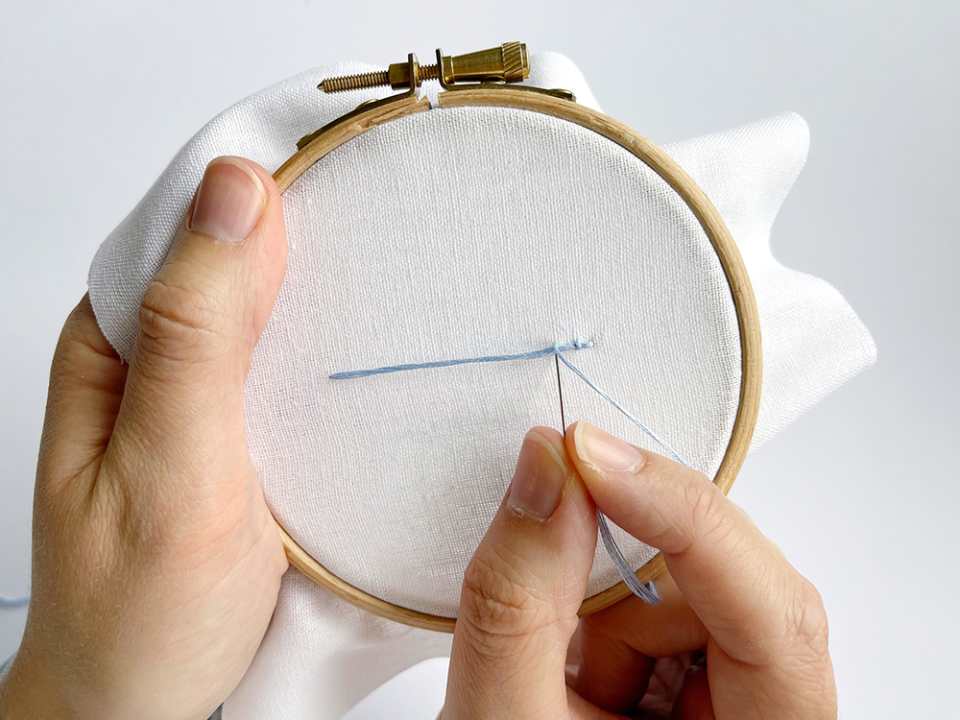
Stem stitch

STEP 1: Come up through the fabric and create the first stitch working back towards the working thread.
STEP 2: Repeat with the next stitch, ensuring the working thread is coming up behind the needle as you stitch. The needle should come back up through the fabric where the previous stitch ended.
STEP 3: Continue to stitch in this way along the line to be stitched.

STEP 4: On the final stitch, push the needle through the fabric to the back and then tie off.

Now that you've learnt how to do 16 embroidery stitches it's time to embark on an embroidery journey and put your new skills to the test. An embroidery kit is a great way to get started – it comes with everything you need and clear instructions to make a beautiful project.
Do you love crafting? Share your creations with us by tagging @primamag in your pictures on Instagram!
You Might Also Like

