
This easy sewing technique will transform clothes and homeware
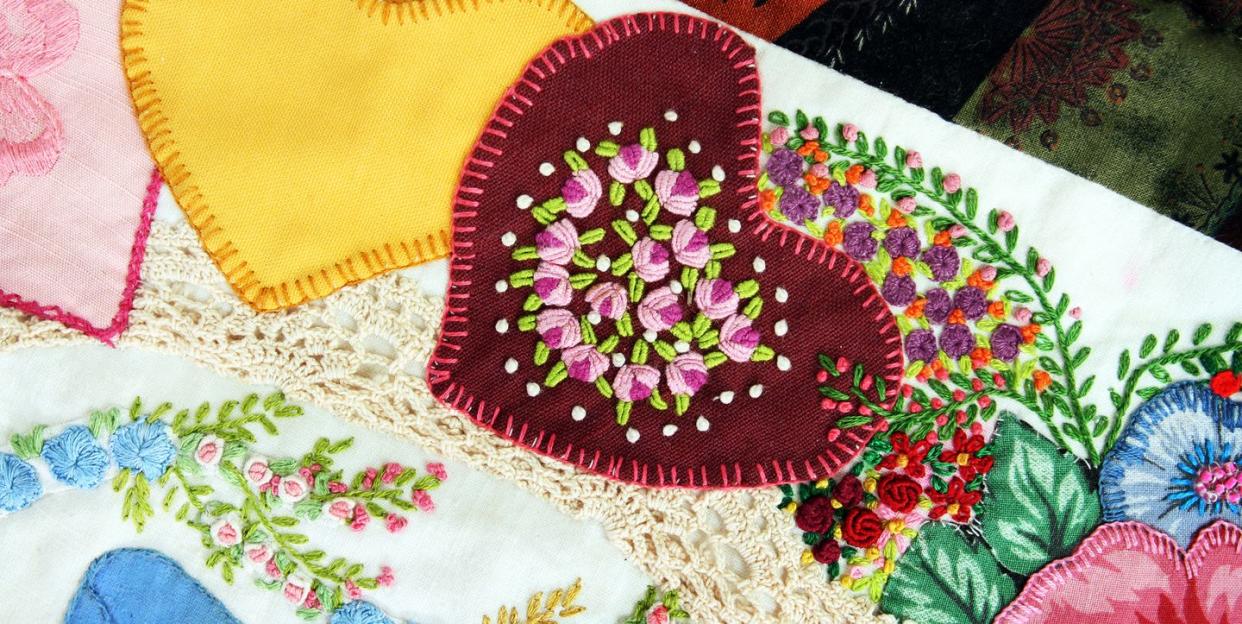
Appliqué is a lovely – and useful – craft to master. Not only is it relaxing to do, appliqué is a fantastic way to add personalisation and flair to so many items.
In essence, appliqué means sewing a piece of fabric (usually a shape) onto another piece of cloth. An accessible and straightforward sewing technique, it’s a great for adding patterns and shapes to everything from patchwork to clothing and cushions.
Whether you use this needlework project to add a decorative element to your sewing, to upcycle soft furnishings or to cover a stain on a t-shirt, once you start appliquéing things, it’s hard to stop. You can use a sewing machine or hand-stitch your appliqué, depending on which appliqué technique you use.
Different types of appliqué
There are many different types of appliqué, including quick turn appliqué (sometimes called inside out appliqué), freezer paper appliqué and reverse appliqué.
Another key type of appliqué is raw-edge appliqué, named so because the cut edges of the fabric are left raw, but secured in place with stitching.
Decorative stitches such as blanket stitch, satin stitch or a tight zigzag stitch are used for this. You also can use fusible webbing to help adhere and position the appliqué shape for raw edge appliqué. Felt is a good fabric to appliqué using the raw-edged technique as it doesn’t fray!
In this guide, we’re going to focus on needle turn appliqué where the raw edges of the fabric shape are turned under before the fabric is stitched onto the backing fabric. This is a hand stitching technique, so you don't need a sewing machine.
How to hand appliqué
We are going to focus on the traditional needle turn method of hand appliqué as it is really accessible, fun to do, gives a tidy finish and also results in a lovely smooth edge to the appliqué shape.
What you need to appliqué
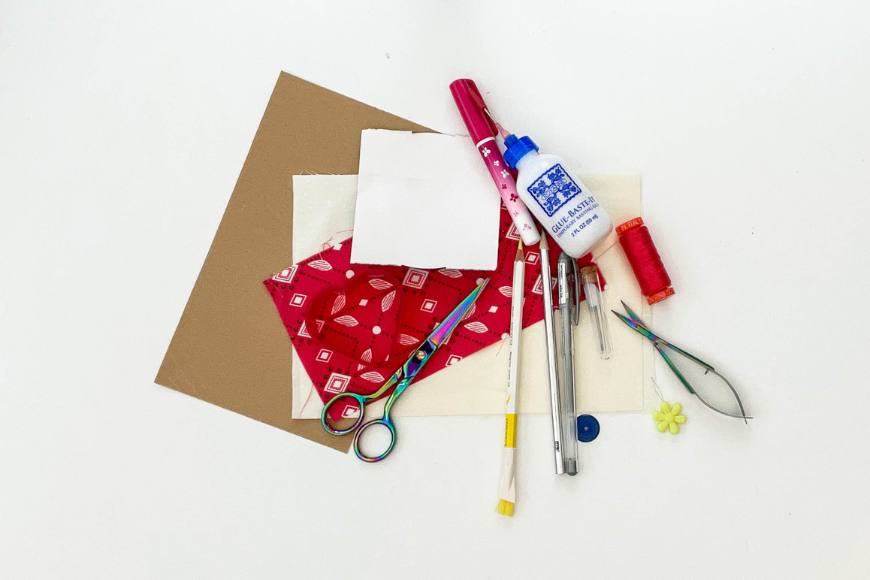
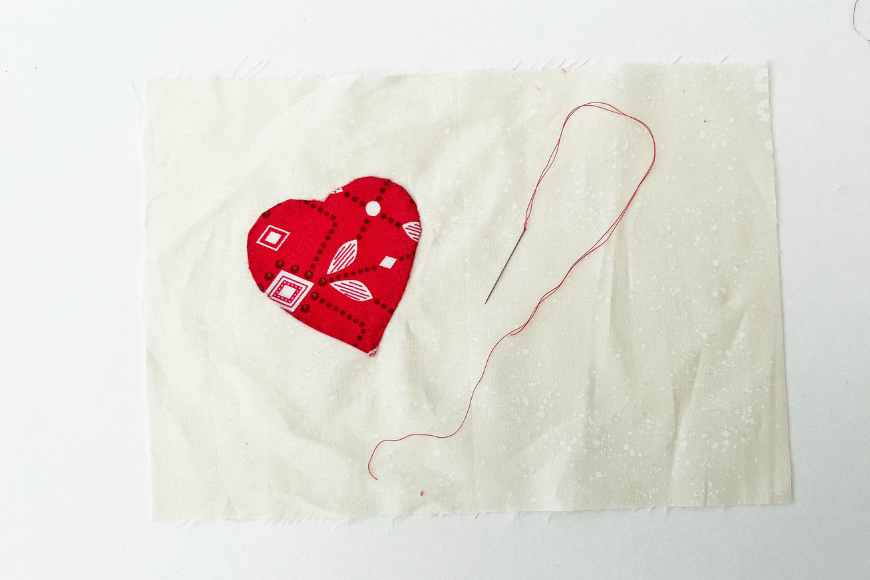
Cotton fabric scraps in coordinating colours for your appliqué shapes. 100% cotton is recommended.
A garment or base fabric to appliqué onto.
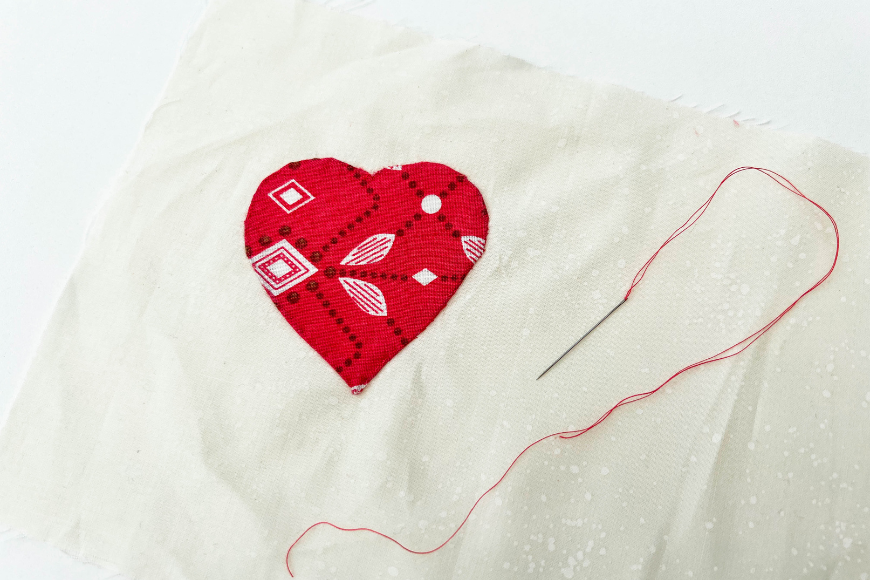
A template, pattern, or line drawing to use as your design pattern. This tutorial uses a heart template made from drawing round a cookie cutter.
Pen and pencil
Fabric marker (optional)
Scissors (for paper and fabric)
Appliqué, straw or milliner’s needle – these are fine, long needles with some flexibility.
Thread – Choose a strong fine thread (50- or 80-weight cotton is ideal) in the same colour as the majority of your appliqué fabric.
TIP: If you are adding appliqué to a washed fabric make sure the fabric you are using to appliqué with has also been washed to prevent uneven shrinkage.
How to do needle turn appliqué step-by-step with pictures
Step 1
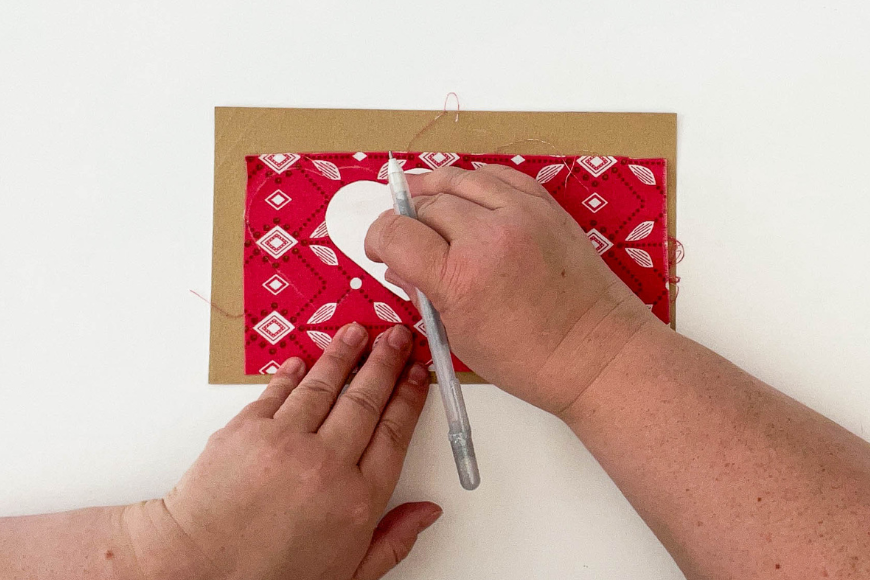
Start by finding a small piece of fabric that will stand out on your project and then trace your template onto the right side of the fabric in either a light pencil or removable fabric marker. This marks the fold line for the seam allowance and will not be visible on your finished appliqué.
Step 2
It can help to place the fabric on a sandpaper board to stop the fabric from distorting as you draw around the shape.
Step 3
Cut out your fabric piece adding a scant ¼ inch seam allowance around the edge of your appliqué template. You can also use a seam allowance wheel to draw your shape before cutting if you find that easier.
Step 4
Place your shape on the base fabric. For this, put the wrong side of the appliqué shape to the right side of the fabric, so the right side of both fabrics are facing the same way.
If you need it in a precise placement, then you can lightly trace on to the right side of the fabric and use a window or lightbox to ensure precise placement. You can also fold the background fabric to help with positioning.
Step 5
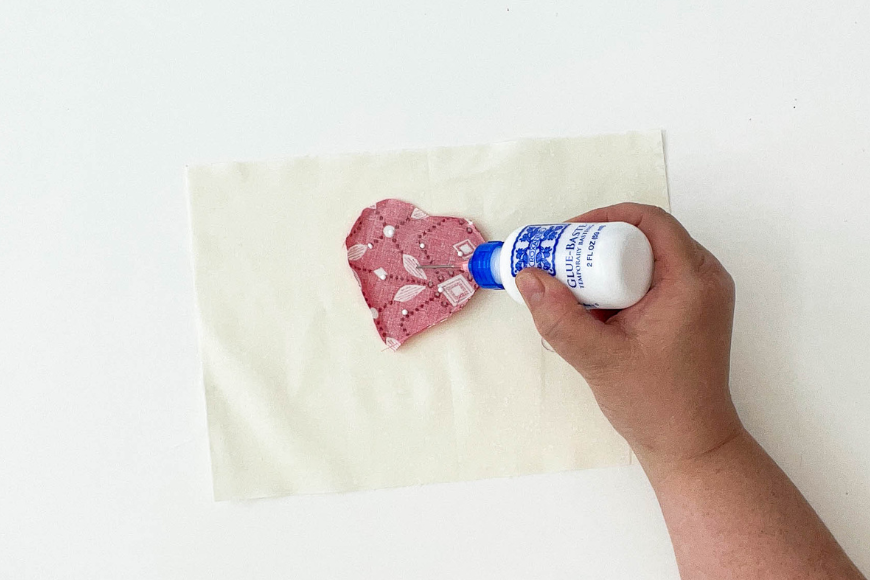
Secure the shape using either pins (small appliqué pins make it less likely to catch your sewing thread) to tack it in place or use tiny dots of washable basting glue, making sure that you leave at least 1/4” inch in from the seam fold line.
Step 6
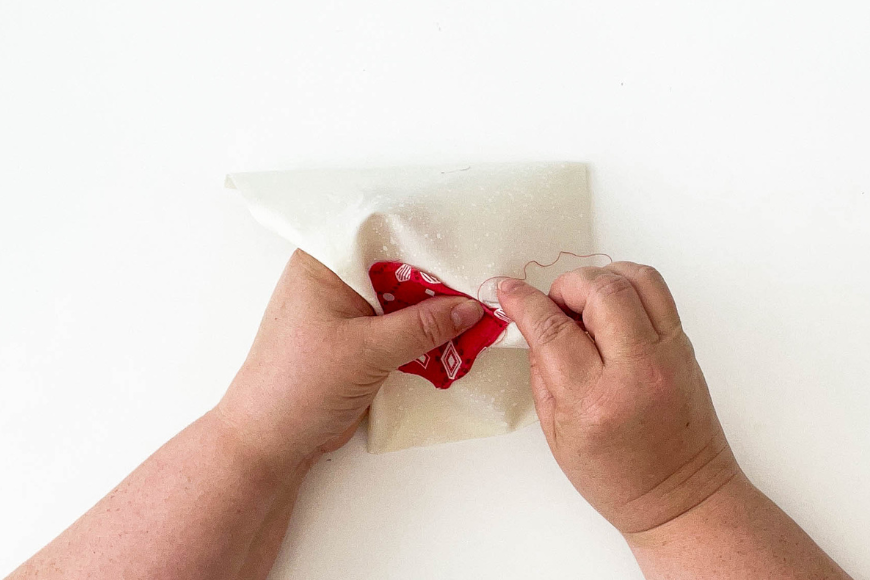
Pinch the seam allowance along the line drawn all around the shape to create a fold. This technique, called finger pressing, gives the fabric a small crease and memory ready to turn in and sew.
Let's get sewing!
Step 7
Cut a length of thread matched to your appliqué patch – elbow to fingertip is a good length to work with – and knot the end.
Step 8
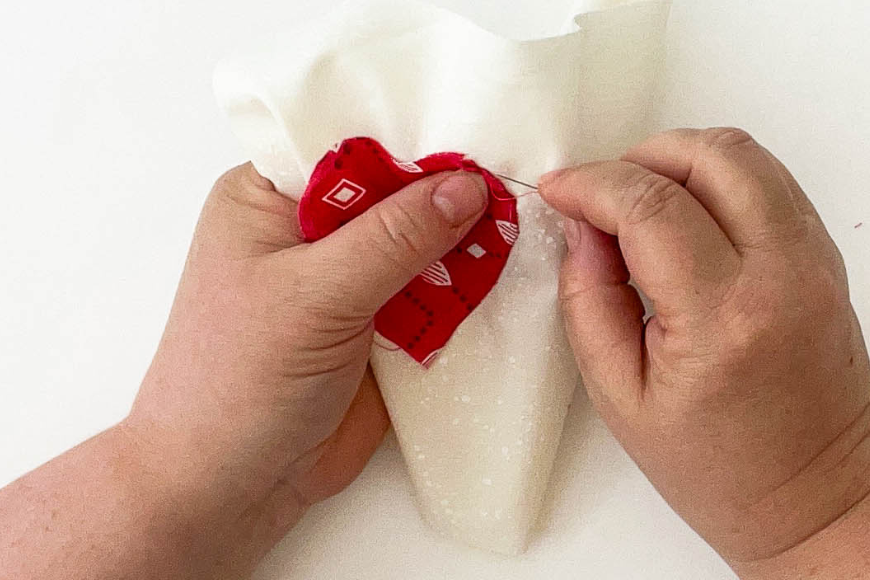
Start on a straight edge of your shape if you have one. If not, choose an outward or convex curve. Slide the needle through the back of the appliqué fabric and direct it to the wrong side of the seam line so the knot is hidden.
Step 9
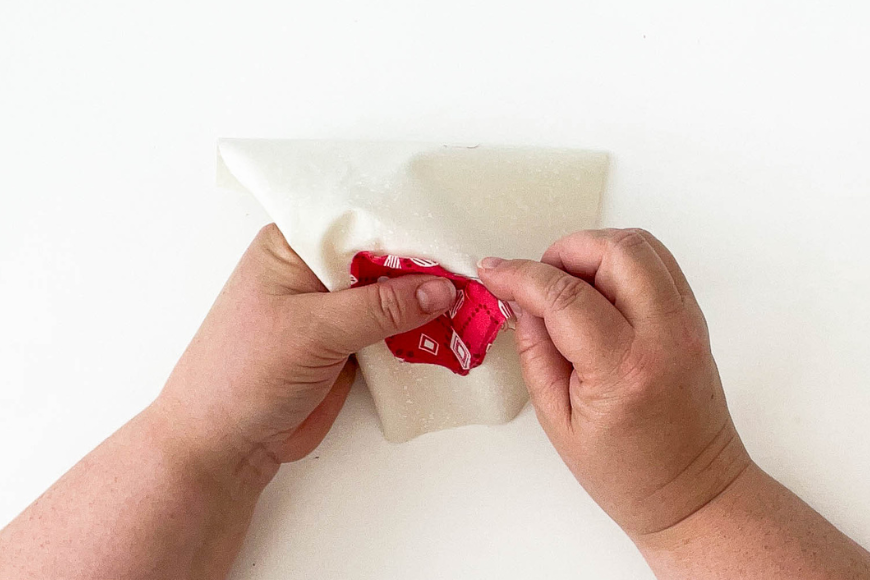
Use the side and tip of the needle to gently roll the seam allowance under for a short distance (approx. 1/2 inch or so) and hold the turned edge with the thumb of your non-stitching hand.
Step 10
Come up approximately 1⁄8 inch away, again through the fold, and then back down into the background fabric. Continue around the shape in this way, sweeping the raw edge under with the side of the needle, holding with your thumb and securing with a small stitch which you won’t see from a distance.
Sewing curves
Concave curves – These curves bend inward, like a bite out of a cookie. It is easier to turn the fabric under and stitch if you make small cuts from the outer edge of the fabric towards the turn line.
Convex curves – These bend outwards like a hill and you don’t need to make cuts in these curves to sew down.
TIP: Embellish your project with hand stitching, embroidery, buttons or beads to make it truly unique.
Sewing points
Inside points – like at the top of our heart shape. Snip straight into inside points, almost to the seam allowance. Stop sewing a few stitches before you reach each interior point and turn under the seam allowance on both sides. Continue sewing, adding extra stitches where the seam allowance was clipped.
Outside points – Like the bottom point of our heart shape. To prevent bulkiness of the fabric seam allowance you need to carefully snip off some of the seam allowance that you are going to turn under, then fold under the excess on the top of the point at an almost 90-degree angle (like a hospital corner on bedding) and continue sewing until you reach the tip.
Next, turn the corner and continue stitching along the appliqué shape as before, using your needle to turn under the seam allowance. Remember to keep your stitches as small as possible.
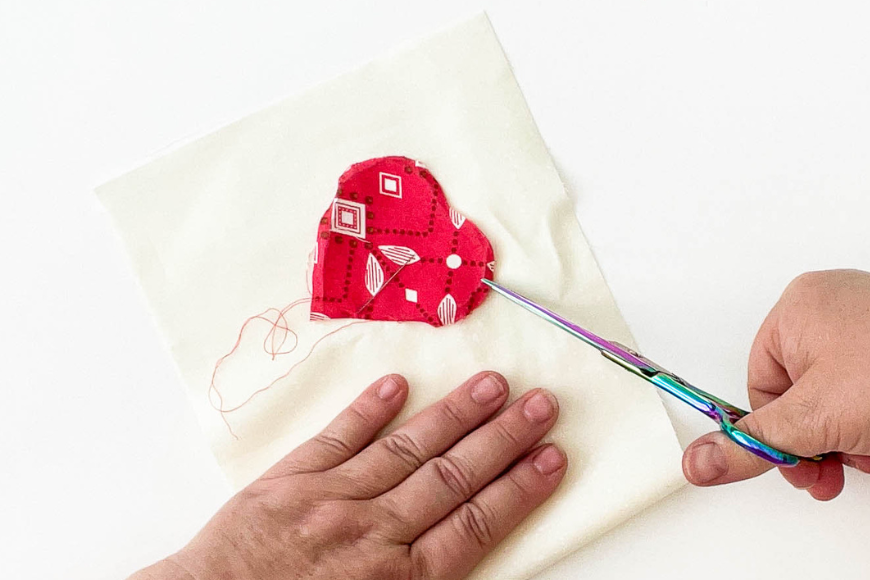
To finish sewing, take your needle to the wrong side of the background fabric covered by the shape and sew a couple of stitches through the background fabric only, passing the needle through the thread loop to make a small knot.
Caring for your appliqué
Appliquéd items are long-lasting, but care should be taken when ironing or pressing any embellished items. Make sure that you iron on the wrong side of the fabric if you have added embellishments or embroidery.
Turn inside out if possible before washing at 40oC. Do not tumble dry if you have used sequins or wool for your appliqué.
Looking for an appliqué project? Try these free Prima patterns! How about making appliqué towels, an appliqué cushion or appliqué egg cosies?
Have you used appliqué on your sewing projects? Share your creations with us by tagging @primamag in your pictures on Instagram!
You Might Also Like

