
How to découpage a glass bottle to make a pretty vase

Découpage is a simple and effective craft you can use to decorate or bring a new lease of life to an object.
You can decoupage pretty much anything from furniture and household items, to using it as a way to add some flair to handmade decorations for celebrations such as Easter or Christmas. It's also a great crafty skill to use when upcycling items.
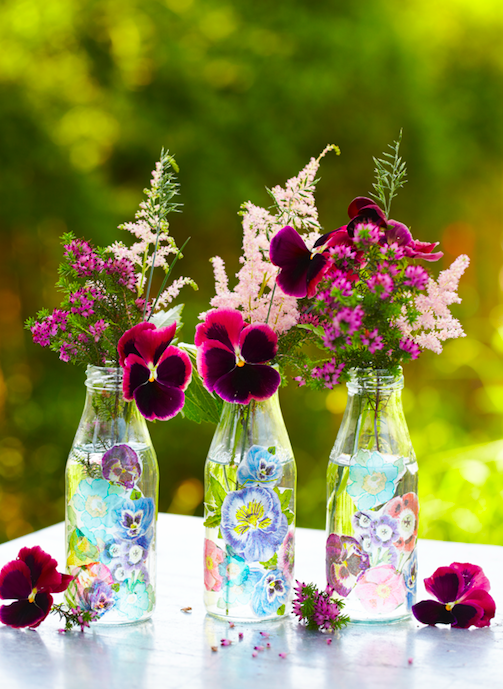
That's why our craft team created this oh-so-easy découpage glass vase project to brighten up table tops. All you need is a pair of sharp scissors (blunt scissors can rip the fragile paper), patterned tissue paper or printed napkins, PVA glue and a clean glass bottle or jar.
These découpage glass vases would look beautiful as an inexpensive wedding table centrepiece. Just match the real flowers to the colour of the paper ones for an extra-pretty effect.
What is découpage?
Découpage is a crafting technique that involves glueing different layers of cut-out patterned papers onto an object to change its appearance. It's a great way to upcycle old homewares such as glass vases, picture frames and boxes or pots.
Find step-by-step instructions to make your own découpage vase below.
You will need:
Patterned tissue paper or printed napkins
PVA glue and glue brush
Clean glass bottles or jars
How to make a découpage glass vase
It's important to make sure that your glass bottle or jar is clean, any dirt or greasy residue can mean that the glue won't adhere properly. Giving the glass a thorough wash in warm soapy water followed by a rinse. Leave to air dry.
Cut your chosen designs out of your printed tissue paper or napkins. Be careful not to tear the paper as you are cutting; it can be fragile. Try to cut as close to the outline of the image as possible to create a neatly finished project
Apply a thin coat of glue to the area of the bottle that you want to add to your design. Carefully place the paper onto the glue, smoothing out any air bubbles or wrinkles. Tissue paper and napkins can tear easily once damp, so take care when smoothing down. If you do get any wrinkles in your decoupage, try to push or press them out to the edge rather than dragging the design.
Build up the design by adding more cutouts. Leave the decoupage to dry so that the surface is no longer tacky, and then add one final layer of glue to seal the design to the glass.
Leave to dry overnight and then fill the bottles with water and fresh flowers.
Fancy trying out your découpage skills on some other projects? We've also got tutorials showing you how to make découpage clay bowls, stainglass style tea lights and decorated découpage wooden hangers.
You Might Also Like
