
How to create every braid you've ever seen
You already know how to three-strand braid (and have since you were five), but if you've ever seen a more complicated braid and wondered, How on earth do I do that? keep reading. From a fishtail to a chain braid, Kayley Pak, braid specialist at the John Barrett Salon in Bergdorf Goodman, shows and tells you how to weave the perfect plait.
1. Regular french braid
Start by brushing your hair back with a boar bristle paddle brush so it's smooth. Then, take a comb (you can also use your fingers) to section your hair off in a "V" formation from your temples to the crown of your head. Next, take three pieces of hair from that section and begin braiding them, making sure to incorporate more hair from each side of your head each time you cross the hair over. Repeat this until the ends.

2. Dutch braid aka the inverted French
To create an inside-out French braid (note: this is also how you braid cornrows), repeat all the steps above, but then when you begin braiding, cross the sections of hair underneath one another, rather than over each other.

3. Rope braid

First, put your hair into a ponytail and create two sections, and twist each one in the same direction. Then, cross the two sections over each other and secure it at the ends with an elastic band. Pro tip: Keep pomade on your fingertips to keep any stray strands in place, and use hairspray to lock your style in.

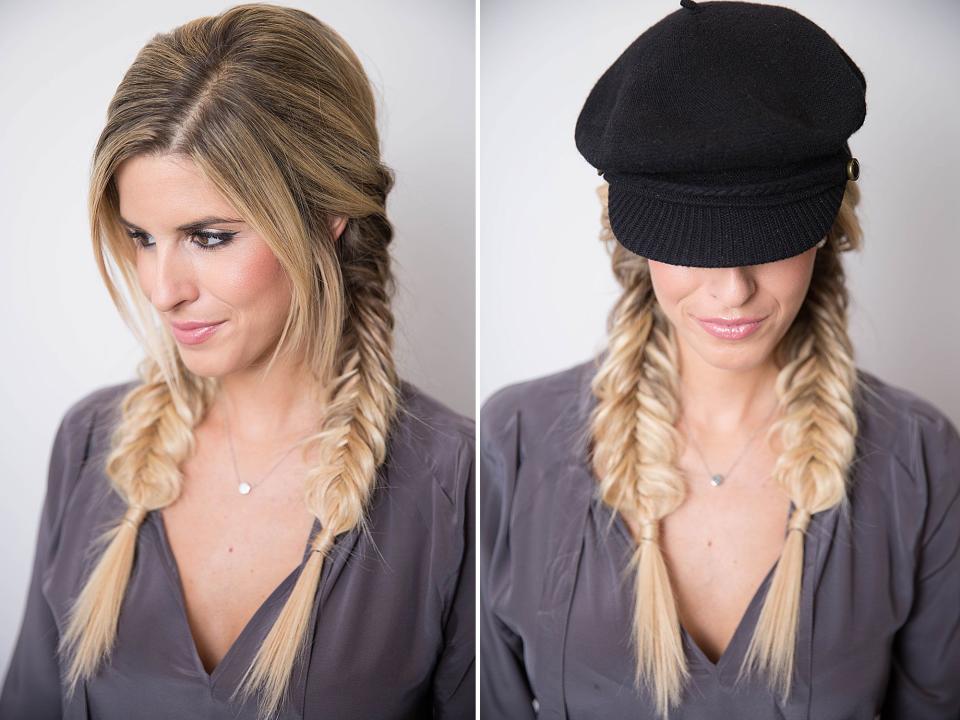
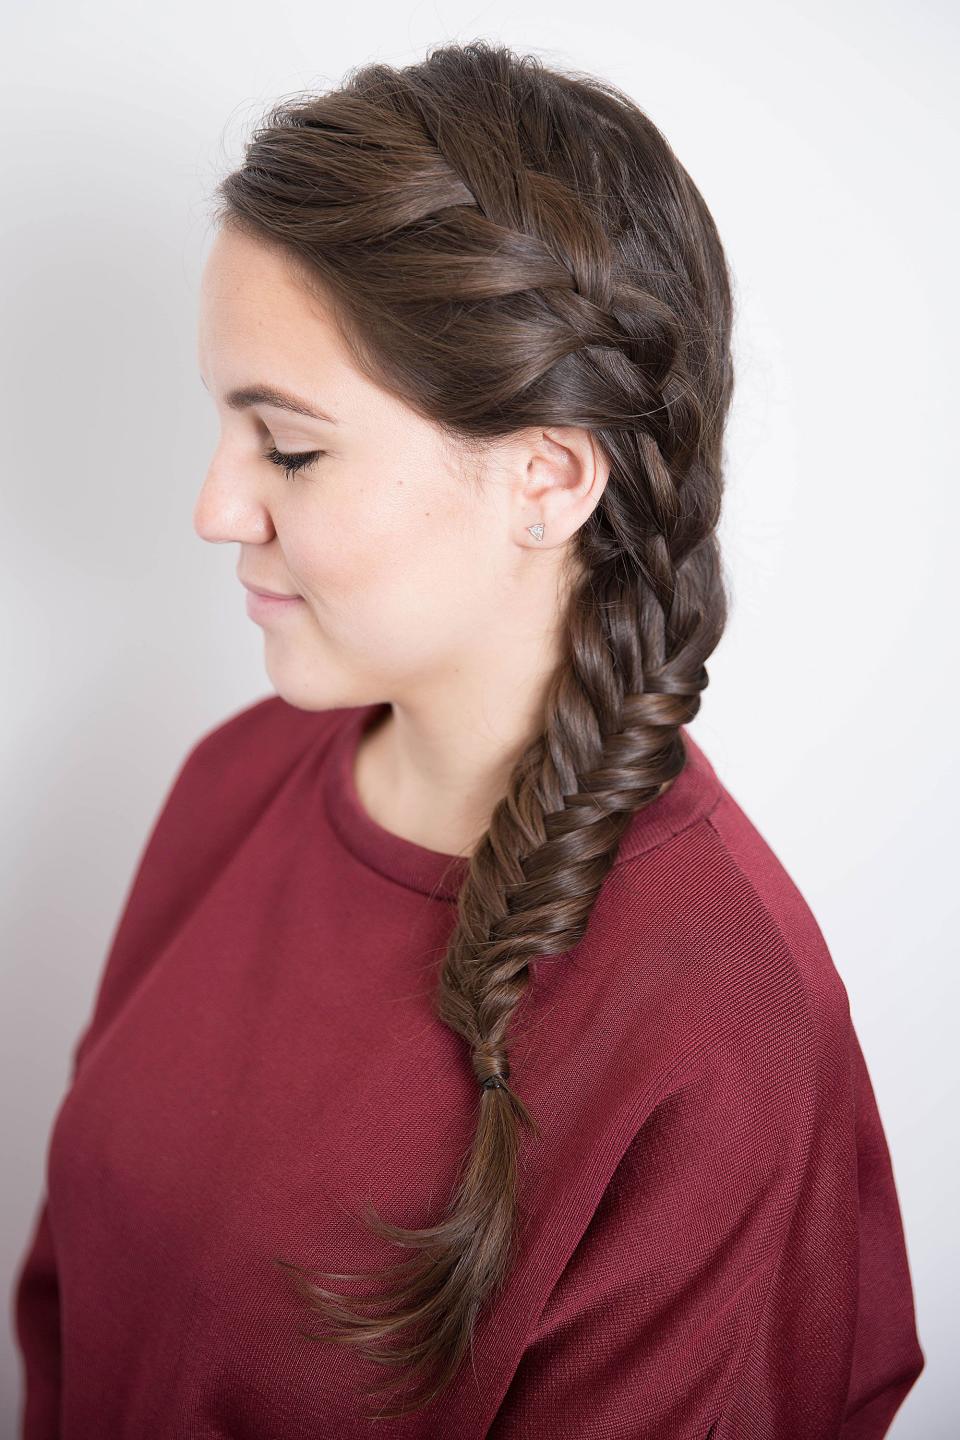
4. Fishtail braids
Start by sectioning your hair into pigtails and divide each section into two (this is instead of three sections, like you would for a regular braid). Next, hold both sections in one hand, separated by your pointer finger, and use your other hand to grab a small piece of hair from the outside of one section. Pull the strand over to the other half, and then take a piece from the outside of that section and braid the opposite way. Keep braiding until you've just about reached the ends and finish it with an elastic. It's even better if it's messy, so pull out some strands and stretch out the braid for an intentionally undone look. Finally, take a selfie (newsboy cap optional.)
5. Dual texture braid

Curl your hair first for added texture, so the braid has more grip - you can even coat it with some hairspray. Next, create a deep part on the right (this will allow more braid to show straight on), and then pull your hair over your left shoulder. Begin creating a regular French braid, pulling pieces from your hairline each time, and braid past your ear. Clip off the braid so it doesn't unravel. Then, from your right temple, French braid the rest of the hair, following the nape of your neck until it meets the first braid.

To finish off the look, combine the hair where the two braids meet and fishtail braid all the way to the ends.
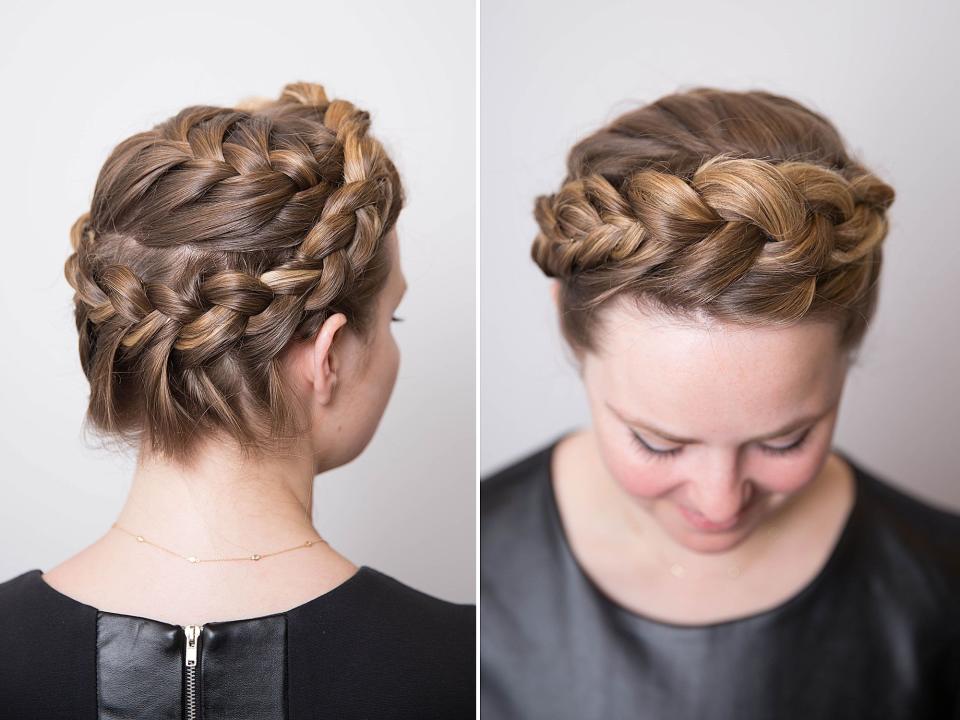
6. Halo braid

Part your hair down the centre. Starting at the nape of your neck on your left side, begin creating an inverted French braid following your hairline. Continue doing so the entire way around your head until you've braiding all your hair. Finally, tuck the secured ends under the braid and you're done.

7. Waterfall braid
Create a centre part (since this hairstyle looks more even that way) and French braid from the right side of the part to your temple. Then, holding the three strands, continue French braiding but drop the outermost section of the braid that you would normally cross over (it's every piece that crosses over to the right if you're braiding the right side, and the left piece when you're working on the left side), letting it fall, thus creating the waterfall effect.

8. Chainlink braid
Start with a low ponytail and wrap a piece of hair around the hair tie so it looks polished. Then create four sections - to make this easy, label them in your head as one, two, three, four from left to right. First, take the third piece and cross it over the second piece, then take the fourth section and cross it under the second and third sections, and then over the third section. Next, drop the second piece and bring the first section under the third and fourth pieces. Continue this sequence until you've reached the ends.

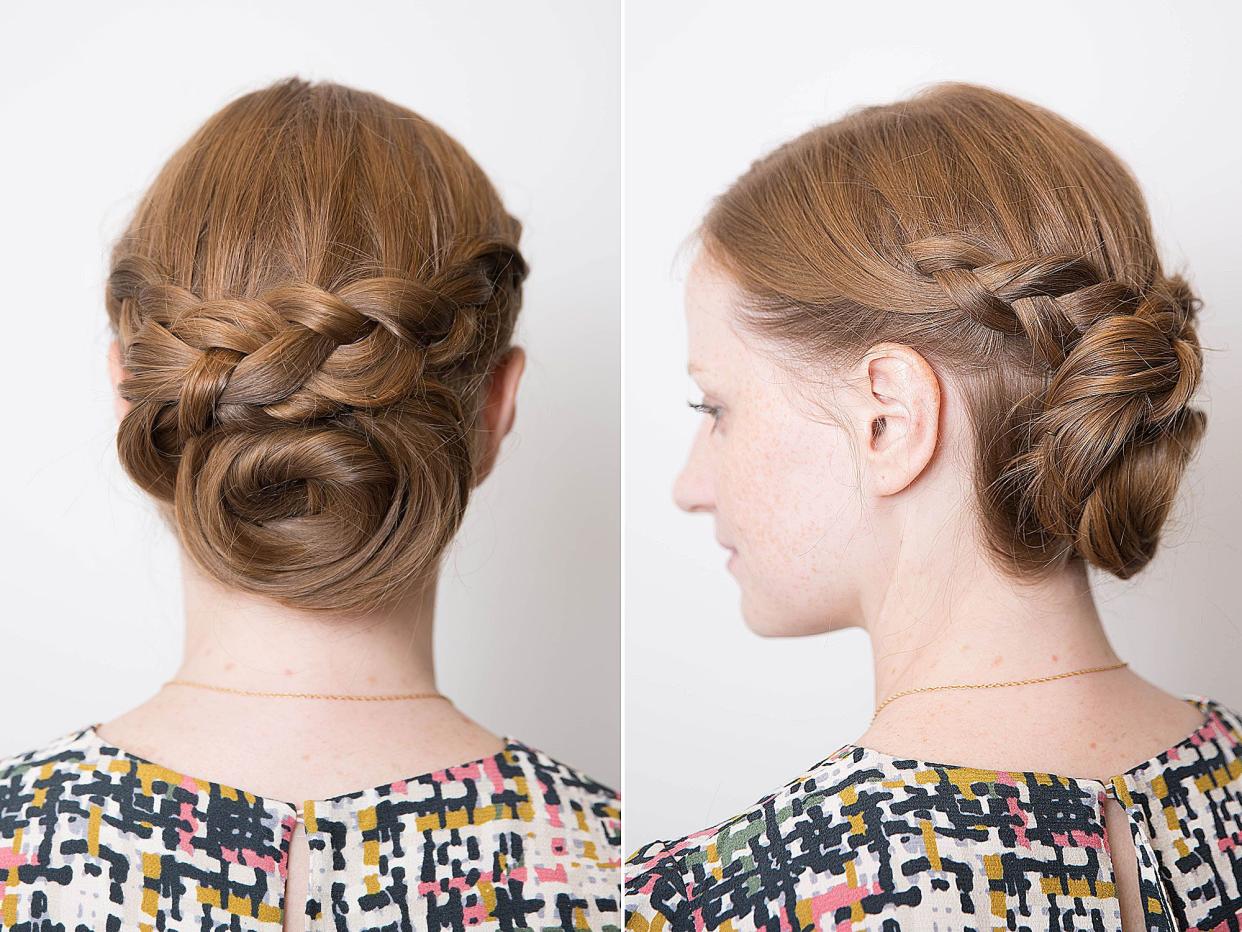
9. Braid to bun

To achieve this look, Dutch braid the top half of your hair from your temples to the back of your head and secure each braid. Then, crisscross them at the back of the hair, and clip them up.

Next, braid the remaining bottom half of your hair in a regular three-strand braid and wrap it into a bun. Bobby pin it to keep it secure. Finally, wrap the two crisscrossed braids around the first bun and pin it into place.

10. Spiral braid
Gather all the hair at the crown and start French braiding counterclockwise in a circular motion across the front of your hairline, down the left side of your head, around the nape of your neck, and ending up on the right side. Finish by tucking the ends of your hair into the braid along your hairline to conceal it.
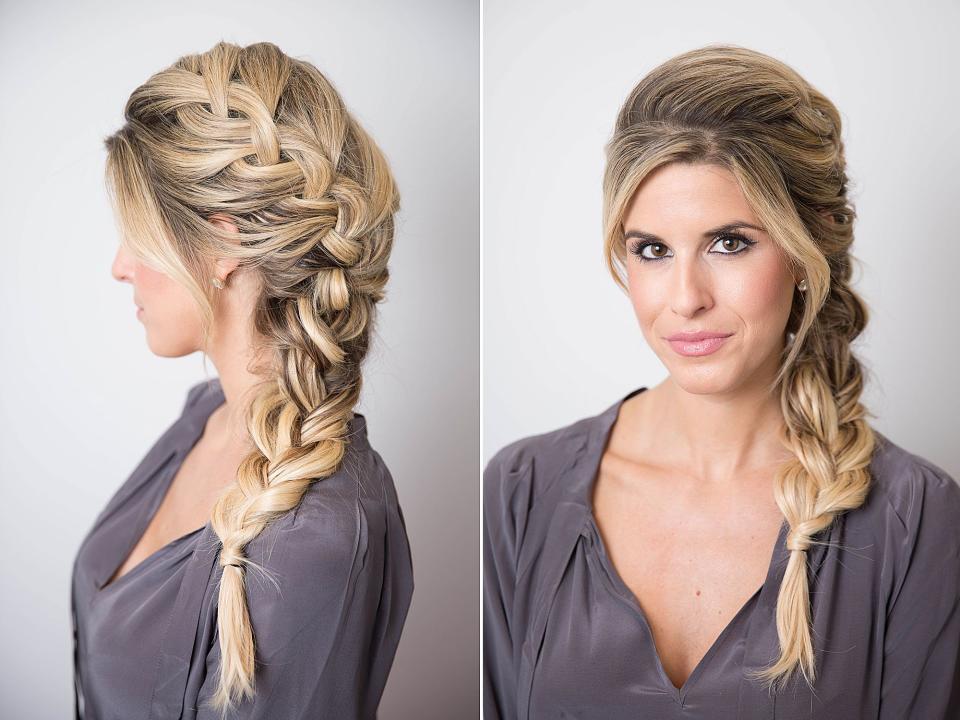
11. Big, voluminous braid

Start by curling your hair and teasing it at the hairline and crown to create major volume. Then, pull your hair over to the desired side and begin French braiding it, taking sections of varied thicknesses to make it appear thicker. Continue this technique to the ends, and then secure your style with an elastic band and hairspray.
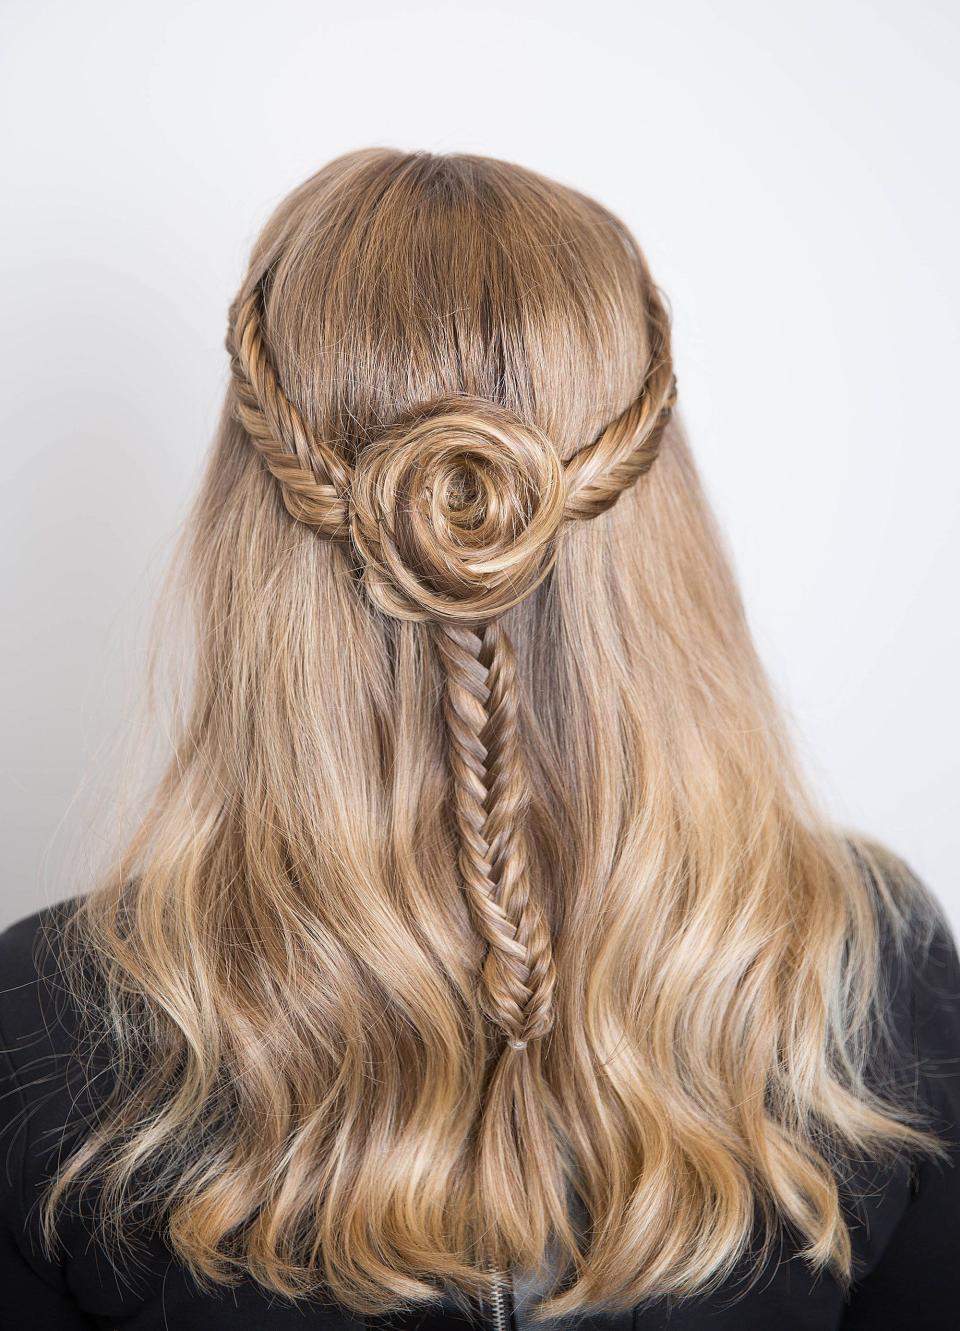
12. Fishtail flower braid
Create a centre part, and then create two thin fishtail braids using the hair at your temples. Don't braid the pieces the entire way. Instead, wrap them into a bun and bobby pin them into place. Then, take a fresh section of hair underneath the bun and begin fishtail braiding it all the way to the ends, securing it with an elastic band.
13. Boho braid
With your hair down and over to the right, choose a small section of hair an inch back from your hairline and three-strand braid it. Secure it with a hair tie. Next, an inch back from the first braid, create a French braid using larger sections and secure with an elastic band. Finally, take all your hair, split it into two, and rope braid it, incorporating the two initial braids you made into it. Secure at the ends.

14. Lobster tail braid

Grab a section of hair from the nape of your neck and braid it, leaving the rest of your hair over your opposite shoulder. Then, take the remaining hair and wrap it under and over your braid, creating a coiled, piece-y effect, until you've reached the hair tie. Finally, tuck the wrapped hair into the elastic and voilà!

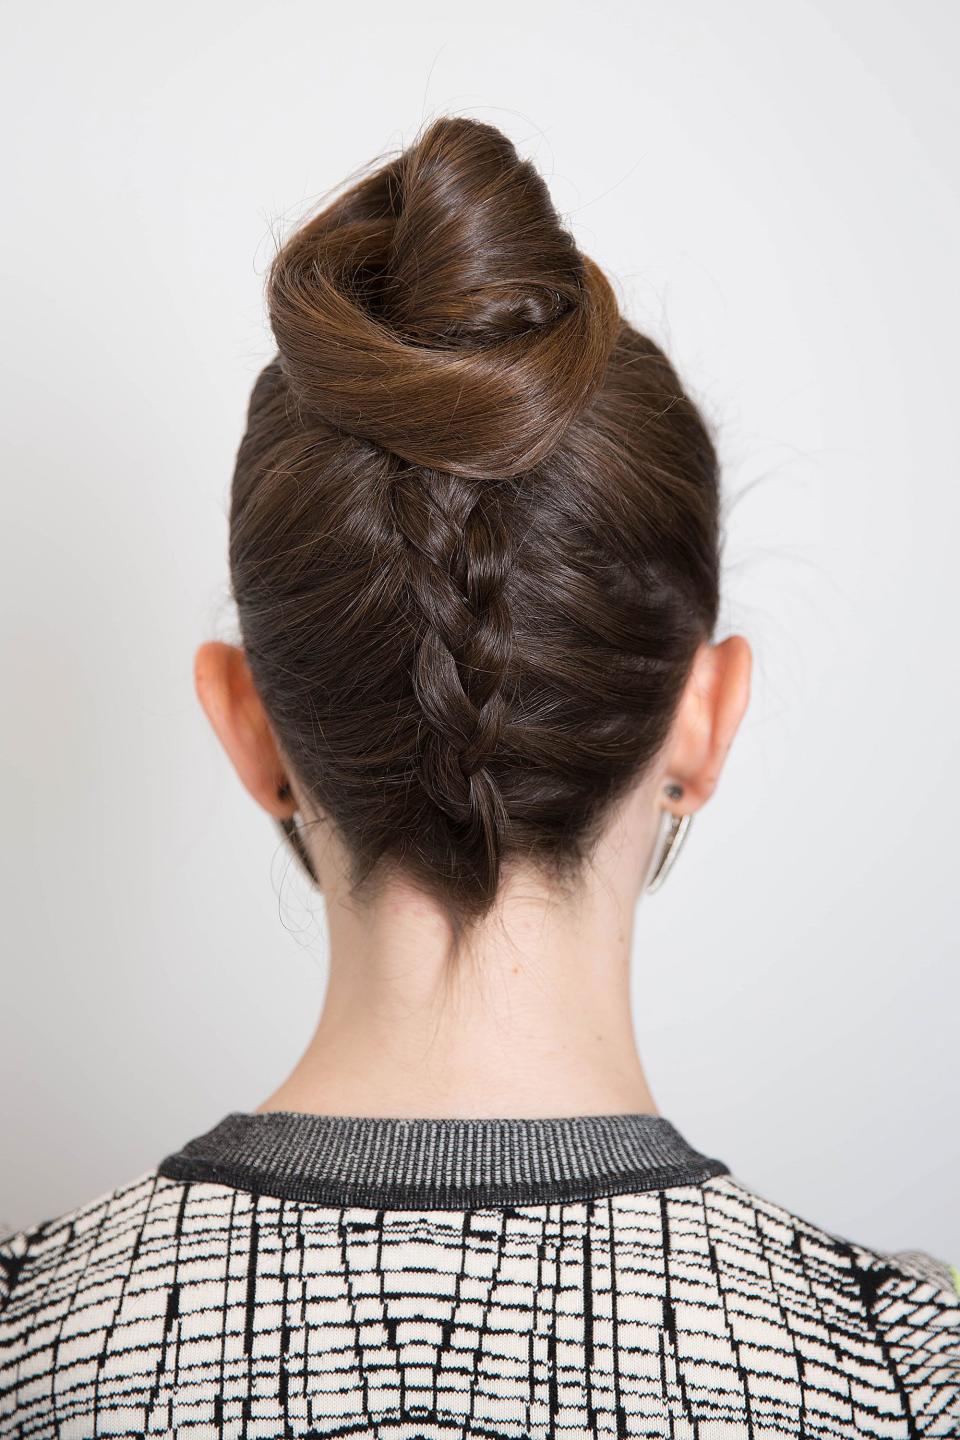
15. French braid turned topknot
Flip your head over and begin French braiding from the nape of your neck to just before the crown of your head. Secure the braid with a hair tie and wrap the hair around the base of the elastic and pin it into place. Boom: a gorgeous, unconventional bun.
16. Dutch braid pigtails
Part your hair down the centre of your head, and then create an inverted French braid down the centre of each section (between your part and your ear) until you reach the nape of your neck. Secure each pigtail with a hair tie, and then wrap a piece of hair around each elastic band, concealing it, and then tuck it in the back of the hair tie to keep it in place.

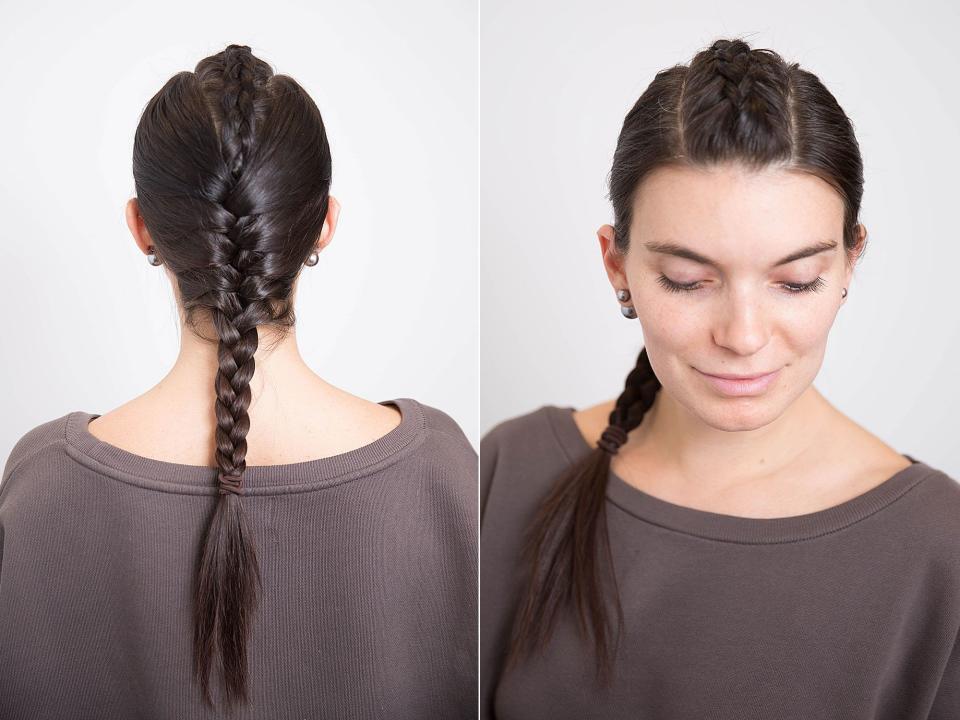
17. Skeleton braid
Section your hair into a 2.5-inch section down the centre and Dutch braid it until you reach just below the crown of your head. Then, incorporate the rest of your hair and three-strand braid it until you reach the ends.
You Might Also Like

