
How clean is your fridge?

Love Good Housekeeping and want more of our Triple-Tested recipes, home tips, fashion inspiration, essential consumer advice and so much more delivered to your inbox? Sign up to our FREE weekly newsletters, sit back and enjoy!
Whether you're cooking a meal or you've just come back from the supermarket with food to chill, the last thing you want is to open the fridge and be met with chaos, or an unpleasant smell.
Common sense dictates, and the Food Standards Agency confirms, that it's important to keep items and surfaces that come into contact with food as clean as possible — and that includes your fridge. A clean, organised fridge can help you improve food hygiene and reduce food waste.
We know that it can feel like a faff removing all the food from the fridge just to arrange it all again once you've cleaned the interior, but cleaning the fridge is a job that's worth doing and worth doing well. To make things easier, we've broken down the process into simple steps to help you get the job done.
1. Plan ahead
Your fridge needs a deep clean every three to six months.
As soon as you remove items from your fridge, you’ll be working against the clock. So wait until it’s at its emptiest (ideally just before you’re about to do a food shop).
You might as well organise the contents once everything is removed. Pre-prepare containers and labels for any loose items you want stored and organised.
Once your fridge is emptied, bacteria can multiply quickly at room temperature, so put dairy products, meat and other food that needs to be kept refrigerated in a cool bag packed with pre-chilled cool bag blocks.
Bin any food that is clearly past its prime and anything that is past its use-by date.
2. Wash shelves and salad crisper drawers
Take out the salad crisper drawers from the bottom of the fridge if you can, as well as all the removable shelves. If it's not obvious how to get them out, check your fridge's user manual before you start so you know exactly how to do it without damaging anything – it will also help you to get them back in! If you can't find the user guide, check the manufacturer’s website or try espares.co.uk.
Next, thoroughly wash the shelves and salad crisper drawers that you've been able to remove with washing-up liquid and hot water. If the shelves (or any other removable parts) are made of glass, it’s best to let them reach room temperature first to reduce the risk of them shattering in very hot water.
Use a toothpick to remove food residue that has collected in the join between the surface of the shelf and the shelf surround. Alternatively, an old toothbrush or an electric cleaning brush can help with this.
Rinse the shelves and salad crispers with clean water, then allow them to dry naturally on the drainer or dry with a clean tea towel and put them to one side if your drainer isn’t big enough.
For any shelves or drawers you can't remove, wipe them down with a clean cloth soaked in a cool solution of washing-up liquid and water, making sure it's thoroughly wrung out.
Sometimes, fridge shelves and drawers can be dishwasher-safe, but you should always check the fridge's user manual first to confirm. For anything that is dishwasher safe, check which dishwasher cycle you should use and where in the dishwasher it should go, too. Let any dishwasher-safe components cool to room temperature before putting them back in the fridge.
3. Clean the interior
Now you can turn your attention to the inside of the fridge itself. Avoid using hot water at this point as it can raise the temperature of the fridge and this will delay how quickly you can get your perishable food back in. Instead, make up a solution of Milton Sterilising Fluid with cold water, and use this to wipe down the interior with a clean cloth.
Pay particular attention to the grooves on the sides of the fridge interior where the shelves rest, as they can be magnets for dirt. A cotton bud is a handy tool for getting old food out of these. Cotton buds are also useful for fiddly places, such as the drip hole at the back of the fridge, which can easily become clogged and grimy.
Dry the inside of the fridge thoroughly using paper towels or a clean tea towel.

4. Wipe down outer surfaces
Don’t overlook areas on the outside of the fridge such as the handle and door surround, where germs can build up through frequent contact with hands. If you have a fridge freezer with the freezer at the bottom, use the crevice nozzle of your vacuum cleaner to remove crumbs that have collected in the folds of the door seal. Alternatively, use a stiff, dry washing-up brush to dislodge them.
Run the corner of a linen or cotton tea towel dipped in Milton solution along the folds for a hygienic clean and use a fresh corner of the towel to dry the door seal afterwards.
If you’re fed up with finger marks on the surface of stainless steel, you can apply a little baby oil or rinse aid using a microfibre cloth to prevent them in the future.
5. Remember the condenser coils
You've likely wiped down the inside of your fridge more recently than its exterior. But when was the last time you spruced up the condenser coils?
Located at the back of the fridge, condenser coils are easily cleaned. Simply turn off the fridge and vacuum the coils to remove the dust. These should be cleaned at least once a year to prevent them from becoming clogged, especially if you have pets, as pet hair can build up here quickly.
Why bother? Clogged condenser coils mean that your fridge has to work harder which runs up your energy bill. They can also shorten the life of your fridge, which can be costly to repair.
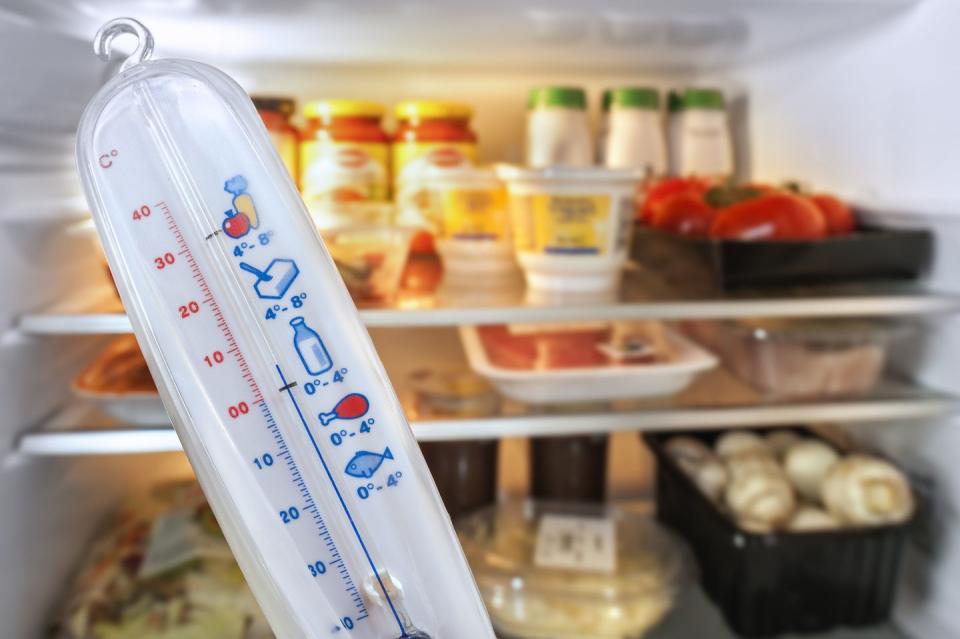
6. Allow to cool
Replace the shelves and salad crisper drawers. If you have a fridge thermometer, wait until the temperature inside the fridge falls to 5°C or below before replacing the food. If your fridge has a fast-cool function, use it to speed up the cooling process.
7. Dress the drawers
Use kitchen towel or old newspaper to line the bottom of your fridge drawers. That way, you can simply lift out the lining and tip old onion skins and other stray pieces of veg straight into the food bin.
8. Banish odours
Stop your fridge smelling funky by leaving a ramekin with bicarbonate of soda inside. It should last up to three months before you have to replace it – try dating the container so you remember when to change it.
If you’d rather save your bicarbonate of soda for baking, you can buy fridge deodorisers, such as the Lakeland Fridge Odour Absorber.
9. When you restock...
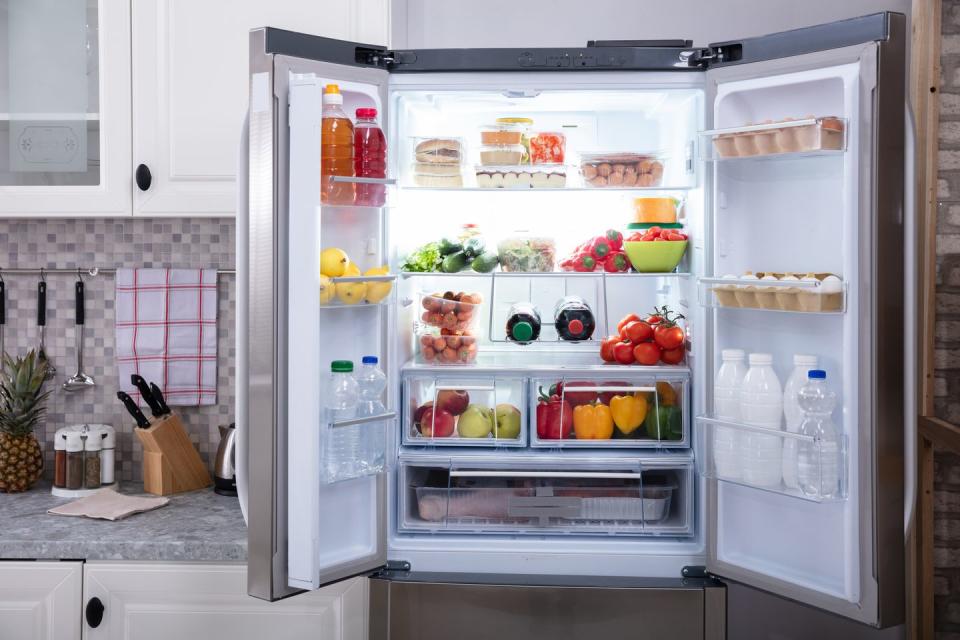
Place your food back in the fridge, making sure everything that's open is labelled with the date it was opened, so nothing remains in there longer than it should. The drawers should be filled with fruit and vegetables. The bottom shelf is reserved for wrapped meat and fish. The middle shelves are for dairy products and the upper shelves for foods that don’t require cooking. For more tips on this, check out how to organise your fridge.
Try to keep a list of what you’ve got stored in your fridge and update it as and when items are removed. That way, you know what needs replacing when it comes to the weekly shop.
Don’t overload the fridge as air needs to circulate for it to work efficiently, and make sure you open the door as infrequently as possible for the shortest possible time, too.
When you restock the fridge, group all chilled items together to place back inside it at once, rather than individually. It’s very tempting to leave the door sitting open as you unpack the weekly shopping but this will cause the fridge to warm up.
Keep on top of fresh spills to prevent odours from developing, and to keep your fridge cleaner for longer.
Our guide on what not to store in the fridge will help prevent it from becoming crammed.
You Might Also Like

