

11 easy step-by-step DIY home improvements for the bank holiday weekend
Big kitchen renovations or bathroom makeovers can take months to plan properly, but there are many achievable and affordable hassle-free ways to refresh your home over the early May bank holiday weekend.
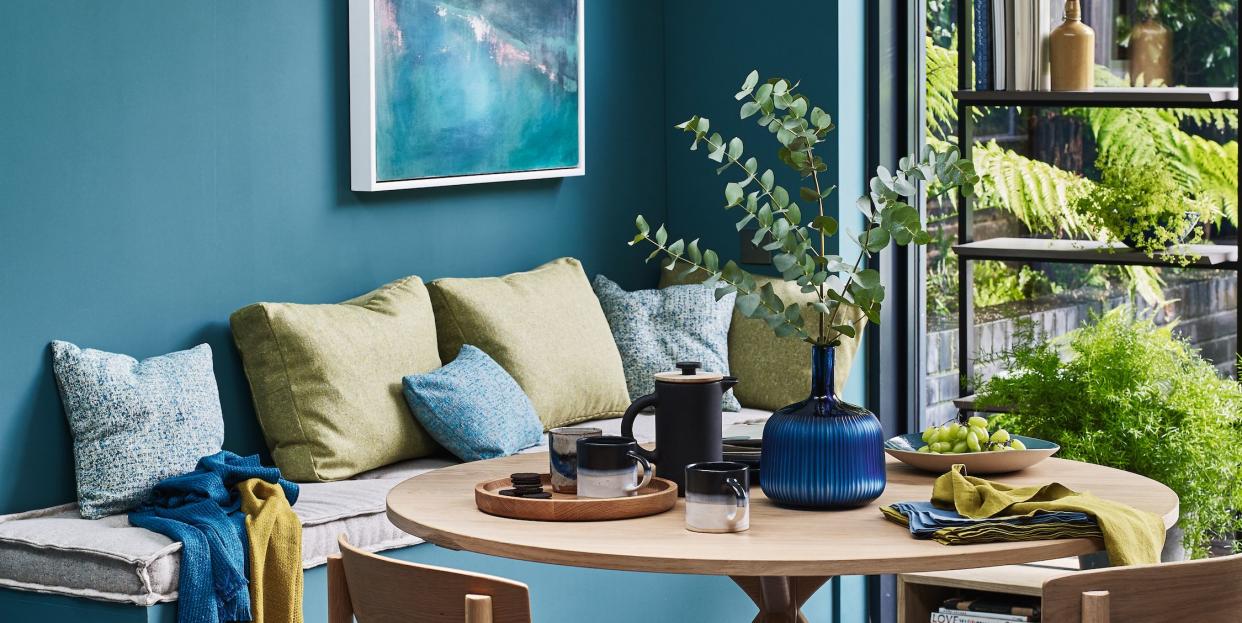
Transforming a room with paint is one of the easiest DIY projects you can tackle, even more so if you stick to small pockets like alcoves, cupboards or a compact downstairs loo. Panelling a wall and upcycling secondhand furniture are both deceptively simple, even for the amateur DIYer, and there are plenty of budget-friendly garden ideas – providing we have good weather, of course.
Read on for 11 quick DIY home updates and a step-by-step guide for each...
1. Paint your kitchen cabinets
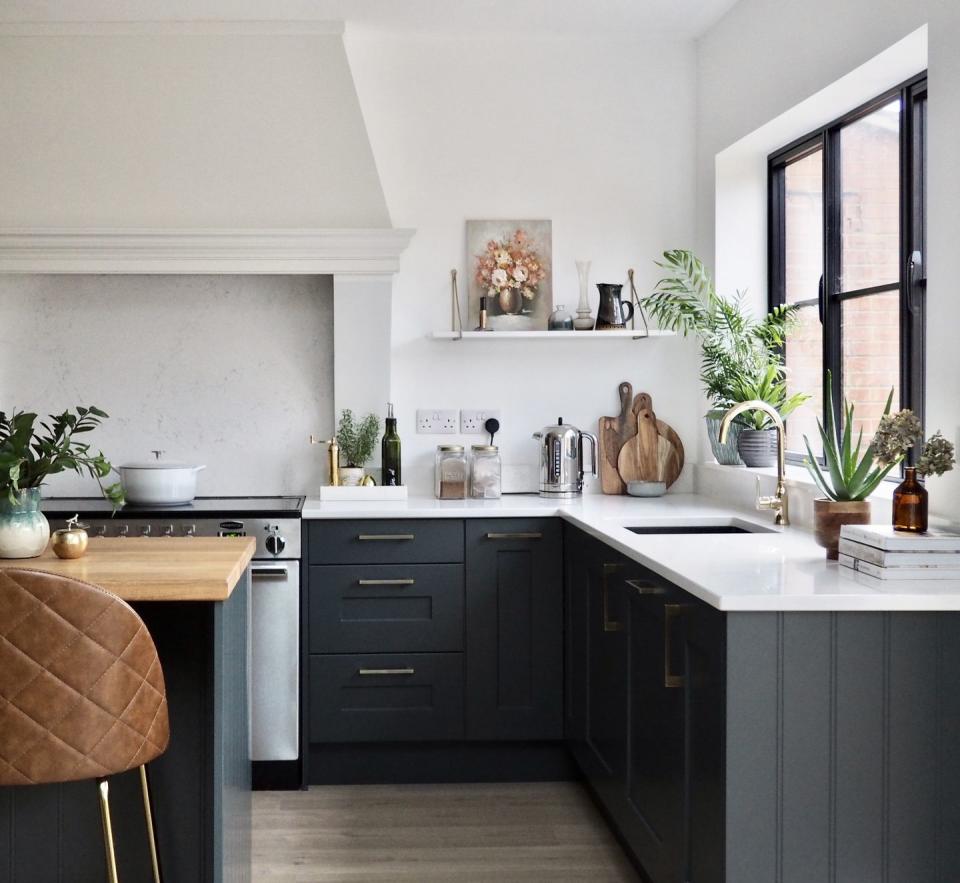
'Painting the kitchen cabinets is potentially the most dramatic difference you can make to your kitchen on a budget,' says Michael Rolland, DIY expert at The Paint Shed. 'You can either choose to refresh the current stain or colour, or to give the kitchen an entirely new look, choose a different colour for your cabinets.'
Here, Michael explains how to paint your kitchen cabinets in five easy steps.
Step one: Pick a semi-gloss paint
'For ease of wiping the cupboards down with a cloth, a paint with a semi-gloss is recommended,' Michael suggests. 'Any flatter and it will have a chalky feel when you wipe it down. Using high-gloss paint will highlight every single brush stroke or roll mark – so unless you’re an exceptional painter a semi-gloss is preferable, such as the Modern Eggshell paints from Farrow & Ball or Intelligent Eggshell from Little Greene.'
Step two: Prep the area
'Clean out your kitchen cabinets and tape plastic sheeting to worktops and floors to help protect finishes and avoid paint spills,' he continues. 'Clean your kitchen cabinets using a degreasing agent like Trisodium phosphate (TSP) to get any grease off of cabinet surfaces. Pay particular attention to areas around the handles, underneath the cabinets, and under the bottom of the edges of cupboard doors. This will ensure that the paint adheres to the surface properly.'
Step three: Sand your cabinets
Give your cabinets a light sand with 220 or 400 grit sandpaper, depending on the finish of your cabinets, Michael advises. 'For cabinets with an open-grained finish like oak for example, you should use a heavier grit sandpaper.'
Step four: Remove your cupboard doors for priming
'After sanding, remove the cupboard doors, lay them flat and brush on a primer coat such as Farrow & Ball Interior Wood Primer & Undercoat. When they are dry, flip the cupboards over to prime the other side. Once the primer is completely dry, give the cupboards a light sanding to smooth out brush strokes,' Michael explains.
'For a really smooth finish repeat the process and use a finer sandpaper the second time. Then vacuum and wipe your cabinets with a tack cloth to clean away any debris.'
Step five: Get painting
For the final step, use a good quality brush or smooth roller to apply paint to the cupboards. Michael explains: 'Apply a thin coat and let your kitchen cabinets dry flat to avoid drip marks. When dry to the touch, turn them over and paint the other side. Wait a few hours before applying a second coat. Applying the paint in several thin coats is better than just two thick ones. It not only gives a better, even finish, but also makes it more hard-wearing.'
2. Update a downstairs loo
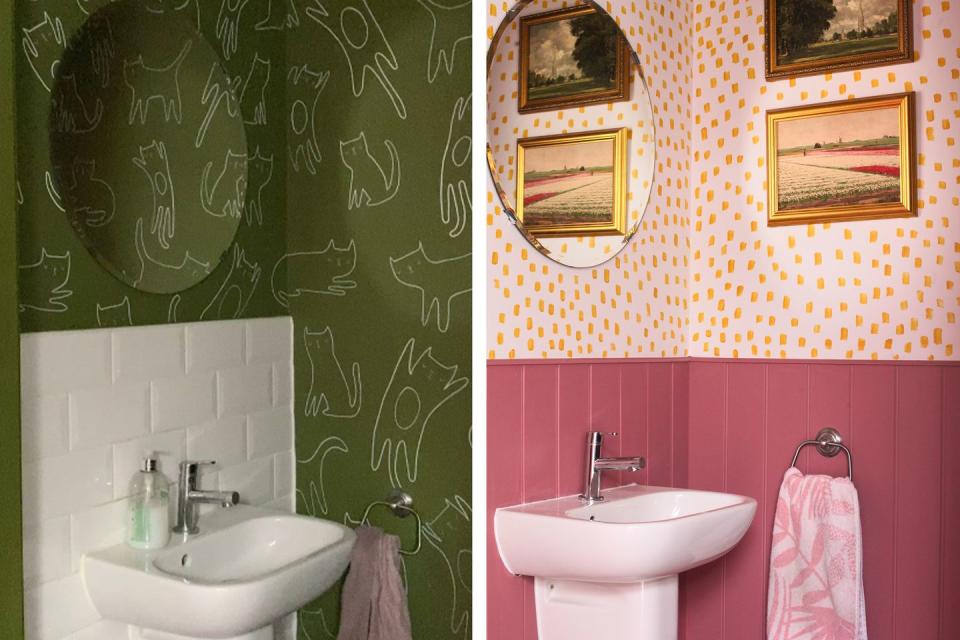
Jen Brake, the talent behind @halfpaintedhouse, recently transformed her downstairs loo, adding bright pink wall panels and handpainted accents. This small but impactful makeover is best suited to those who have panels installed, or those who know their way around a saw and a nail gun.
Read the step-by-step guide here
3. Paste the wall wallpaper
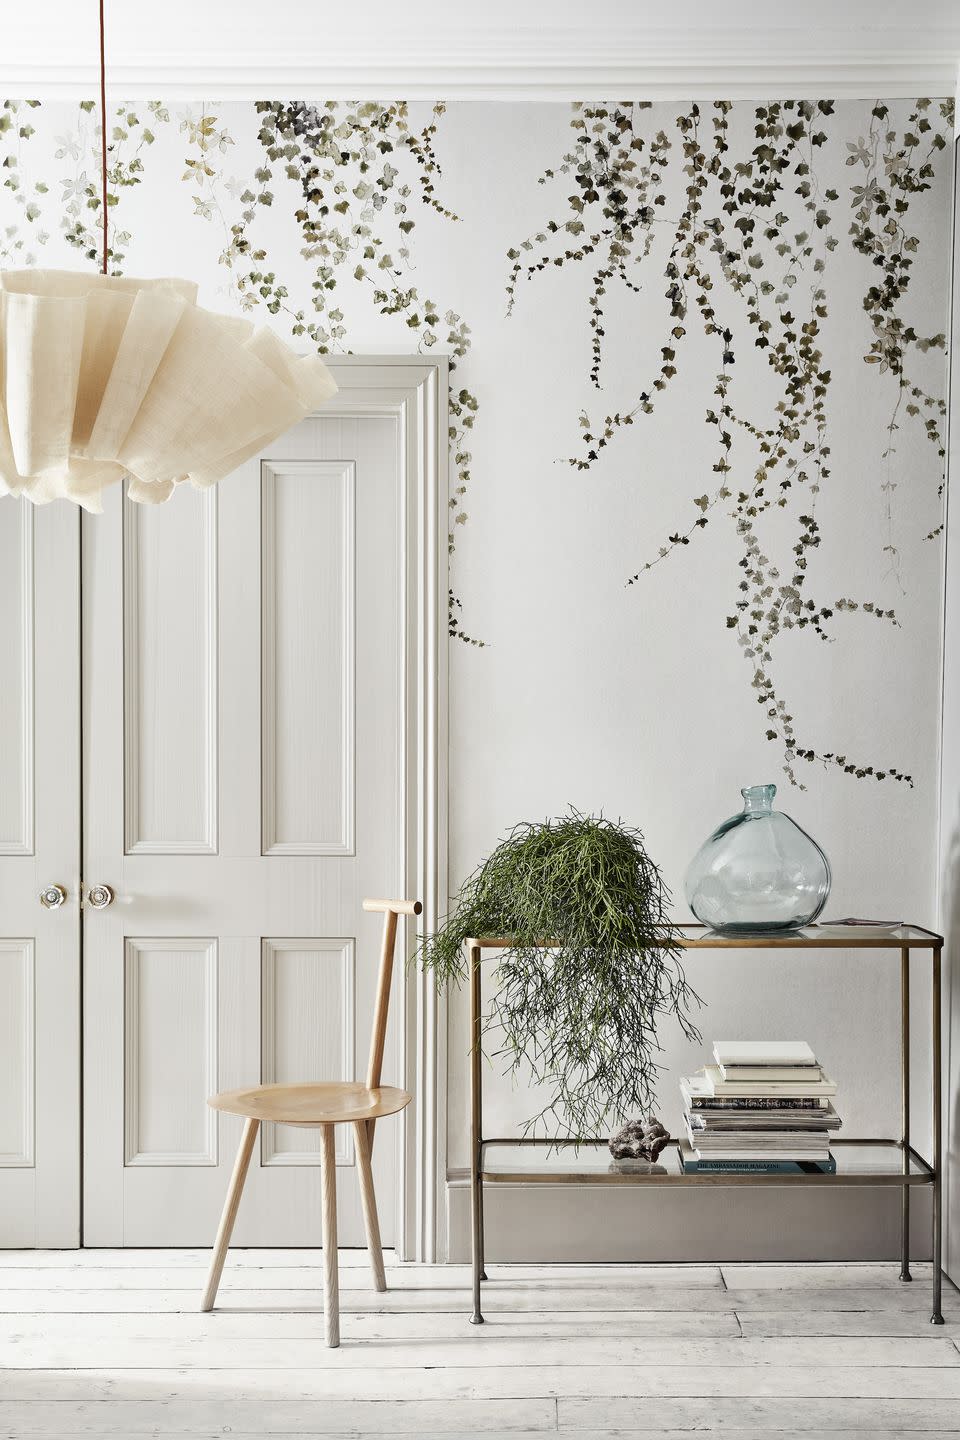
Traditional wallpapering can be a fiddly process that leaves you battling with soaking rolls of wallpaper as they stick to skirting boards and dust sheets – no way to spend a long weekend. Paste the wall wallpaper by contrast is a modern solution without the mess or the hassle.
As the name suggests, this method allows you to spread your adhesive directly onto the wall rather than the wallpaper itself. No pasting table is required, and you reduce the risk of common hiccups, like smearing paste onto the front surface of the wallpaper or soaking the paper with too much adhesive.
Olivia Hunter, decorating specialist at Wallpaper It, shares three easy tips for perfect DIY wallpapering.
One: Prep the wall
'First, take time to prep your wall. Make sure any existing wallpaper has been removed and the surface has been smoothed using sandpaper,' says Olivia. 'If you find you have cracks in the wall, repair with wall filler and sandpaper before rinsing the wall with soapy water and allowing it to dry completely.'
Two: Plan your approach
'Before you start hanging your wallpaper, take some time to plan where to place the first piece – it's important to get the first piece straight,' Olivia warns. 'Ideally, begin at the corner and hang your first length of paper on a wall with no doors or windows to hang a full length from the ceiling to the top of the skirting board.
'If your wallpaper is patterned, hang the first length over a focal point such as a fireplace. Work away from it in both directions to help ensure the design stays central and symmetrical.'
Three: Apply (carefully)
Use a plumb line to draw a vertical line onto your wall as a guide for placing your first piece. Use a roller rather than a brush to apply adhesive to the wall to speed up the process.
4. Easy upcycling
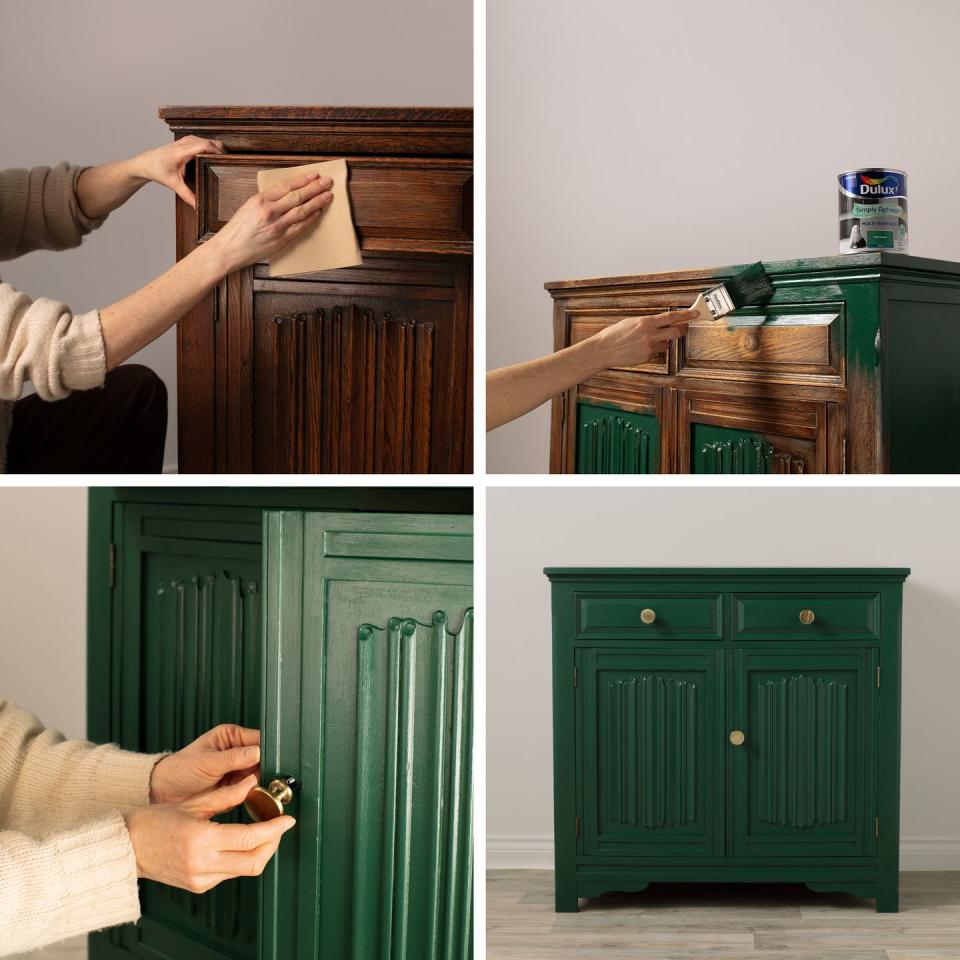
Upcycling can be a fairly easy DIY task if you're focusing on something as simple as refreshing vintage or antique furniture. eBay's on-site DIY hub combines a collection of pre-loved furniture with tools and paint from Dulux.
'There’s no satisfaction quite like the joy of bringing someone's pre-loved items back to life with a lick of paint,' says Marianne Shillingford, creative director at Dulux. 'Whether it be a bold statement piece, or a more neutral addition – our new Dulux Simply Refresh Multi Surface paint and pre-loved finds from eBay are the perfect combination. DIY really has never been easier!'
This super simple sideboard refresh comes straight from the eBay DIY hub, and can be applied to any wooden furniture such as wardrobes or dressing tables.
How to refresh a sideboard:
Remove any handles and hardware
Lightly sand using abrasive pads to create an even surface for painting
Wipe the sanding dust off using lint-free cloths to ensure a super smooth finish
Apply two coats of a multi-surface paint leaving at least 3-4 hours between coats.
For a real transformation, swap out the old handles for something more contemporary like brass.
5. Revive a tired garden (on a budget)
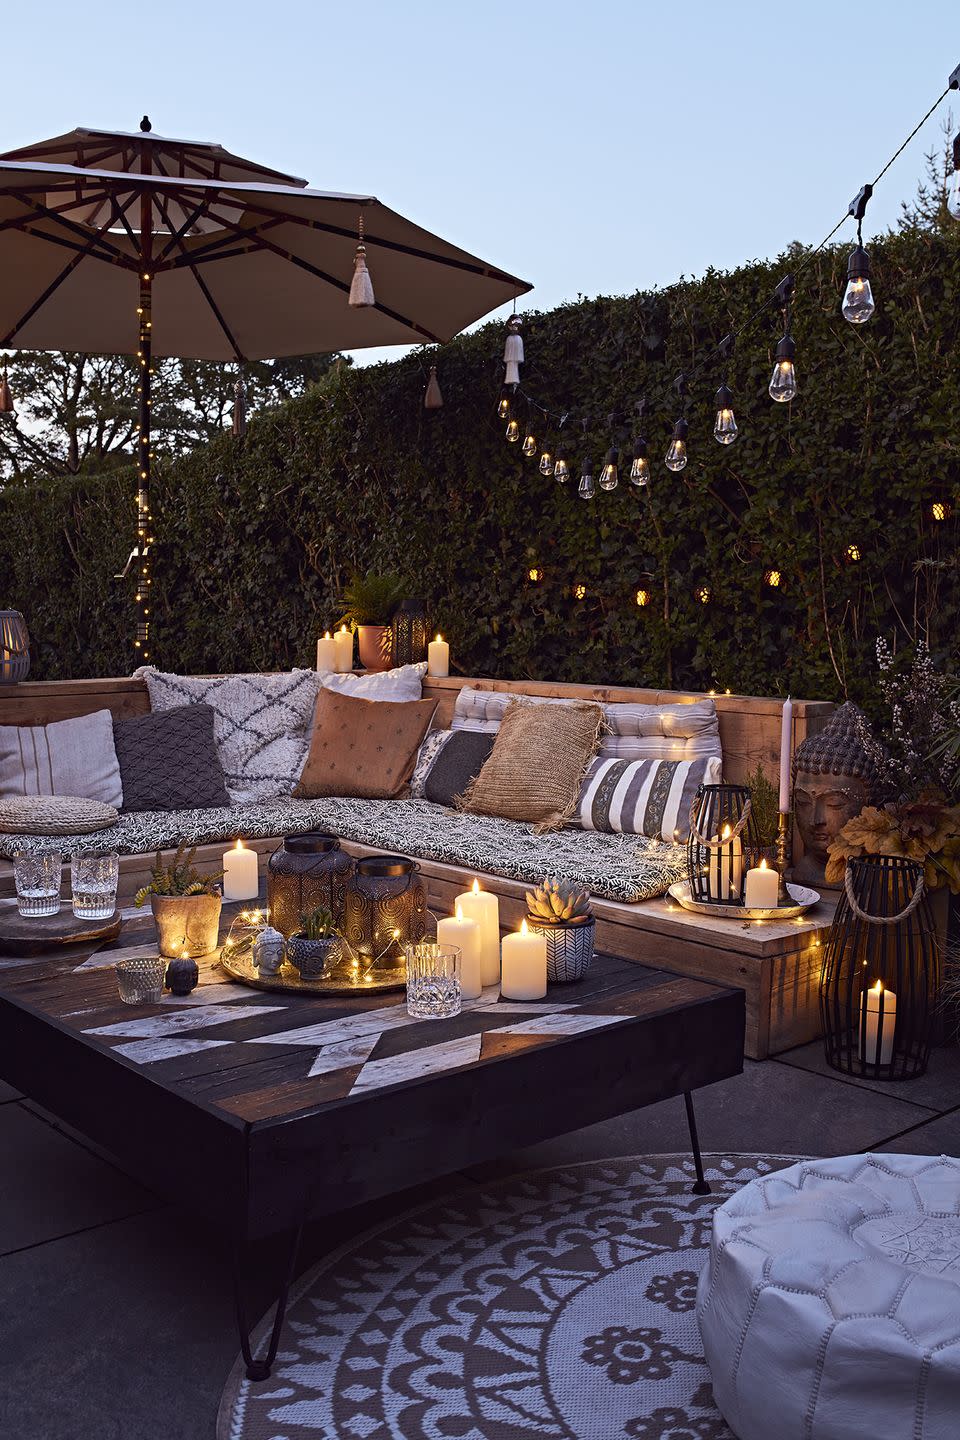
Gardens are so often neglected during the colder months and, weather permitting, a long weekend is a great opportunity to do a bit of a tidy up, especially as we're now in spring. We are huge proponents of budget-friendly upgrades when it comes to a garden, so whether it's creating a DIY garden bar, getting clever with how and what you plant, or repurposing old items into new, there are plenty of thrifty quick fixes to tackle.
Read our guide to 22 cheap garden updates here
6. Upgrade a fireplace (for under £100)
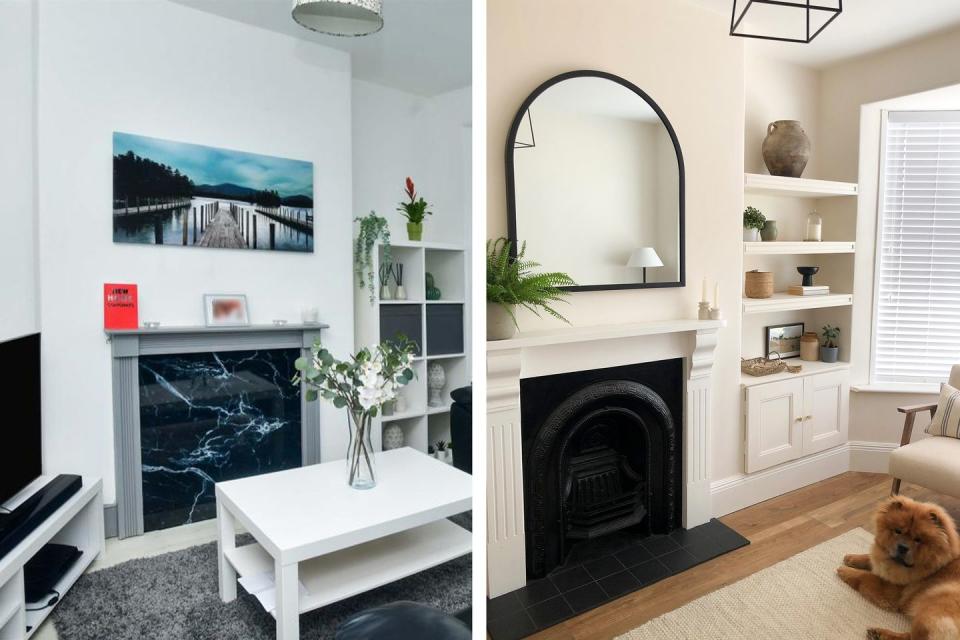
Interiors blogger, Nicole Sage of Sleek Chic Interiors, shares how to create a characterful Victorian fireplace for under £100.
'When we bought our Victorian terrace house, we were adamant that we were going to restore the original architectural details for period authenticity,' she says. 'The previous owners had removed what would have once been a Victorian fireplace; it was boarded up with a plastic sheet to cover the hole that was left.
'It was really important to us to restore what would have once stood there, but as we were hoping to renovate the entire property, keeping costs as low as possible was essential. Overall, for the materials and fireplace itself, the total cost of fitting a brand new fireplace set us back just under £97. If we bought this type of fireplace brand new, it would have cost at least £500 – not to mention having to also pay for installation costs!'
Below, Nicole shares four tips for creating your own.
One: Sourcing a secondhand fireplace
'Because we were keen to renovate the fireplace on the cheap, we knew immediately that shopping secondhand would be key. We scoured the likes of Vinted, eBay and charity shops but eventually sourced a beautiful pre-used fireplace from Facebook Marketplace. It cost just £50 and was exactly what we were looking for,' Nicole explains.
'My tip for anyone else looking to do the same thing would be to not give up and to not compromise! Items of furniture are added to these platforms daily, so persistence is key – and don’t be afraid to barter.'
Two: Preparing the area
'Before fitting the new fireplace, we had to sand the surround and then painted this in a white satin paint which we already had, costing us next to nothing. We then cleaned the fireplace and used a wire brush to get rid of any dirt or rust. Then we painted it using Hammerite matt black finish spray paint, which cost just £12,' Nicole reveals.
'In order to fit the fireplace, the first step was removing the plastic cover installed by the previous tenants and enlarging the existing hole ourselves. As there was already a lintel existing within the wall, we were not required to install a new one.'
Three: Creating a DIY hearth
'To create a hearth, we bought some matt black tiles and secured them in place using an adhesive, then grouted them using a black grout. All of these three materials came to £25 and the DIY was surprisingly easy to undertake for someone with little experience,' Nicole admits.
Four: Fitting the fireplace
Nicole concludes: 'After the hearth had set, we inserted the fireplace into the hole and secured this to the wall with plugs and screws, ensuring it was fit to the centre of the wall and was level. We then used a ready mix cement for the lower area which cost £10, and finally sprayed the cement with the same matt black paint spray once it had set. The surround was then fitted into place and secured with screws, ensuring it was level, and we then used caulk to seal any exposed edges.'
7. Paint the front door
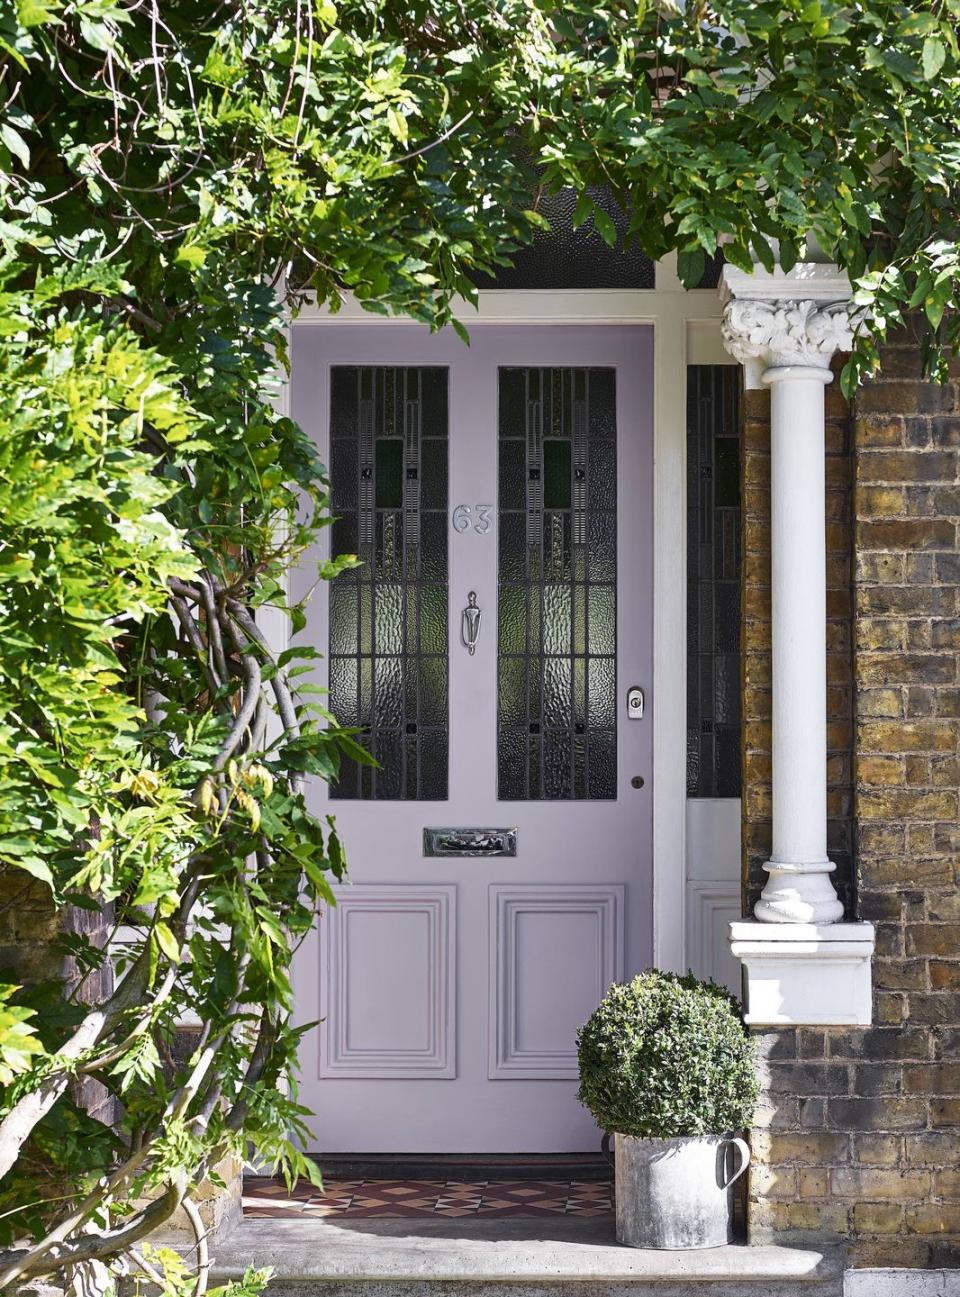
'The warmer weather and more sunlight hours that spring brings is the perfect excuse to give your door a fresh repaint,' says Michael, especially if the winter weather may have left the paint on your front door looking tired and faded.
'A sharp-looking door can really transform the look of a property so choosing a colour that works well is crucial,' he continues. 'Anthracite grey is fast becoming a popular choice of colour for a style-conscious homeowner. Anthracite grey is a delicate tone of grey, adding a touch of class to traditional and contemporary properties.'
A fresh coat of paint is a quick and inexpensive transformation, and we've asked the experts for their top tips on what paint to choose and how to prep your front door for the job.
Read our really useful guide to painting a front door
8. Panel a wall
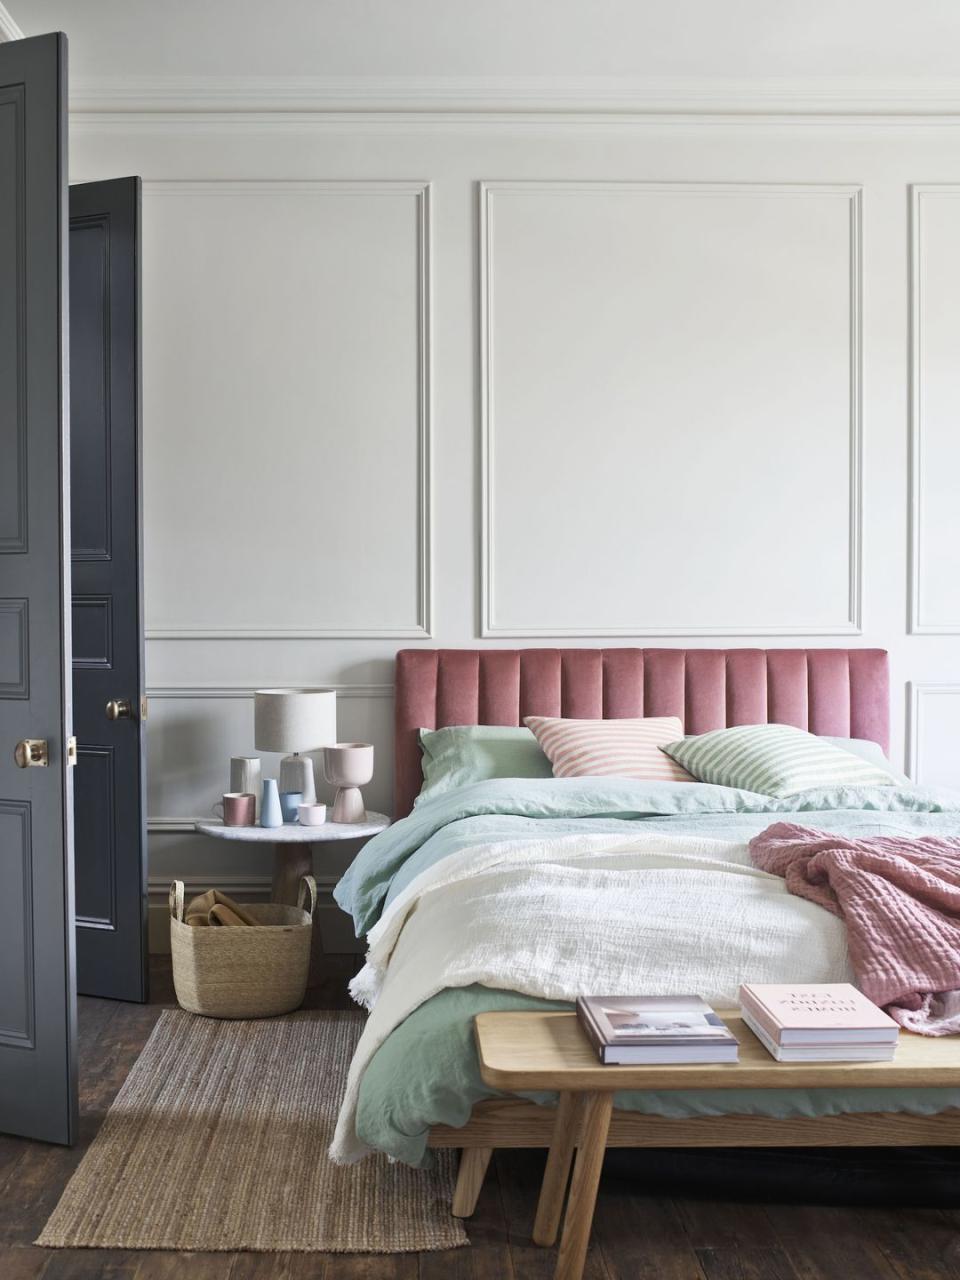
Adding decorative panelling to your walls is a deceptively easy DIY task. It's a great design solution for contemporary properties that tend to lack character. There are plenty of retailers like B&Q that will pre-cut your chosen wooden panels as long as you provide measurements.
HB's tip... Instagram is a great place to seek out inspiration if you're stuck for ideas. Use the hashtags #wallpanelling and #wallpanellingideas to see what other people have been up to.
Read our step-by-step guide to wall panelling
9. Paint a feature wall
'Bank holidays make the perfect time to do some painting, providing you with ample time to clear a room and prepare walls before applying paint,' Jimmy Englezos, senior brand manager at Ronseal, tells us. Whether it's your home office or bedroom, painting a wall should only take a few hours.
Take a look at Jimmy's tips below:
One: Prepare your walls
'Preparing your walls is essential for a smooth finish, so don't skip this step,' Jimmy says. 'Clear the room of furniture, and then check the walls for any loose nails or staples and remove them.'
Two: Fill any cracks
If you notice cracks in your wall, use filler to smooth imperfections and then leave to dry for at least an hour, Jimmy advises. Then, sand the walls and wipe clean with a damp cloth. Once your walls are completely dry, it's time to paint.
Three: Time to paint
'Stir your paint well before use, and if you have more than one tin of the same paint, mix both together to ensure your colour stays consistent upon application,' says Jimmy. 'Load up your brush or roller with plenty of paint and apply to walls, working from dry to wet areas. Do note that if painting over bold colours, you may need to apply a second coat after two to four hours.'
10. Create a DIY splashback
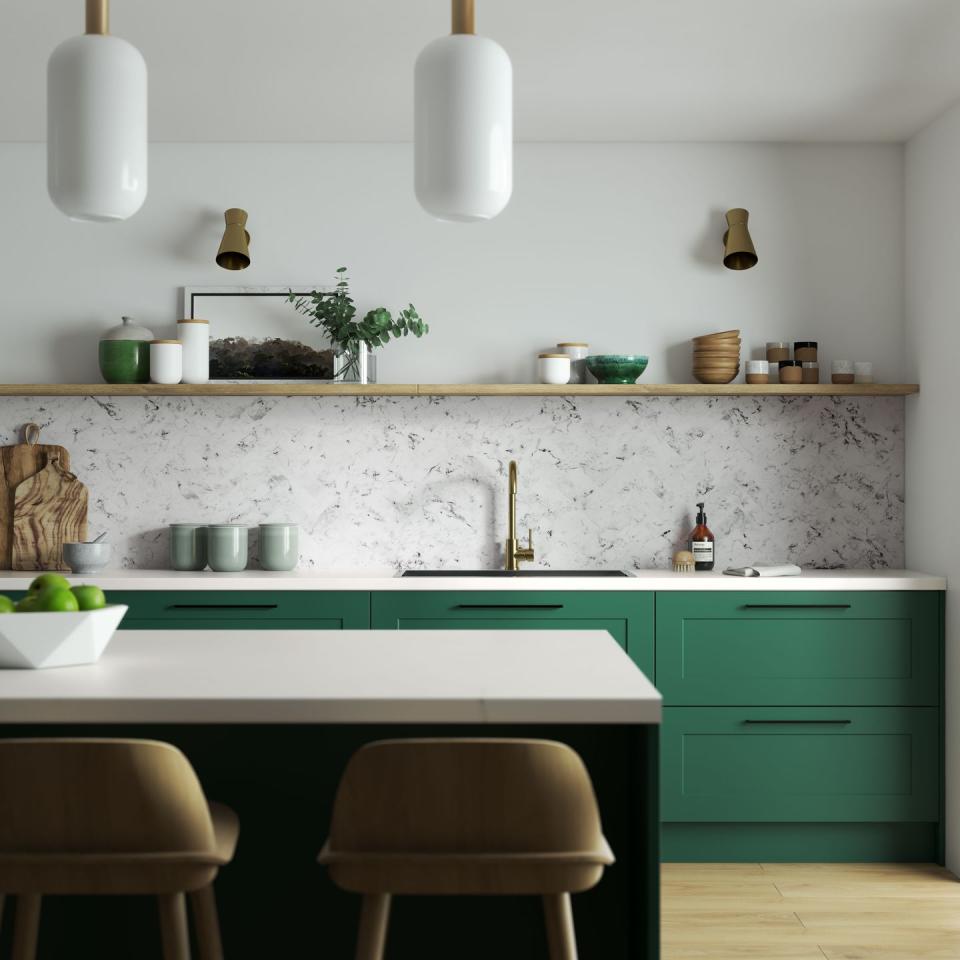
A splashback is an essential part of any kitchen design, serving as a practical and functional element. But are you looking to update yours without breaking the bank?
'We all know that small changes can make a big difference – and a new splashback is a prime example of how you can enliven any space quickly and affordably over the bank holiday,' says Harriet Goodacre, Topps Tiles' style consultant. 'Bold patterns or textured tiles can add tactility, making your bathroom or kitchen feel more dynamic, while warm earthy tones can cultivate a sense of calm.'
11. Paint your shed
According to garden building retailer Tiger Sheds, Pinterest searches for 'shed colours' have increased by 80 per cent in the last few weeks. Want to give yours a new lease of life? Shed expert, Sam Jenkinson, shares his step-by-step advice on how to paint your shed like a pro.
One: Wash and prepare
Before you start the painting process, make sure your shed is clean. 'Start by sanding the wood down as much as possible, removing any flakes of existing paint. Also, check the shed for any cracks or gaps and use wood filler to close them up,' says Sam.
'Then using water and a wood-friendly detergent, clean the shed of any mud, grime or dirt. For any trickier ground-in dirt, cobwebs or debris, a wire brush is great to use.'
Two: Treat your shed
'An optional step but one which we recommend is applying a preserver,' continues Sam. 'This adds a layer of protection to the wood, helping to protect your shed from bad weather and should help the building last longer.'
Three: Prime
Another optional step is priming your shed before painting. Shed primer makes it easier to create a more even finish and it gives your shed an extra layer of protection against the elements, in turn helping to prolong both the life of your shed and its paint job.
Four: Preparation
'Before painting, cover any surfaces you don't want to paint with newspaper and masking tape, such as windows, metalwork or surfaces you want to paint in a different colour at a later stage. Use your dust sheet to cover any plants that you can't move away,' explains Sam.
'Make sure to paint your shed on a reasonably warm day and avoid painting in temperatures below 5°C or if wet weather is expected within 48 hours. Paint around midday or early afternoon so that the paint isn't affected by drops in temperature.
Five: Paint
'With water-based wood paint, use a wood brush or roller and paint in thin layers to avoid clumps or drips of paint. If you find any drips, dab the brush onto the area so that the paint soaks into the wood,' says Sam.
'Work on all the trimmings first before painting each board – starting at the top and moving down. For the best results, paint in the same direction as the grain of the timber. Generally, try to aim for at least two layers of paint, allowing two to four hours between coats.'

Follow House Beautiful on TikTok and Instagram.
You Might Also Like

