
11 Tips For Crunchy Homemade Pickles

When the farmers market or your garden overflows in the late summer, preserving the harvest becomes top of mind. If you've taken care to preserve summer's bounty of fresh cucumbers, it can be heartbreaking to crack open that jar of homemade pickles to be greeted by a soggy, mushy mess. Pickling is one of the best ways to preserve fruits and vegetables for long-term storage, but it sometimes seems easier to produce a jar of disappointment than to ensure your pickles are crisp. Homemade pickles can be tricky; unlike lacto-fermentation that relies on heavily salted water and time, pickling uses a balanced brine of salt, vinegar, and sugar; the second this liquid is added even the crunchiest cukes start to soften.
There is a learning curve when it comes to making crunchy homemade pickles. I spent years in my mother's kitchen, watching her carefully prepare quart jars of cucumbers harvested from our quarter-acre garden. Still, it took a long time and a lot of practice making pickles on my own to figure out the tricks that virtually guaranteed crisp pickles in every jar. Yes, occasionally I still get the limp dill spear or the soggy bread-and-butter chip, but 99% of the time, each delicious cuke turns into a sour, savory, crunchy pickle with limited drama and no great stress. Here are 10 tips to help you achieve pickle perfection.
Read more: Vinegar Cooking Hacks You'll Wish You Knew Sooner
Choose Fresh Cucumbers
For the crunchiest pickles, choose the freshest cucumbers you can find and process them immediately. Unlike some fruits and veggies that can hang around on the counter or in the fridge for a few days before canning, cucumbers have an enzyme that sets to work softening them the second they are separated from the vine. This enzyme acts through the blossom end and can produce noticeable softness after a few days.
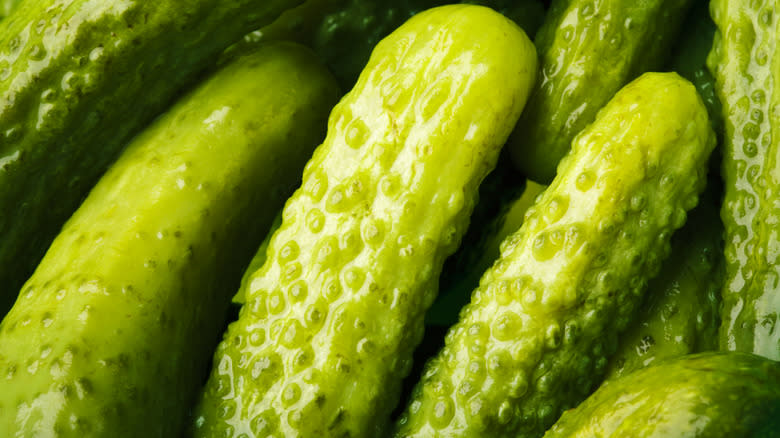
To counteract this, use fresh, firm Kirby or Persian variety cucumbers. They are shorter and fatter than the long skinny cukes you slice up for salads. The smaller varieties tend to be better at keeping the hope of crunchy pickles alive. A notable exception is those whole fat dill pickles you find floating in barrels in a typical New York deli. These are a larger variety but still have smooth skin and a plump midsection. They should ideally be picked the same day you plan on pickling. Store them in the fridge while you assemble your other ingredients, and get them in their briny bath as soon as possible to get the best results.
Soak Cucumbers In Ice Water

Cucumbers are 96% water, but after they are picked and travel the long distances typical of supermarket produce (around 1,500 miles on average), they can become dehydrated. Dehydrated cucumbers are more likely to become soggy in their brine as they take on excessive amounts of liquid in their desperate thirst. The skin is a permeable membrane that allows liquid to pass easily into the cucumber's center, but when cucumbers become dry, they can absorb too much brining liquid.
Even if your cucumbers feel relatively firm, soaking them in ice water can only help. Fill a large bowl with ice water and add your whole cucumbers. Place the bowl in the fridge and let it sit for a couple of hours (or overnight if necessary). Soaking cucumbers helps them firm up and rehydrate before they are covered in brine; it's also a good idea if you won't be processing the day you bring your cukes home.
Soaking cucumbers in ice water is a good step for any pickling pro, but do yourself, and your community, a favor and buy from local farms whenever possible. Chances are good that the cucumbers were picked that morning close by. This proximity is good for the local economy, the planet, and you, and your fresh cucumbers will still be juicy when you're ready to pickle.
Cut Off The Cucumber's Blossom End
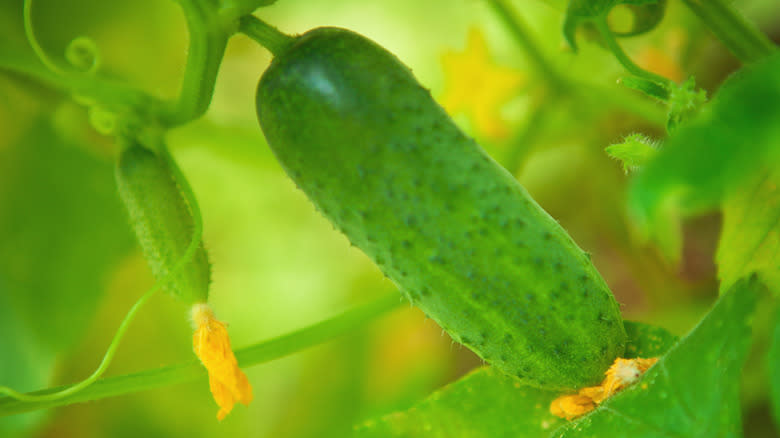
The blossom end of the cucumber heralds the beginning of the fruit (they are, botanically speaking, a fruit) with a lovely yellow-orange flower. But this beauty also holds the key to the start of the cucumber's demise. The blossom end contains an enzyme called pectinase that breaks the fruit down after it has been harvested. Leaving it intact when pickling is why your classic bread and butter pickles don't have that crunchy snap atop your burger.
Cutting off the cucumber's blossom end is the easiest fix on the list and goes a long way to crispy pickles. Trim off the blossom end of the cucumbers before submerging them in ice water and continuing your preparations. Once the enzyme is removed, that chemical reaction is also removed, giving your pickles a fighting chance. You need not trim off copious amounts — a sixteenth of an inch should work. Look for the rougher end of the cucumber, the one without the indent. If you are not sure which is the blossom end, trim a bit off of both ends. This ensures the enzyme's action gets stopped before you continue the process, and skipping this step is a surefire road to soggy pickles.
Add Calcium Chloride
If you have ever wondered how those supermarket pickles in the refrigerator section stay so crispy, wonder no more. The food industry uses calcium chloride — commonly known as pickle crisp — to preserve the texture of canned fruit and vegetables. Calcium chloride is a type of salt that dilutes quickly in water and further prevents the softening of cucumbers. It is different from calcium hydroxide, also known as pickling lime, which has been discontinued due to its tendency to lower the acidity of canned foods. Even foods that have been properly processed can harbor dangerous bacteria when the acid levels drop precipitously, and the use of calcium hydroxide has been historically linked to botulism outbreaks that can be deadly.
You should follow the directions on the kind of pickling crisp you purchase, but in general, plan to add around a quarter to three-quarters of a teaspoon per quart of pickles. This can be added to your ice water bath, but some brands suggest adding it to jars before processing. And don't let the "chloride" fool you. Yes, calcium chloride is a type of salt, but it's not a salty salt that adds flavor. You'll still need to include any salt your recipe calls for.
Don't Forget To Add Tannins
Another way to short-circuit cucumber-softening pectinase is to add tannins to your jars. Tannins are bitter, astringent compounds found in bark, leaves, and some fruits — they are the compounds that cause your mouth to feel dry after drinking some types of wine. In nature, these compounds deter curious animals from consuming too much of them, but they provide a crispy-making public service in pickle-making. Tannins naturally inhibit pectinase and work hard to keep pickles crisp.
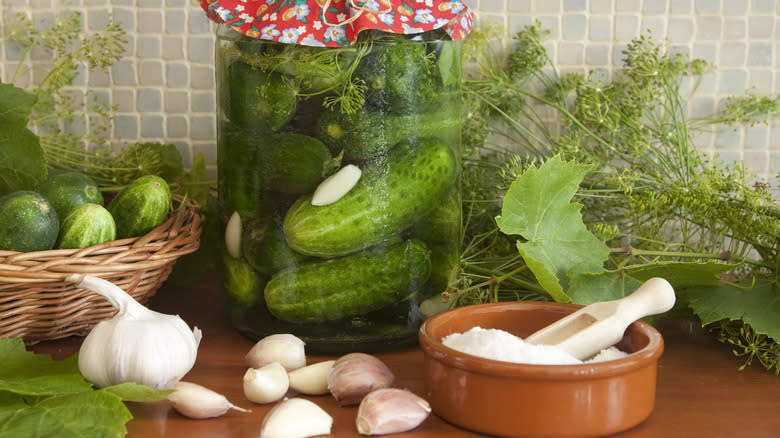
Grape, oak, or horseradish leaves are good options with plenty of naturally occurring tannins. Any of these can be harvested off a local tree or vine — just one or two will do the trick. If you can't access these leaves growing in the wild, head to the supermarket and pick up some canned grape leaves. These work just as well. Can't find those either? If you trim off the blossom ends, adding tannins isn't strictly necessary.
Use The Correct Salt, Sugar, And Vinegar Ratio
When lacto-fermenting cucumbers, adding enough salt is critical to start the process. Salt draws liquid from the cucumber and replaces it with the brining solution. If you are planning your pickling around a brine solution, salt is just one of the ingredients needed for both flavor and to maintain the pickle's crispy texture. You'll also need to add vinegar and sugar for a well-rounded flavor that doesn't deter the chemistry salt brings to the process.
You'll need a solid balance of vinegar, salt, and sugar to flavor and keep the pickles crisp. A classic, easy-to-remember ratio is 3:2:1 — three parts water, two parts vinegar, and one part sugar. This allows you to adapt your measurements based on the amount of pickles you plan to make. You can eliminate or reduce the sugar, but many pickle lovers find it balances the sour and salty flavors nicely.
There are many different types of vinegar to choose from, but because you want the cucumbers and spices to shine, plain white vinegar is an obvious choice. Look for vinegar with at least 5% acidity. Anything below this may not effectively kill all bacteria and can be dangerous. If you like the flavor of apple cider vinegar, feel free to use that, but heavier vinegar like balsamic may mask any other flavors (and look pretty funky in the jar).
Boil Brine Only
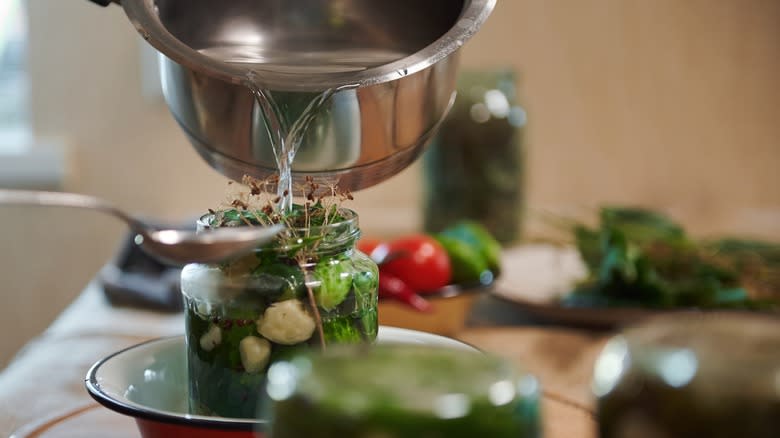
Cooking cucumbers softens them, so you must boil your brine separately. Beginning picklers make the mistake of adding their sliced cucumbers to the pot when the brine is cooking, which virtually ensures limp, soggy pickles. Even though the hot brine solution and your method of processing will heat the cucumbers, the goal is to cook them as little as possible.
To prepare your brine, add all ingredients to a heavy pot large enough to accommodate a gentle boil. Bring the ingredients to a boil and cook for a minute or two. This melts the sugar and evaporates a bit of the water to bring your brine into balance. If you've added other spices such as garlic, peppercorns, or red pepper flakes, a brief boil blooms their spices, opening up their flavors so they pop in the jar. Cool the brine for about 10 minutes before adding to the jars.
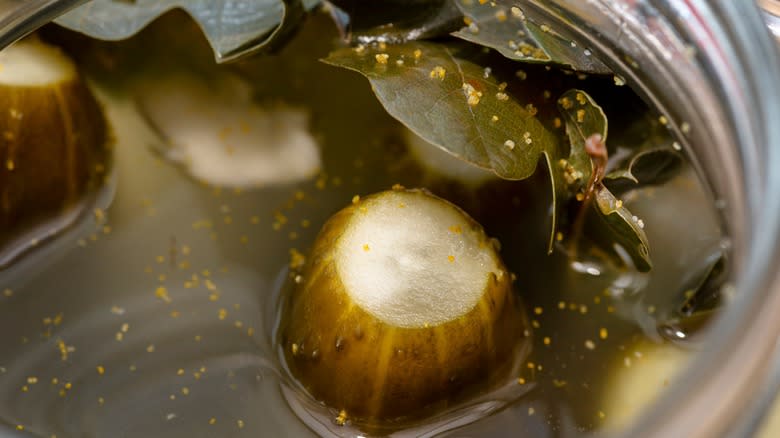
Don't be too enthusiastic about the boil, though. Maintaining a rolling boil for longer than a few minutes evaporates too much liquid and can leave you short when you pour it into your jars. You also don't want to place delicate herbs like dillweed into the boiling brine. Add those to the jars with the cukes.
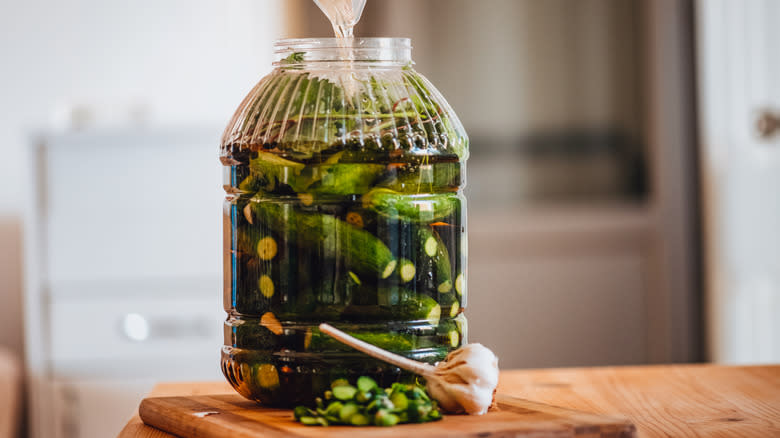
Pack Cucumbers Firmly But Carefully

You've done everything right so far, but it's still possible to sink the ship in the final stages. How you pack your cucumber makes a big difference in getting a crunchy final result. Many novice pickle makers are too tentative when packing their jars, reasoning that more space means a more even brining. This logic seems impeccable, but more space means more hot brine to waterlog your pickles and soften them.
When packing your cucumbers into jars, do it firmly enough to fit as many as possible without crushing them. From spears to chips, you don't want any floating pickles swimming in a cuke-softening briny bath. Use your best Tetris skills to pack those jars full with just enough space for your savory brine to slide into the small gaps. If you are using additional spices or herbs, add those evenly, too — layer them between levels of chips or sidle them up against spears for even flavor disbursement.
Process Pickles Quickly
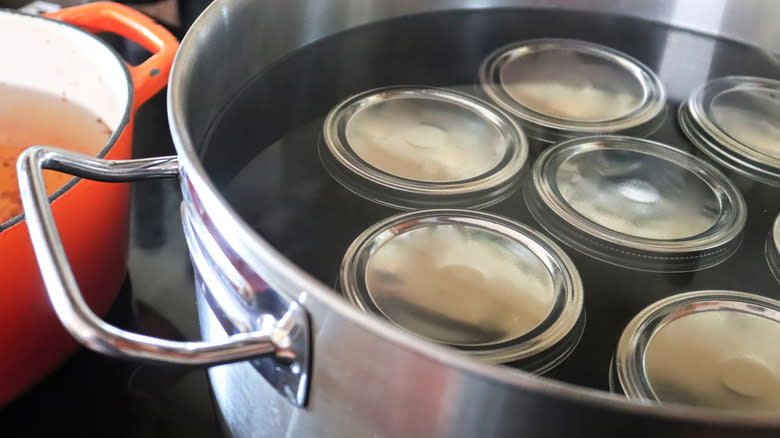
Down the home stretch, it's easy to process your pickles into mushy oblivion. The best method for processing pickles for storage is water bath canning, which is the old-fashioned way. You have to strike a balance between food safety and food enjoyment, processing your jars in a water bath canner long enough to make them safe but not so long that you open up a jar of pickle spread.
Another way to process your pickles without melting them to mush is to use a steam canner. Steam canners are best for high-acid foods, so check the final pH of your pickles to make sure it is lower than 4.6. If your pH is high but you want to avoid boiling jars, a pressure cooker is an option, but not the best one. Pressure canning a low-acid food takes time, and the amount of time it takes might liquify your pickles. Forget about using your Instant Pot. These cookers are good for many uses, but they do not get hot enough to safely can food of any kind.
Regardless of the canning method, the key is to ensure that all of your canning equipment (jars, lids, tongs, scoops, etc.) is sterilized and that your processing times are adequate. The United States Department of Agriculture (USDA) publishes a complete guide to home canning that can help you safely preserve any type of food. Follow these guidelines for best results.
Store Processed Jars Properly
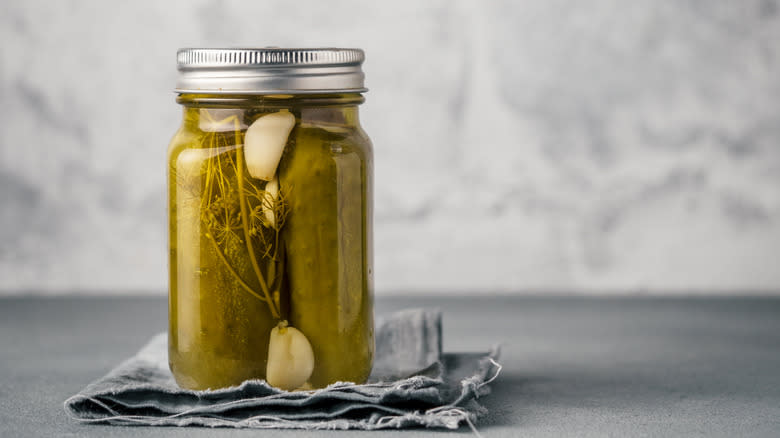
Canning at home is much more accessible than it used to be. The advent of Mason jars and convenient home canning tools like jar tongs and canning racks makes lifting jars into and out of the water safer, and folks stuck at home during COVID had plenty of time to master this nearly lost homesteading art. Having a full pantry of food is a comfort, and many people have kept the habit of keeping their shelves adequately stocked even after grocery store shelves were replenished.
Don't ruin your good work by improperly storing your canned goods. When exposed to heat and light, even the most carefully preserved food begins to degrade over time. Storing jars in a cool, dark place protects the contents and preserves your pickles' crispy deliciousness. Properly canned food will last at least a year, but that timeline speeds up if your canned food pantry is in a sunny room, next to heated pipes, or is bathed in daily sunlight.
Experiment With Unexpected Vegetables And Foods
Once you taste the salty, sour, sweet, crunchy brilliance of proper pickles, you may be tempted to try pickling other foods. Go for it. There are very few foods that won't benefit from the judicious application of vinegary brine and a few carefully selected seasonings.
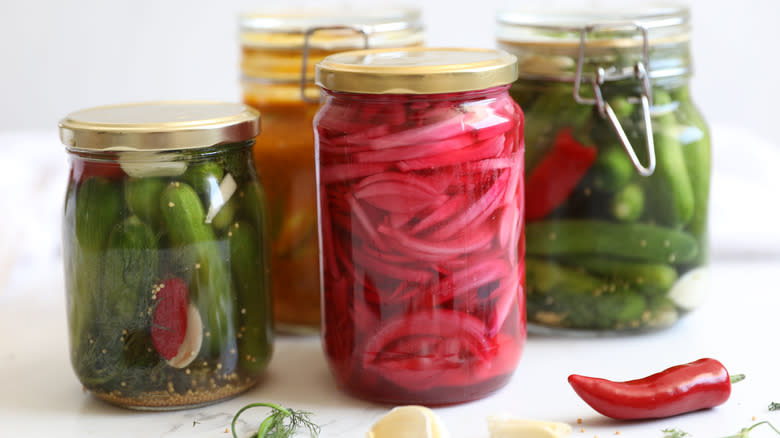
Start your experiment with the ultimate topping for that summer burger or hot dog: Pickled red onion. This sugar-free version of pickled onions is great on salads, sandwiches, and the aforementioned burgers and dogs. Pickled onions can be sliced or chopped, which is a great option for mixing them with tuna or egg salad.
Speaking of eggs, pickled eggs may not appear at your local watering hole, but they used to be a staple behind the bar. Herby pickled eggs make for a quick and savory snack or on-the-go breakfast. Use them to put a twist on your standard deviled eggs, or slice them up and layer them on toast with some creamy avocado.
Finally, if you hate food waste and don't like to throw any part of a fruit or vegetable away (we see you collecting your vegetable scraps for stock), give pickled watermelon rind a try. The best recipes utilize not only the white rind but also some of the watermelon juice for a light, bright, and refreshing flavor. Add it to salads, or pair it with goat cheese on crackers for a light appetizer.
Read the original article on Tasting Table

