
All the spring cleaning tips you need to give your home a serious refresh

Cleaning ranks pretty low down on our list of favourite things to do. There's Netflix to watch, friends to see and bottomless brunches to attend, after all. However, from time to time we can admit there is a certain satisfaction in making your space squeaky clean. And when it comes to this time of year, we're actually quite looking forward to the big annual spring clean.
Spring cleaning is one of those weird traditions where everyone has generally accepted that with the new season, comes the chance to give your home a deep clean. But of course you can do a big clean of your home whenever you choose. As well as giving the home a once over it's also a chance to do those big cleaning jobs you don't tend to do every week (read: deep cleaning the oven).
But where do you even start? We spoke to the cleaning experts over at method who gave a full rundown of how to tackle the big spring clean, including their most important tips.

So you can essentially consider this your spring cleaning checklist. Happy cleaning! (If that's a thing?)
1.Prep, prep and more prep
Before you even begin the cleaning process, get yourself a checklist of all the jobs you need to do and divide them up between each room.
This will make the tasks feel more manageable and you'll get a bigger sense of achievement when you tick something off your list.
Once you know how much you have to do, you can then see if you're going to do all the jobs in one day, or split them across multiple days. We'll definitely be doing the latter.
2. Stock up
Now that you know which jobs you have to do, you can assess your cleaning product situation, and see which products you may need for certain jobs.
Make sure you've got a good mop, vacuum, reusable cleaning cloths and cleaning products such as a surface cleaner, polish and floor cleaner before getting started.
Method's multi-surface concentrate is ideal for tackling multiple jobs at once because you can dilute it with water and use it as a spray, pop it in a mop bucket or apply neat for tackling tough grime.
3. De-clutter
It sounds obvious but getting rid of items that no longer serve purpose will reduce the amount of work that needs doing during the spring cleaning and will also free up space – rather than simply letting unwanted items sit gathering dust.
Struggling to get rid of items? We feel you, but there are two hacks we love for when it come to de-cluttering.
The first is the 80-20 insight. The principle is pretty simple and is based on the fact that we only actually use 20 per cent of what we own around 80 per cent of the time. Keep this in mind when clearing out rooms, shelves and cupboards, do you really use all those weird utensils in that forgotten drawer? This will help you prioritise what stays and what doesn’t make the cut.
The other hack is the ski slope’ method, which involves breaking down a room into separate zones which you can glide between one after the other, crisscrossing across the room to reach your end goal. When decluttering, it’s great to have four distinct piles – ‘keep’, ‘dump’, ‘recycle’ or ‘donate’.

4. Start from the top down when it comes to cleaning
When cleaning each room start by cleaning high, then going low. Overhead fixtures that we sometimes forget about, like lighting, are prone to dust build-up and usually don’t get cleaned as often – and when they do, the dirt and grime will sprinkle down to the floor and surfaces below them.
So, avoid creating more work for yourself by starting from the top and cleaning down in each room. We love any hack that saves us some time.
5. Start with the kitchen
Ok, now we can finally begin actually cleaning and let's start with one of the most important rooms - the kitchen.
Understandably, the kitchen is one of the highest ‘touch’ areas in the house and therefore one we’re more likely to clean regularly – meaning half the work should (hopefully) be done. A nice place to start. Begin by removing all food, products, crockery and other equipment from drawers, cupboards and other surfaces, to give yourself a decluttered, blank slate for the kitchen deep-clean.
Remember the high-before-low rule too, and begin cleaning high fixtures before moving to appliances – making sure to move them away from the wall where possible to clean under and behind them (it’s called a deep clean for a reason!), before finally moving on to counter-tops, drawers and lower cabinets. We'd recommend using the method multi-surface concentrate mixed with water in a spray bottle.
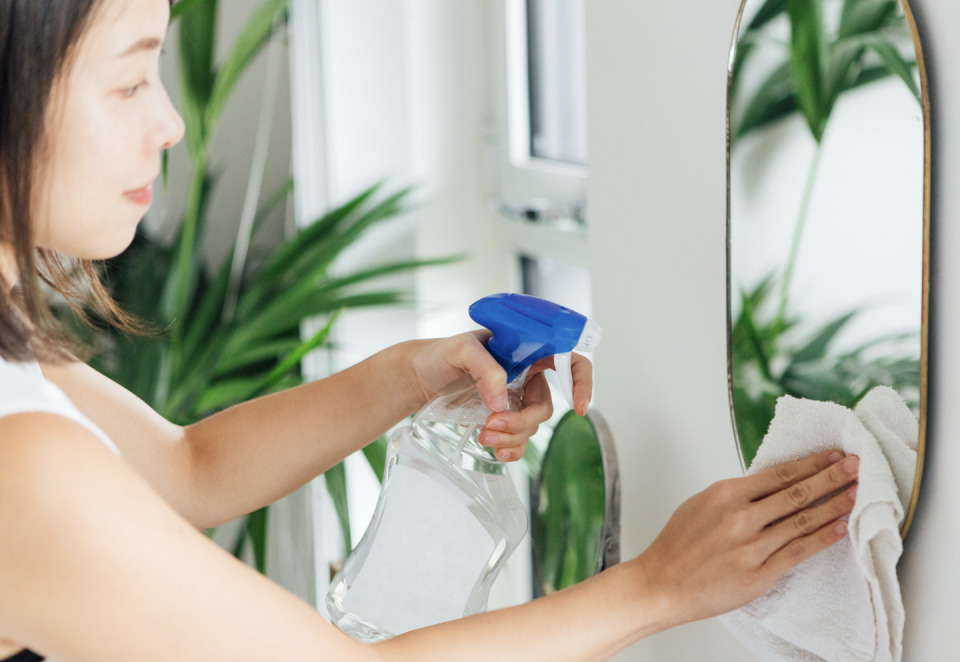
6. Then tackle the bathroom
Again, start high then go low, before moving your attention to blitzing and disinfecting the shower, bath, and toilet. method's bathroom cleaner is perfect for these tasks, and its eucalyptus mint fragrance will leave the room smelling minty fresh.
Pay special attention to under the rim of the toilet and the back of the toilet bowl, as these can often be forgotten in your more regular cleaning routines. Given it’s a deep clean, repeat the spray-leave-wipe technique several times for optimum results. Once you’ve blitzed the bathroom, finish with an antibacterial spray and wipe all-over just to get rid of any lingering germs.
7. Focus on the rest of the house
When it comes to bedrooms, living rooms, hallways, and the rest of the house, save time and avoid chopping-and-changing between cleaning products and equipment by tackling them task-by-task, as opposed to room-by-room. Don’t forget the overlooked areas too, like door handles and skirting boards.
Skirting boards and door knobs can make or break how clean a room appears. You’ll want to make sure they’re in tip-top condition. So, use your favourite spray cleaner and a cloth to gently damp-dust skirting boards and help prevent any future dust from sticking to the surface.
8. Don't forget the door knobs
Yes even the door knobs and handles need cleaning!
Where plastic or painted door knobs and handles are easy-peasy to clean, making brass or copper sparkle is a different story.
But fear not, as using a combination of flour, salt and vinegar (one tablespoon of each) on a cloth creates a simple paste that can be painted onto the surface and rinsed off after a couple of minutes with soapy water. Simply buff it with a soft cloth and regularly clean using your favourite spray cleaner to maintain the shine!
9. Finish with the floors
Working from top to bottom, leave the flooring until last. For hard flooring, like wood and tiles, start with a deep vacuum and thorough sweep – ensuring all corners, tight spaces and hard-to-reach areas that you may usually turn a blind eye to are covered.
Finish up with a thorough mopping, ensuring you use a product that’s safe for the type of flooring.method’s Almond Wood Floor Cleaner is perfect for sealed hardwood and laminate floors and will leave flooring looking spick-and-span. These tasks will be much easier to complete without all the furniture and clutter, so take your time and *be thorough*.
To keep your laminate or wood flooring looking pristine – and save yourself from being caught short by the unpredictable sunny spring spells – mop once a week after the deep clean. Just don’t use too much water, as this can cause water spots or warp laminate surfaces. Be mindful to avoid polishing, waxing or doing any abrasive cleaning too, as these all have the potential to scratch the floor and damage the protective finish.
10. Stay on top of regular cleaning tasks, to prepare for the bigger deep clean
It sounds super boring but to save yourself time and energy for the big spring clean, staying on top of your daily, weekly, monthly and even quarterly cleaning regimes really does pay off in the long run.
For example, deep cleaning the fridge should be done every 3-6 months to banish germs – just ensure it’s done before the weekly food shop, when it’s not fully stocked up. Clear all food and other items from the fridge, then remove the shelves and fittings – a key hack here is to wait until they reach room temperature before cleaning to prevent them from cracking.
Next, thoroughly rinse the shelves and salad drawers with warm soapy water. Whilst the fittings are air-drying, get to work on the rest of the fridge!
The same rule applies for every other room, including the bathroom. We all want that dazzling shine on the shower, but it really does come down to regular weekly cleaning.
You Might Also Like
