
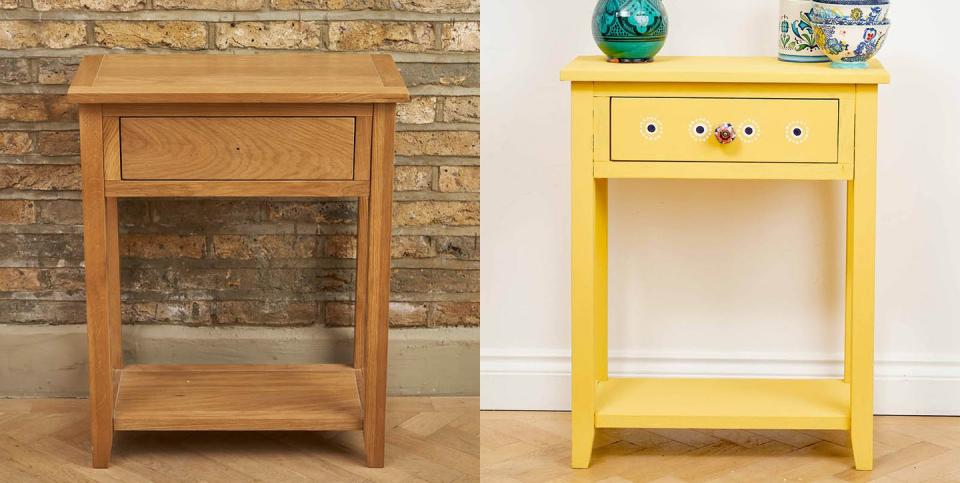
Paint and stencil a table to give it a new lease of life
We're all watching what we spend at the moment, which makes simple upcycling projects a great way to inject new life into your home without breaking the bank.
There are so many great DIY craft projects to get stuck into. We love the idea of turning old furniture into beautiful unique pieces which you can love forever.
This table stencilling project is a great place to start – it's such an easy way to make an unloved table look brand new! Stencils are an effective way to create really neat results for crafting beginners. Use whatever stencil shapes best suit your style and the room you have in mind.
And if you're inspired by this project, why not try reupholstering an old chair or make a new shade for your favourite lamp.
Happy crafting!
TOP TIP: Use masking tape to keep your stencil in place while you pain and use a roller rather than a paint brush for a smoother finish.
You will need
Table
Stencil of your choice
Paint brushes
Paint roller
Newspaper
How to stencil a table
1. Start painting the first layer of Chalk Paint onto your piece of furniture. Keep the layers thin so they don’t take too long to dry. Repeat this step for 2-3 layers depending on how much you need to cover your piece of furniture. If you want a smooth finish then sand between each layer to get rid of the brush stroke texture.

2. Use a hair dryer to speed the drying process up and if your piece of furniture has drawers you can always paint those whilst waiting for the rest to dry!
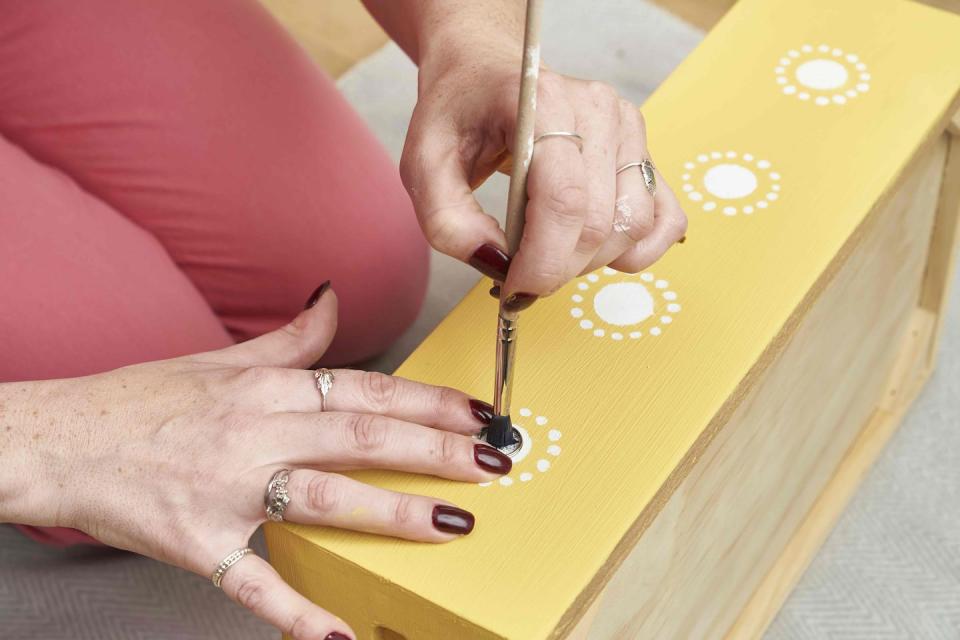
3. Place the stencil onto the front of the drawer and start to paint into the stencil. Once dry, paint the second layer.
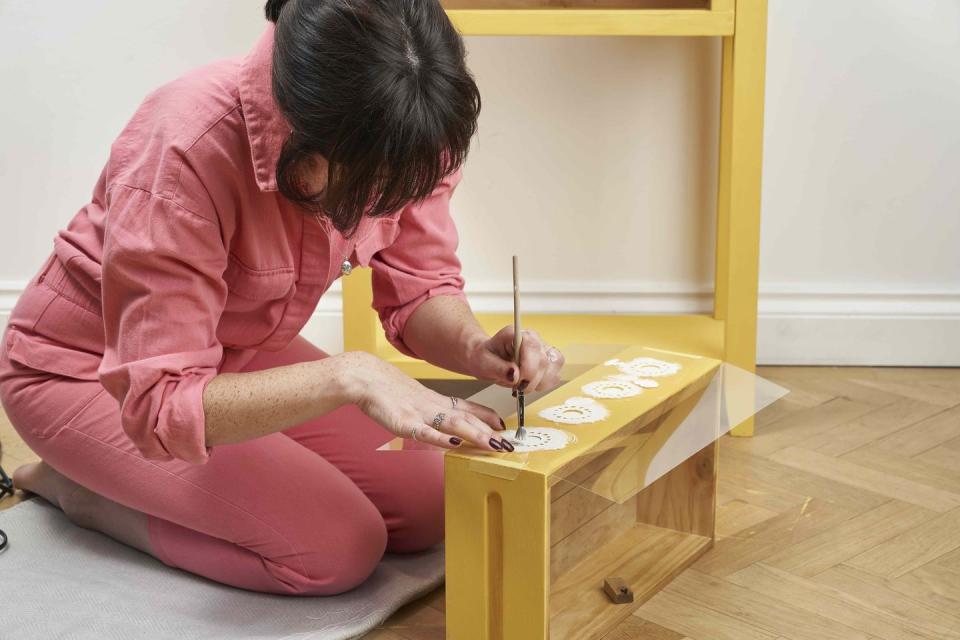
4. Remove the stencil and neaten any edge with a small paint brush.
5. You can also add to the design with a bit of free-hand painting if you feel confident!
6. To seal the paint, take your chosen wax and using either a wax brush or cloth brush brush over your piece of furniture. Once you have covered the whole piece, leave to dry.
7. Finally screw the drawer knob back in place – you can always get a brighter knob to complement the stencil!

Have you created upcycling projects for your home? Share your makes with us by tagging @primamag on Instagram!
You Might Also Like
