
The November garden: testing blight-resistant box and a recipe for kohlrabi
Ever since the school eye test aged seven, when they asked me to read the letters on the eye test board, and I asked “what board?”, I realised that my sight was not my best asset. But I can now see with 20/20 vision, having had cataract operations and new lenses inserted in both eyes. I can highly recommend the procedure: painless and life-changing.
The downside of my op is that I look far older than I thought… and my garden definitely needs a bit of a spruce-up. The second realisation has come at the right time of year and I will spend the next few months getting things in order. There will be some big changes.
New box for old
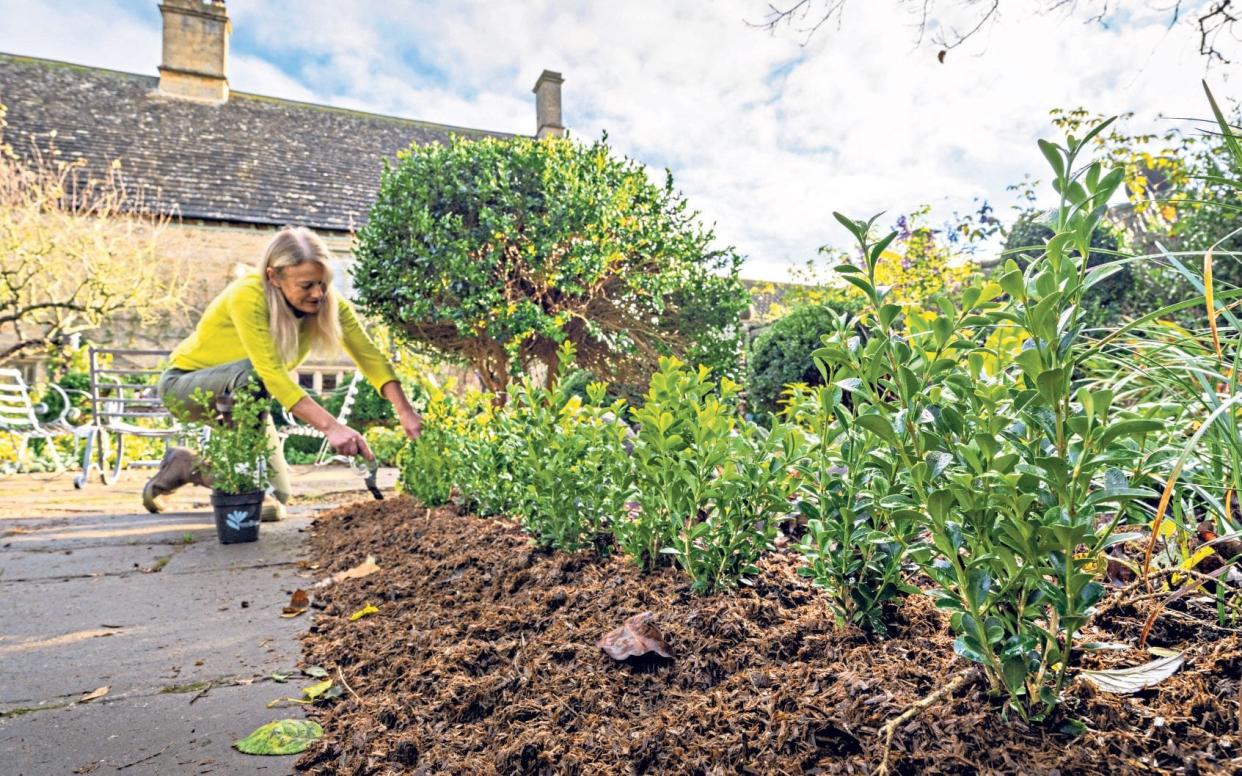
The first big change involves pulling out some of my old box hedging because the plants are susceptible to box blight. Didier Hermans, of Herplant, started a breeding programme in 2007 and now has four varieties of blight resistant box.
He sent me around 300 plants of ‘Heritage’, plus samples of ‘Sky Rocket’ (best for larger topiary), ‘Renaissance’ (for low hedging) and ‘Babylon Beauty’ (prostrate habit). This delivery was the first to the UK.
Previously, I managed the blight by spraying with Signum and Topbuxus, but last winter’s endless damp meant more frequent applications. Also, many of my clients garden in parts of the UK that are much wetter than my sunny East Midlands, so would benefit from growing blight-resistant varieties of box. However, I hate specifying plants I have not grown, so thought I should take the plunge and try them out.
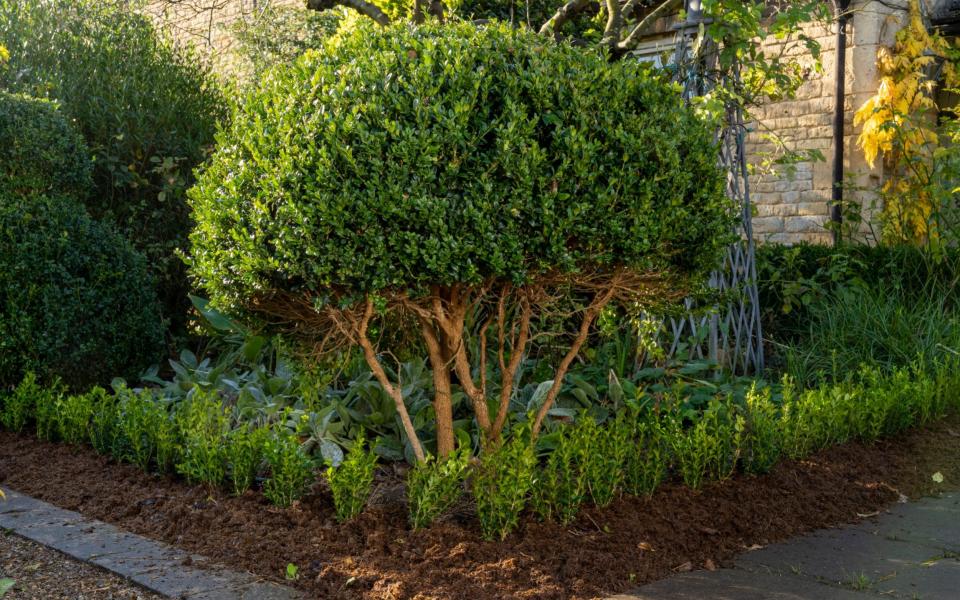
I planted my box hedges 36 years ago using a thousand rooted cuttings that I took from a beautiful Victorian garden about to be bulldozed. As we began ripping it all out, I realised I had been overgenerous with numbers. There were up to 15 plants per metre – whereas now I would specify six. So the plants were overly stressed.
I asked Didier’s advice on planting new box on the site where old box had grown, and he said: “Box blight can probably be transmitted by affected leaves, but it is not the main cause.
If you cover the soil with mulch or bark, you can counteract this. The spread of box blight has been researched over the past 20 years… the infestation almost never starts at the bottom. Box blight is mainly transmitted by wind, contact, birds, snails, etc.”
Before planting, I added compost to the soil and mulched well. What surprised me was that the garden does not look as naked as I thought it would – probably because planting in the beds is so mature. The big box balls on the corners were bald on the sides where they had touched the old hedge, so I raised their skirts all round, forming multi-stem mini-box trees, which I love.
We’ve not seen box moth here yet, but no doubt we will do and I will sort this out with the biological insecticide that is based on Bacillus thuringiensis.
All plants from betterbuxus.com.
New kit for renovation jobs

I had thought pulling out my old box hedges would be easy, but, as my garden is virtually on hardcore and the old box plants were so close, the roots extended a good 500mm down. My husband, watching me struggling from the kitchen window, suggested a ratchet winch. The next day a Silverline ratchet winch, capable of pulling two tonnes, arrived from Amazon, £21.95.
Dave, who helps me in the garden, joined me to work with this great tool, hitching one end around a quince tree and the other around the box plants. No doubt it will be used in future for other projects; for bigger fry you can get ratchet winches that pull four tonnes and are capable of removing small trees.
The old plants have been resettled in the woodland. Who knows how many will survive being transplanted so late in life but it’s worth a shot.
Revisiting past gardens
Starting my YouTube channel has prompted me to revisit gardens I created years ago. One, the Old Vicarage in Whissendine (as featured on Gardeners’ World) belongs to Professor Peter and Sarah Furness – a great partnership as Sarah is an avid gardener, while her husband, a notable pathologist, is also a keen and skilled joiner.
It was a bit like seeing your baby again for the first time after 11 years. My initial design involved creating an easily accessible sitting area from existing French doors on to what was originally a grass bank. But with the services of a mini digger we were able to pull the slope back and create a flat area of paving with planting.
People are always apprehensive of level changes but, to my mind, slopes don’t make the best “resting” spaces. You want to get to the top or to the bottom. You don’t always have to construct expensive retaining walls, here we made a planted parterre on a 30 degree slope – which shows off the pattern work effectively.
We removed the parking from directly outside the front door too, and created a courtyard, so that on arrival you view plants as opposed to Peugeots and Porsches.
I never design a garden without a good level survey. I have been surprised so many times by the actual level differences. Only when you know what you have can you decide on the most productive course of action.
Pot know-how

I have been using baseless pots in my garden schemes for more than 30 years as I know few gardeners who can grow a plant in an ordinary pot and keep it looking lush over a long period. My Baseless Pots YouTube video has attracted 400,000 views in two months and many questions and comments.
To address these I have done a follow-up video. Quite a few people wanted to know, how can you move the pot? Generally the idea is not to, but I have just found a technique that makes it easier: I planted a perfect Pinus nigra into a Rootex Root Control bag.
These bags have a copper-based coating on one side; when the root comes into contact with the copper it stops growing and new fibrous roots develop. The pine will go into a big baseless pot in the Rootex bag (after being used as a Christmas tree). I will need to water it, but not as much as if it was in a “normal” pot.
These Rootex bags have other uses. They are perfect for planting a fig to restrain the roots, so limiting vegetative growth and promoting fruiting growth. And apparently some gardeners, who live with honey fungus, have had far better success rates by using Rootex bags before planting in the ground. Allotmenteers often use them for fruit trees, too, as it means the roots don’t stray to other plots.
Waterproof gear

There have been many times when I have suffered from soggy, cold feet from gardening in wet trainers. Last week I was sent some waterproof socks. These contain merino wool and, surprisingly, don’t make your feet sweat as they are highly breathable as well as snug to wear.
I also received a couple of waterproof beanies, one a slouchy black number and the other a Fair Isle one. As a rule, I never garden without a hat, for sun protection in summer and warmth in winter. Cosy and comfy, the waterproofing puts these hats head and shoulders above the others. Two ideas for your Christmas list perhaps? (aquaproofs.com)
Family news

Peter, the bull, arrived last Sunday, much to the joy of my two black Dexter cows and great curiosity from their two calves. Peter is a fine two-year-old red Dexter.
The view from the ha-ha has now been animated somewhat. If you have excess grass to mow, then grazing does prove a great alternative. Having livestock is a responsibility, but if you have the space it does seem a bit bonkers just to accumulate more mowing miles.
Somehow the frequent exchanges with the various beasts increases the sense of living in a community, especially in these weird times we find ourselves living in.
See Bunny’s YouTube channel for her latest videos: Baseless Plant Pots – your questions answered; Blight Resistant Box; The Old Vicarage (levels and cars).
Kohlrabi, apple, Stichelton, and walnut salad
By Charlie Hibbert, head chef at Thyme.

SERVES
six
INGREDIENTS
For the vinaigrette
1 tbsp Dijon vinegar
1 tbsp cider vinegar
8 tbsp olive oil
For the salad
1 kohlrabi
½ head of fennel
1 apple
1 celery heart
150g Stichelton (a raw milk blue cheese), crumbled
100g walnuts
2 heads of chicory, separated into individual leaves
A handful of chopped parsley
Maldon salt flakes & freshly ground black pepper
A glug of olive oil for serving
METHOD
Start making the vinaigrette by whisking together the mustard and vinegar in a bowl. Place a tea towel under the bowl to stop it spinning and slowly drizzle in the olive oil while whisking continuously until all the oil has been incorporated. Set it to one side while you prepare the salad.
To toast the walnuts, put a small frying pan onto a low heat and add the walnuts. Toast for five to 10 minutes, mixing the nuts around to ensure that they don’t burn. When toasted, remove from the heat and keep to one side until you are ready to assemble the salad.
For the salad, start by preparing all of your vegetables. A mandolin is very useful to achieve thin and even slices, rendering a beautiful finished salad.
Peel the kohlrabi, slice it into ½cm disks and chop into matchsticks.
Next, slice the fennel by cutting away the stems, slicing the head in half, and cutting into thin strips. Submerge both the kohlrabi and fennel into iced water. Peel and core the apple and then slice it into matchsticks, before slicing the celery heart from head to root.
Finish the salad by draining the kohlrabi and fennel, then tossing all of the ingredients together in a large bowl, coat the salad with the vinaigrette, season with salt and pepper, a drizzle of olive oil and a handful of chopped parsley.
Toss together once more and tumble onto a platter.

