
Four easy ways to make the most of your garden this month

The summer is a good time to look at your garden with a critical eye and decide whether the design really suits all your needs. When walking around new clients’ gardens the same problems crop up repeatedly.
These include a lack of cohesion of the various different areas and areas lacking definition. This comes about because most owners approach the design in a piecemeal fashion.
Get an accurate survey done of your garden, then place some tracing paper over it and, using a pencil and a good soft eraser, start to redefine all the problem areas.
Many may be dominated by eyesores that, if removed from view, would hugely improve the garden. Often the arrival and parking areas are inherited; a reorganisation would allow you to improve that all-important first impression of your house.
Connectivity between the main living room(s) of the house and the garden can often be made more direct – there is no doubt that the easier it is to get into an outdoor space, the more popular it is. Sometimes this even means putting in an extra door or changing rooms around inside.
I like all the spaces in the garden to have a definite function, a definite style (led by the architecture and surroundings); I also like them to have a different feel from each other and to be of different scales, too. Even a tiny garden can have variety.
One important thing to bear in mind is that parking, trees, hedges, paving and sheds may have been in the right place for a previous gardener but are often totally wrong for the current incumbent.
How to keep peonies looking their best

Peonies just get better every year. Not surprising, I suppose, when you think that herbaceous peonies often live for 100 years. I have a hedge of P. lactiflora ‘Agida’ (above), which is backed by pleached apples.
In full bloom now, they are spectacular, even on my thin, alkaline (pH8) soil. While they are establishing I don’t let the attractive seed heads develop to ensure that all energy goes to the plant, but once established I leave the seed heads on.
A friend also gave me a clump of white herbaceous peonies that I planted last autumn; it is in full bud now. The common myth that peonies don’t like being moved is wrong, you just need a clump with three to five eyes on the roots. These will develop into stems. When you plant the clump, the roots need just half an inch of soil over the eyes. Deep planting and mulching cause the biggest problems.
Intersectional hybrids (Itoh peonies) are a cross between tree and herbaceous peonies. Claire Austin gave me one, ‘Julia Rose’, for a big birthday five years ago and it now is a wonderful clump of about a square metre. These hybrids stand up to adverse weather better than herbaceous ones and their flowers last longer. Now it’s well established I will divide it this autumn.
Mowing made easy

The grass mowing here has catapulted from a slow easy start with the cold spring, to super-manic growth. Dave, who helps me one day a week, has been otherwise engaged, so I have revised my grass-cutting regime.
More grass areas have moved on to being maintained by my trusted friends, the robotic mowers. I have just installed another to cut my orchard which has small squares of wild flower meadow with a grid of mown paths breaking it up.
Mowing this design was awkward – lots of reversing and turning – but for the robot it is no problem. Having lived with them for five years, rather like a washing machine, I do wonder how I managed without them.
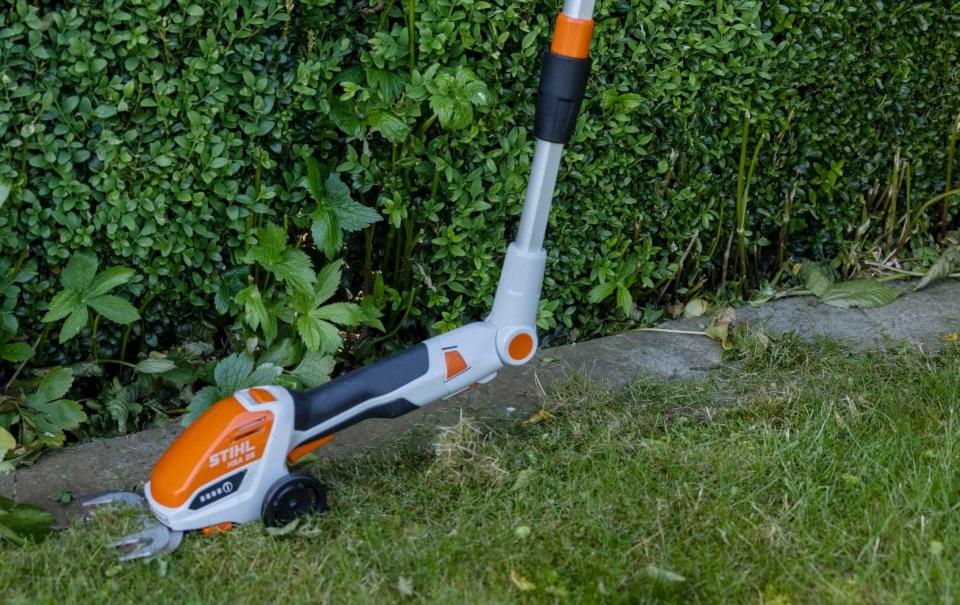
Just a few, small farther-flung areas are still mown by hand and for these I now use a cordless mower, the Stihl 235 (the big advantage being that it is rather like a toy lawnmower – it is extraordinarily light and easy to cart around). But in no other sense is it toy-like. It is capable of cutting quite long grass and for use on uneven areas, plus it collects the cuttings.
For the all-important edges I have been converted by the telescopic shaft which I attach to my cordless garden hedge cutters, also from Stihl; the HSA 26. With this brilliant edger, no bending is involved and it does a super-quick, good, smooth job.
How to perk up box hedges, old and new
In my November column, I mentioned how we winched out the old box hedge from my courtyard and replaced it with the new blight-resistant box from Didier Hermans in Belgium. I chose ‘Heritage’ from the four available types, as it is highly suitable for “broderie” or parterre-type designs; Paramount Plants stock this.
The young plants already look surprisingly hedge-like and the advantages of removing the 30-year-old hedge (which I planted from cuttings) have surprised me. Visually I much prefer the lower height; I had let the original hedges get too high and wide (about 80cm – or 30in – high and almost as wide) but hedges creep up on you.
Now the plants in the beds, such as roses, peonies and nepeta, are all far more noticeable. I can also step over the hedges to tend the plants more easily.
Older box hedges are more prone to box blight unless you thin out the growth inside – which people rarely do. So now I spend a fraction of the time spraying old hedges for box blight, a tedious job, for which I use Signum mainly.
Renovation pruning
In May I renovation-pruned a short stretch of 70cm box hedge, right down to around 10cm high. I reckon it will be around two years before it fills out again fully. This is an experiment just to see how quickly it comes back. On ancient yew, hawthorn and beech hedges I have done this with success.
Lift the skirts
The other big visual change is that the corner box balls, 12 of them, which are getting on for around 1.5m high, had fairly bare “skirts” around their base as the old hedges stole their light. I have stripped the lower stems totally and now have multi-stemmed box specimens which gives a new great twist to the courtyard. So satisfying when you give old friends a successful makeover.
Foxtail success

My white foxtail lily (Eremurus himalaicus) is in full bloom, reaching around 2.5m (8ft) high on a really stout stem. I planted the starfish-shaped roots of this perennial in 2016 having seen vast drifts of them while working in Hokkaido, Japan. They like cold in winter and free drainage.
On GQT we get regular queries on how to succeed with them from gardeners who have repeatedly failed. Looking back, I see I planted five (from Gee Tee Bulbs, £1.70 each), but only one succeeded. I hope it self seeds but I think I will invest in more this autumn; that single plant is a triumph.
A new RHS editor

While writing a piece for The Garden magazine recently I was surprised to learn that the RHS journal has a new editor. Tom Howard, 37, formerly deputy editor of the NME (New Musical Express), has taken over the reins.
It seems that owing to the increase in younger people getting into gardening, the RHS has a real thirst for making the magazine more appealing to this growing sector.
As Tom says, the RHS is not a youth brand (the majority of its members are in their 60s) but he wants to make the magazine accessible to younger readers while still keeping in-depth content that covers the invaluable scientific research and plant trials which the RHS carry out. The circulation is massive: 541,000 as all members get a free copy.
Tom worked as a gardener for a couple of years after NME, while doing a City and Guilds course in horticulture.
Try this recipe...
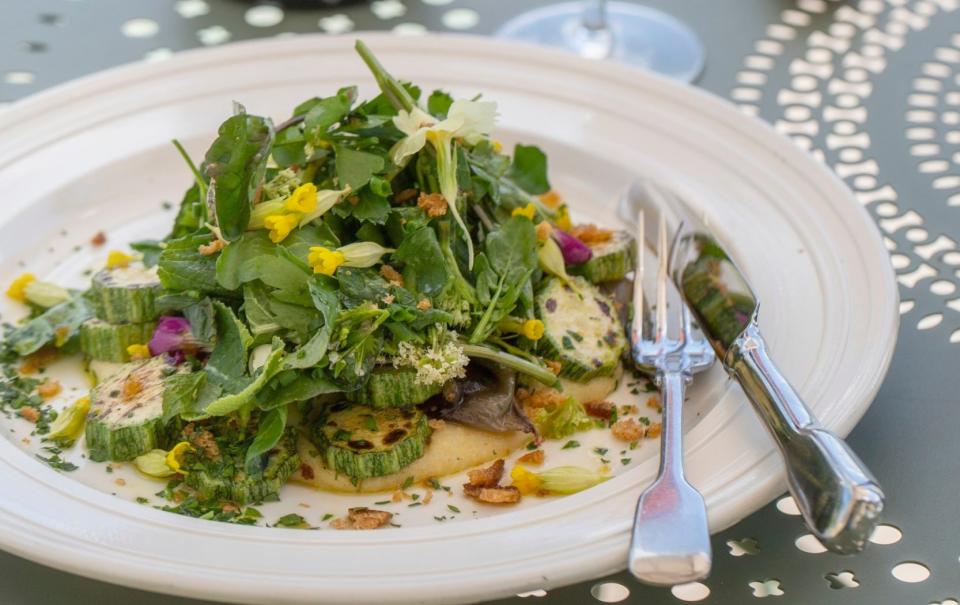
Polenta and grilled courgettes with onions and flowers
By Charlie Hibbert, head chef at Thyme
SERVES
four
INGREDIENTS
For the polenta
600ml water
100g polenta (NB check instructions on the packet as not all polentas are born equal!)
Olive oil for cooking
Sea-salt flakes and freshly cracked black pepper
60g parmesan, freshly grated
For the courgettes and onions
4 small onions
Olive and vegetable oil for cooking
Sea-salt flakes
4 courgettes, sliced into 1cm rounds
1 lemon, zest
½ lemon, juice
For the leaves and flowers
2 bunches watercress
1 bunch mint, flat-leaf parsley and chives (approx 25g each), leaves picked, stems discarded
15 nasturtium leaves and flowers or other edible flowers (optional)
25ml olive oil
1 lemon, zest and juice
METHOD
Preheat the oven to 180C/160C fan/Gas 4.
Cut the onions in half from root to tip, making sure you don’t peel them.
Place them on a baking tray cut side down, dress with olive oil and salt, and put them into the oven for 20 minutes until caramelised and cooked through.
Place a pan over a medium heat, allowing it to get nice and hot before you start cooking.
Dress the courgettes in a good drizzle of vegetable oil, ensuring they’re completely coated. Fry them in batches, ensuring they cook in one even layer.
Once browned on each side set them aside in a tray, dressed in the olive oil, lemon zest and half the lemon juice.
Bring the water to the boil with a good glug of olive oil, salt and pepper.
Gently pour the polenta in a stream into the water, while constantly whisking.
As the polenta begins to thicken, turn the temperature right down and whisk periodically to prevent it catching on the bottom.
Allow it to cook for 5-20 minutes (the cooking time will depend on the quality of the polenta that you have bought and whether it is quick-cook or not – your pack will come with instructions).
If you need to add more water or polenta to get to the correct consistency, go ahead. It should be almost porridge-like, holding its shape without being stiff and rigid.
Stir through the parmesan at the end and take it off the heat.
Make the salad by putting the watercress, herbs and flowers in a bowl. Dress the salad in olive oil and lemon and gently toss.
Take a large spoonful of polenta and put in the middle of each plate. Scatter over the courgettes and two onion halves, before tumbling the herb salad over the top.
Watch Bunny’s videos on youtube
Visit YouTube/Bunny Guinness for her latest videos: Design Course Part 2: Sorting the Spaces, My Garden Highlights – May, and Perfect Peonies

